• We have updated our Community Code of Conduct. Please read through the new rules for the forum that are an integral part of Paradox Interactive’s User Agreement.

drakblod

Corporal
3 Badges
Feb 9, 2015
48
7
  • Cities: Skylines
  • Cities: Skylines - After Dark
  • Cities: Skylines - Snowfall
Hi!
I've wanted to step up the quality of my building by adding contours and other shadows to my windows at night( something like what zed68 does ), but I'm not sure how.
I'm right now using 192 as neutral on my illumination-map and believe the principle is to grayscale and then adjust levels on the detailed window so that the gray is between 128-192 and somehow adjust it so that 192 is like furnitures and other objects.
But I don't have a clue how to really do this.

So if anybody has any input on how to do achieve this effect, I'd really appreciate it.
I know I could try add zed68 on steam, but he seem to have abandoned cities skylines for a while.
 
Can add that I've messed around with adjustment-levels and got so black spots in the window now had the same color value as the background.
The problem though is that this value somehow became 172, which isn't neutral anymore, even if I had set the output level to be between 192-255.
 
Okay, I'm replying again on my own post as I think I've fingured out something similar to how zed68 does his nightlights, and thought I could share it for anyone interested.
The problem I had when I did this previously was that I affected all layers in photoshop. This was fixed by grouping and using Clipping masks.


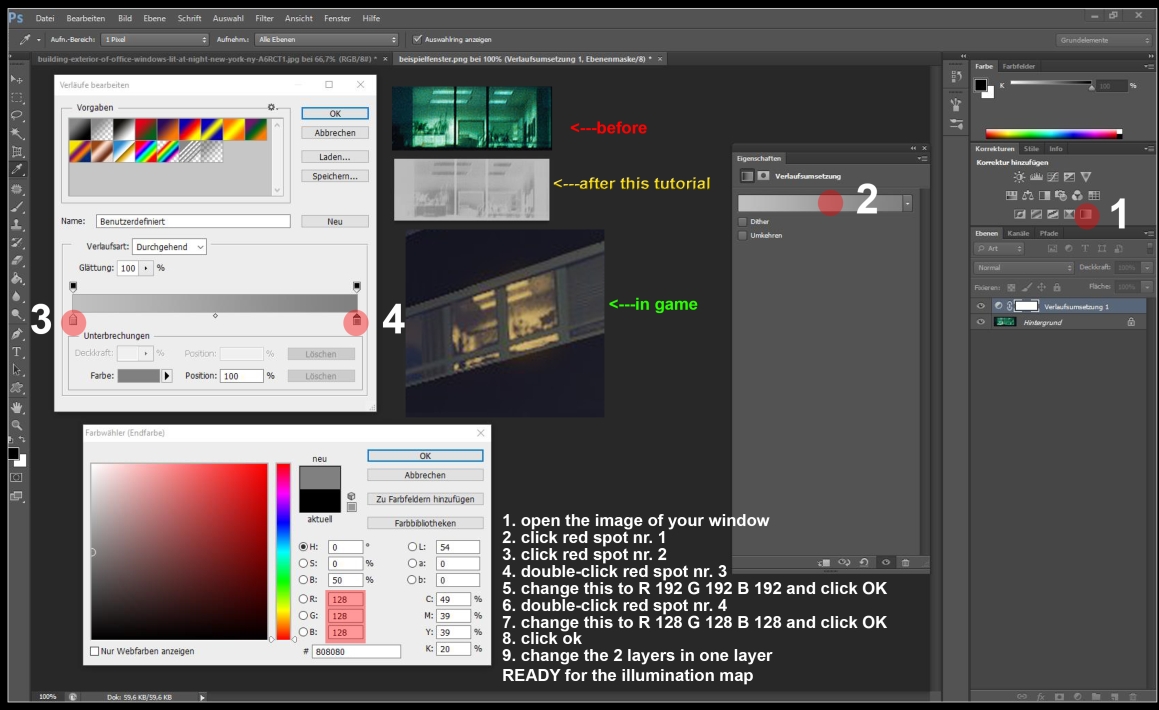
Sorry for using a swedish version of photoshop, but I've highlighted the important things with red.
So here's step by step how I did to make nightlights using a detailed photo of a office window:

For this example i used "192" as neutral for my illumination-map.
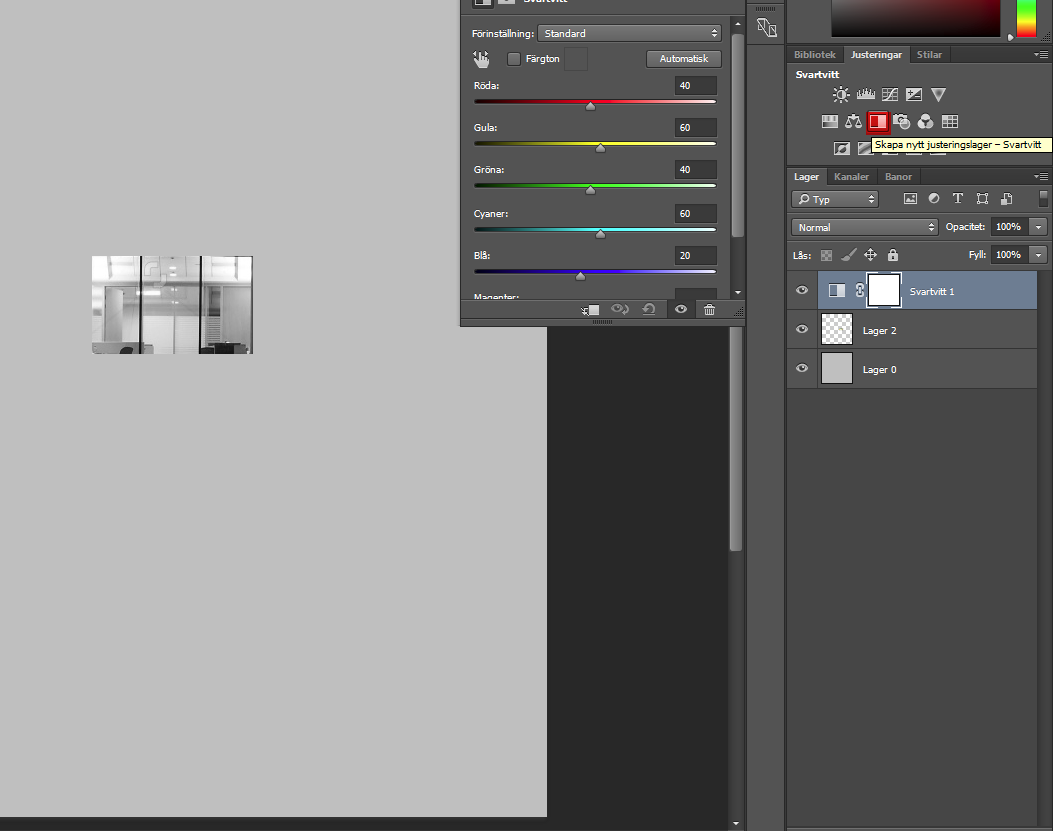
First of I added the Black and White adjustment to my window. I do also recommend inverting your image at this stage "ctrl + i" in photoshop. I'll explain in a later stage why.

bnw.png

Then If you want some structure, you can put all windows inside a group "ctrl+G", but it isn't really needed.
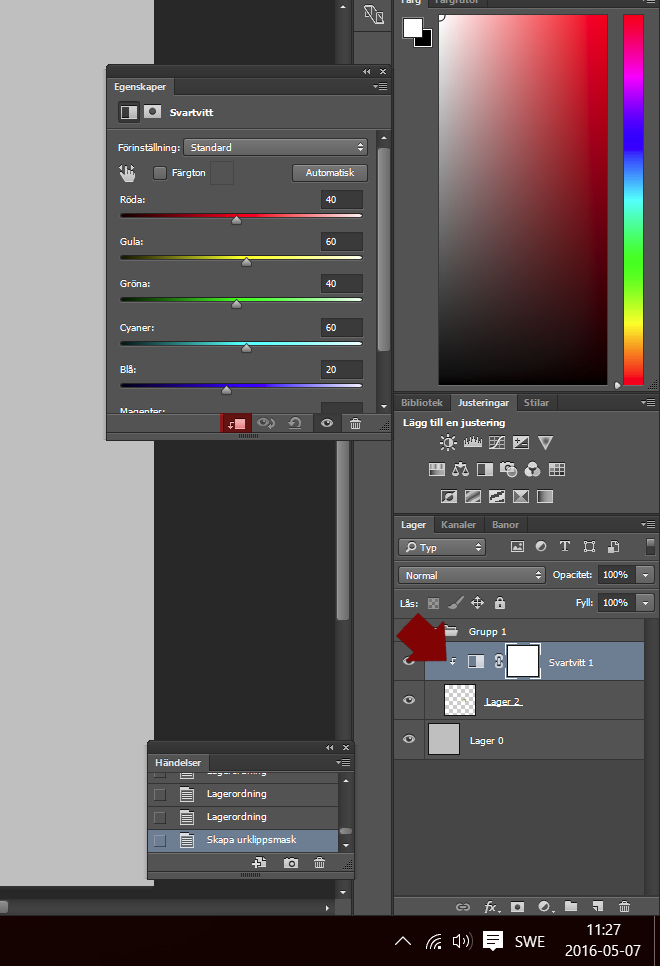
But what you'll want to do is to add a clipping mask to the layer. This will make it so this adjusment only affects the layer below. The adjusment layer should have an arrow next to it when the clipping mask activated.

clipping-mask.png

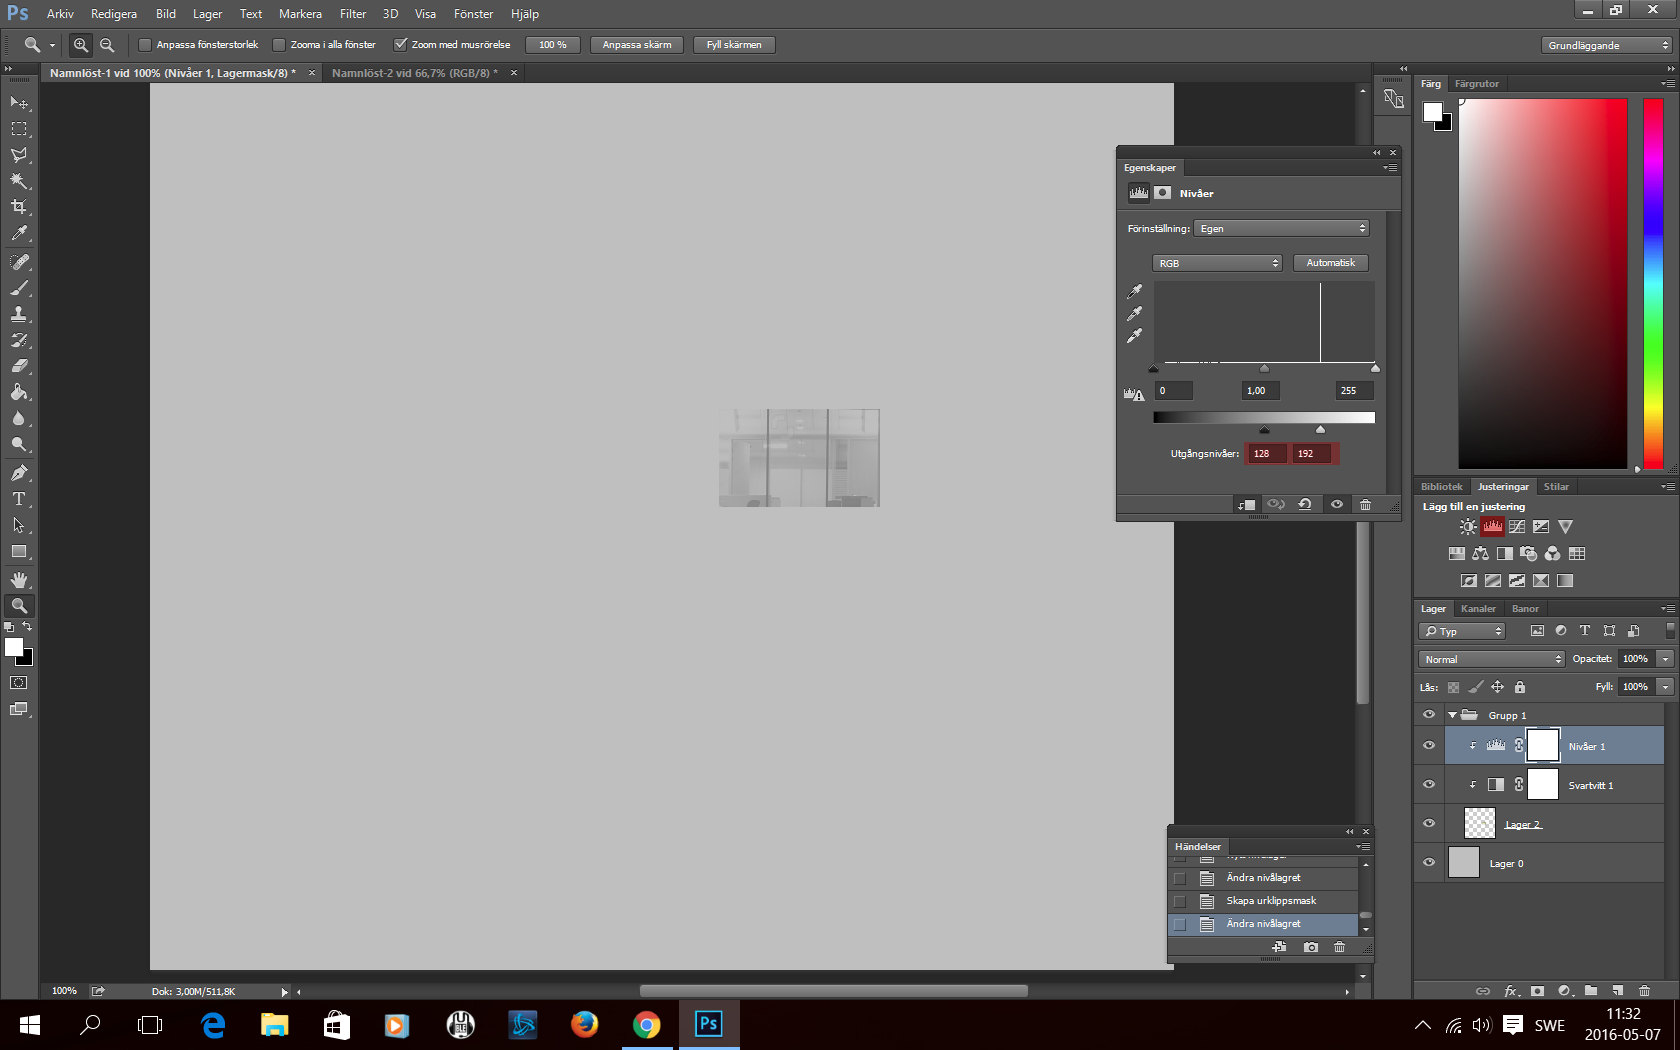
After this you will have to add a level adjustment to your window. This is where you decide the range from the lowest to highest.
This one is very important to add a Clipping mask to. If not, your background will not keep the colorvalue 192 after you've set your color-range.
So after adding the clipping mask to the level adjusment, I can set the range to whatever as long as 192 is the top value.
In this example I've set 128 ( strongest random illumination ) and 192 ( neutral ).

But as you can see on this picture, the furnitures and window frames are the darkest. So they are closest to 128 which means the furniture and frames will be lit.
This is why you'll need to invert your image. "Ctrl + i"

levels.png
 

Attachments

  • end-result.png
    end-result.png
    12 KB · Views: 25
Last edited:
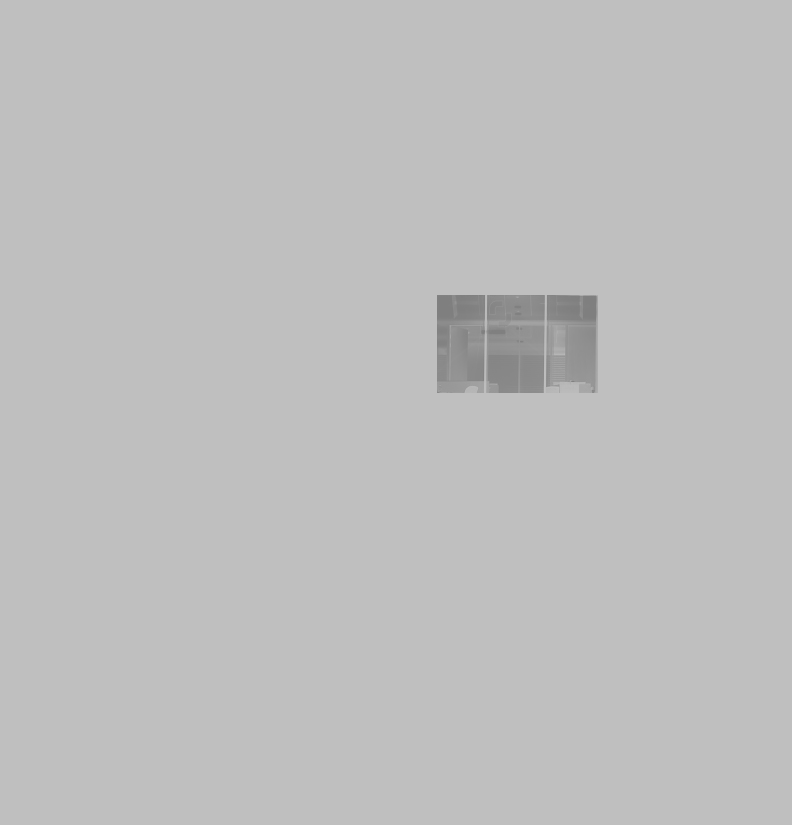
So the end result should look something like this with the image inverted. It will ofcourse look better with a couple of different looking windows that doesn't all have full random illumination.
end-result.png


I'd guess this is somewhat similar to how zed68 does it.
Hope it helped anyone who was interested in doing something similar.

//OfficialSauron
 
  • 1
Reactions: