Since I've noticed disappointed that the guys who worked on AoD managed to totally destroy the skins,I've decided to show off how the original team managed to do the flags they managed to do.
Now,lets take our topbar(the "top" layer),shall we?:

Notice that I've managed to change its color.How?Simple:Go to Image->Adjustments->Desaturate.
Woops!Its black and white.No problem.Its exactly what we need.
Now,go to Image->Adjustments->Photo Filter.Instead of killing ourselves with the different types of filters,select "Color" and then select the desired color and play with the density anyway you like.
Notice that in case you dislike the color and you can't see "Photo Filter" in the history,there's no problem:you can desaturate the layer as many times as you wish,since its only the color which is changed.
Now,lets go to our flag.
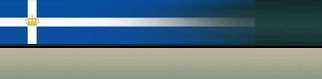
I'll start with the Kingdom of Greece flag,which can be easily found on wikipedia here:
http://en.wikipedia.org/wiki/File:Hellenic_Kingdom_Flag_1935.svg
I'll copy it to Photoshop.
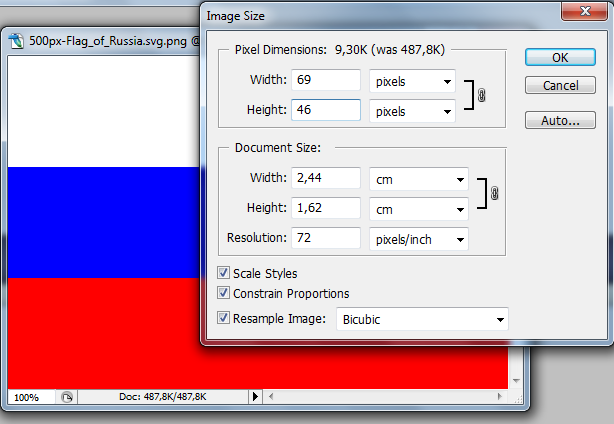
But oh wait!Its so big!No problem,we'll take the layer and use "Free Transform" tool,found in the edit tab.Note that the width and height must be equal so that the proportions will be exact and the flag won't be distorted.

Here comes the tricky part:The flag transformation.Select a left part of the flag(most flag are symmetric,therefore it won't hurt to select a part of its left) and go to Layer->New->Layer via copy.A new layer will appear.Take the full flag layer and make it invisible.
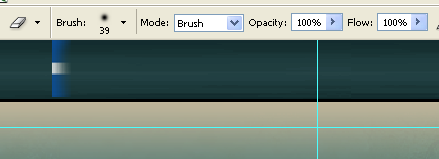
Go now to eraser tool and select "Brush" mode.Erase the layer like in the next image:
Now,select the new layer and move it a bit to the left.(ProTip:Click on Ctrl and use the arrow keys to move it).Now everything should look like this:

Hm,not that good looking,isn't it?It ain't that "stretched" like in the original topbar,isn't it?Well,select the new layer,and use "Free Transform" again,and stretch it to the left,stopping at the blue line.It should look like this now:

Damn it,still not looking that nice.Well,select the new layer and then right-click "duplicate layer".Still not nice?Duplicate it again.Got a small position problem?Use the tip above mentioned.Select the 2-3-X layers(Don't know how yours will turn out!Maybe you'll erase more and the new layer will be way more transparent.)
Great,now it should look like this:
Damn,still not nice.Well,merge the 2-3-X layers.Now,select "Eraser tool" again,again as a brush,and make it to be something like 200-300 pixels big.Now erase from the new layer's(formed after the merging of the 2-3 layers) left.

Hah!Now it looks like the original!Just add the japanese flag overlay if you want and you're done.
Now,lets take our topbar(the "top" layer),shall we?:
Notice that I've managed to change its color.How?Simple:Go to Image->Adjustments->Desaturate.
Woops!Its black and white.No problem.Its exactly what we need.
Now,go to Image->Adjustments->Photo Filter.Instead of killing ourselves with the different types of filters,select "Color" and then select the desired color and play with the density anyway you like.
Notice that in case you dislike the color and you can't see "Photo Filter" in the history,there's no problem:you can desaturate the layer as many times as you wish,since its only the color which is changed.
Now,lets go to our flag.
I'll start with the Kingdom of Greece flag,which can be easily found on wikipedia here:
http://en.wikipedia.org/wiki/File:Hellenic_Kingdom_Flag_1935.svg
I'll copy it to Photoshop.
But oh wait!Its so big!No problem,we'll take the layer and use "Free Transform" tool,found in the edit tab.Note that the width and height must be equal so that the proportions will be exact and the flag won't be distorted.
Here comes the tricky part:The flag transformation.Select a left part of the flag(most flag are symmetric,therefore it won't hurt to select a part of its left) and go to Layer->New->Layer via copy.A new layer will appear.Take the full flag layer and make it invisible.
Go now to eraser tool and select "Brush" mode.Erase the layer like in the next image:
Now,select the new layer and move it a bit to the left.(ProTip:Click on Ctrl and use the arrow keys to move it).Now everything should look like this:
Hm,not that good looking,isn't it?It ain't that "stretched" like in the original topbar,isn't it?Well,select the new layer,and use "Free Transform" again,and stretch it to the left,stopping at the blue line.It should look like this now:
Damn it,still not looking that nice.Well,select the new layer and then right-click "duplicate layer".Still not nice?Duplicate it again.Got a small position problem?Use the tip above mentioned.Select the 2-3-X layers(Don't know how yours will turn out!Maybe you'll erase more and the new layer will be way more transparent.)
Great,now it should look like this:
Damn,still not nice.Well,merge the 2-3-X layers.Now,select "Eraser tool" again,again as a brush,and make it to be something like 200-300 pixels big.Now erase from the new layer's(formed after the merging of the 2-3 layers) left.
Hah!Now it looks like the original!Just add the japanese flag overlay if you want and you're done.