Hello everyone!
My name is John and I’m the 3D artist for Hearts of Iron IV here at Paradox! For this week's Dev Diary, I will be giving you all a behind-the-scenes look at my role in the team and our process for making the 3D art for Hearts of Iron IV.
My role is to create and manage all the 3D art in the game! Not all 3D art is created by a single individual, however. To save time we also have help from various talented outsourcing partners to make sure we can have as much juicy art ready for release as possible!
During this diary, there may be some terminology that may or may not be familiar to you but I will try and make sure that everyone can enjoy reading this and get a glimpse into the 3D art for Hearts of Iron 4.
Creating, tweaking, and managing all this 3D art is a lot of work but it is also a fun and rewarding process so let’s not waste any more time and get right into it!
Receiving art requests
First of all, I will receive a bunch of 3D art requests from our awesome content designers that will provide me with some general information as well as some reference images and useful links to help explain what they want to be added to the game. Doing research and finding material is time-consuming work so this is very useful to get things started.
You never know what can end up being requested. There were a lot of interesting vehicles and uniforms during World War 2 so this helps keep things interesting!
To manage all of these requests we use Miro which is a useful tool to manage a lot of images and text. These requests will be added to my 3D art board in Miro where I will sort them by things like priority and country. From here I will decide which units to work on. I will place the assets that I want to outsource on a separate board where they can be gradually reviewed along each step of the creation process. I will usually provide them with more technical feedback when it comes to the 3D art and our content designers will give input on how the asset looks from a more historical standpoint.
Finding References

These are the types of images that I look at when I’m making a 3D model!

These are the types of images that I look at when I’m making a 3D model!
For 3D art, you generally want to have as much reference material as possible so I will usually try to add some additional reference images from the information I have been provided if needed. To understand things like angles, scale, and movement better, watching videos can also be incredibly helpful. If there are any vehicles or uniforms that still exist to this day, then this will provide greater image quality and it can also be good for color reference. It’s important to be aware of re-created paint jobs and modifications that may have been added after the war. Finding good references can be hard at times, we always try our best to stay faithful to the reference material but time is always limited so it can be easy to make mistakes. Being very meticulous and delivering a lot of assets in a short amount of time is definitely a balancing act!
Blockout
The process of creating 3D art can differ a bit from artist to artist or depending on what it is that you are creating but usually, I will begin blocking out the most important shapes for whatever I’m creating. During this phase, I won’t need to care too much about the typical rules of 3D modeling. Things like that will become more important later on. The most important part here is to create the basic shape and also get a good understanding of how all the pieces will fall into place. At the end of this phase, you can use the basic building blocks that you have created to make a high-detail and a low-detail version of your 3D model. This helps save a lot of time and it will ensure that the high and low-detail versions are not too different from each other.

A block out using simple shapes.
A common trick to make sure that you have the right base shape is to disable the lights in the viewport of your 3D modeling software, this leaves you with only the silhouette. If the silhouette looks good you know that you are on the right track!

Can you guess the names of all of these vehicles?
High Poly - Making a detailed version of our tank!
Now we will use the block-out model as a base to start working on a version with a lot more fun details. This is the part where you can truly let loose in terms of geometry, no polygon limits are needed here! We will use this model and bake it down to our low poly version later. In short, this means that a highly detailed version of the model will be projected onto the lower detailed version to simulate detail. This will make the end product look less blocky and detailed without using a lot of polygons that can impact performance. In other words, we will get the best of both worlds!
The thing I will need to keep in mind here is to add detail to make the model interesting and accurate to the source material but at the same time, it is important to not add too much detail that will make the model hard to read from a distance. Adding too many tiny details will make it hard for the brain to distinguish between different parts of the model.

Some extra details like tools or holes will be added! These aren’t present in the low-detail version of our model. I will use colors to mask out various parts that will help me later on when adding textures to our model.
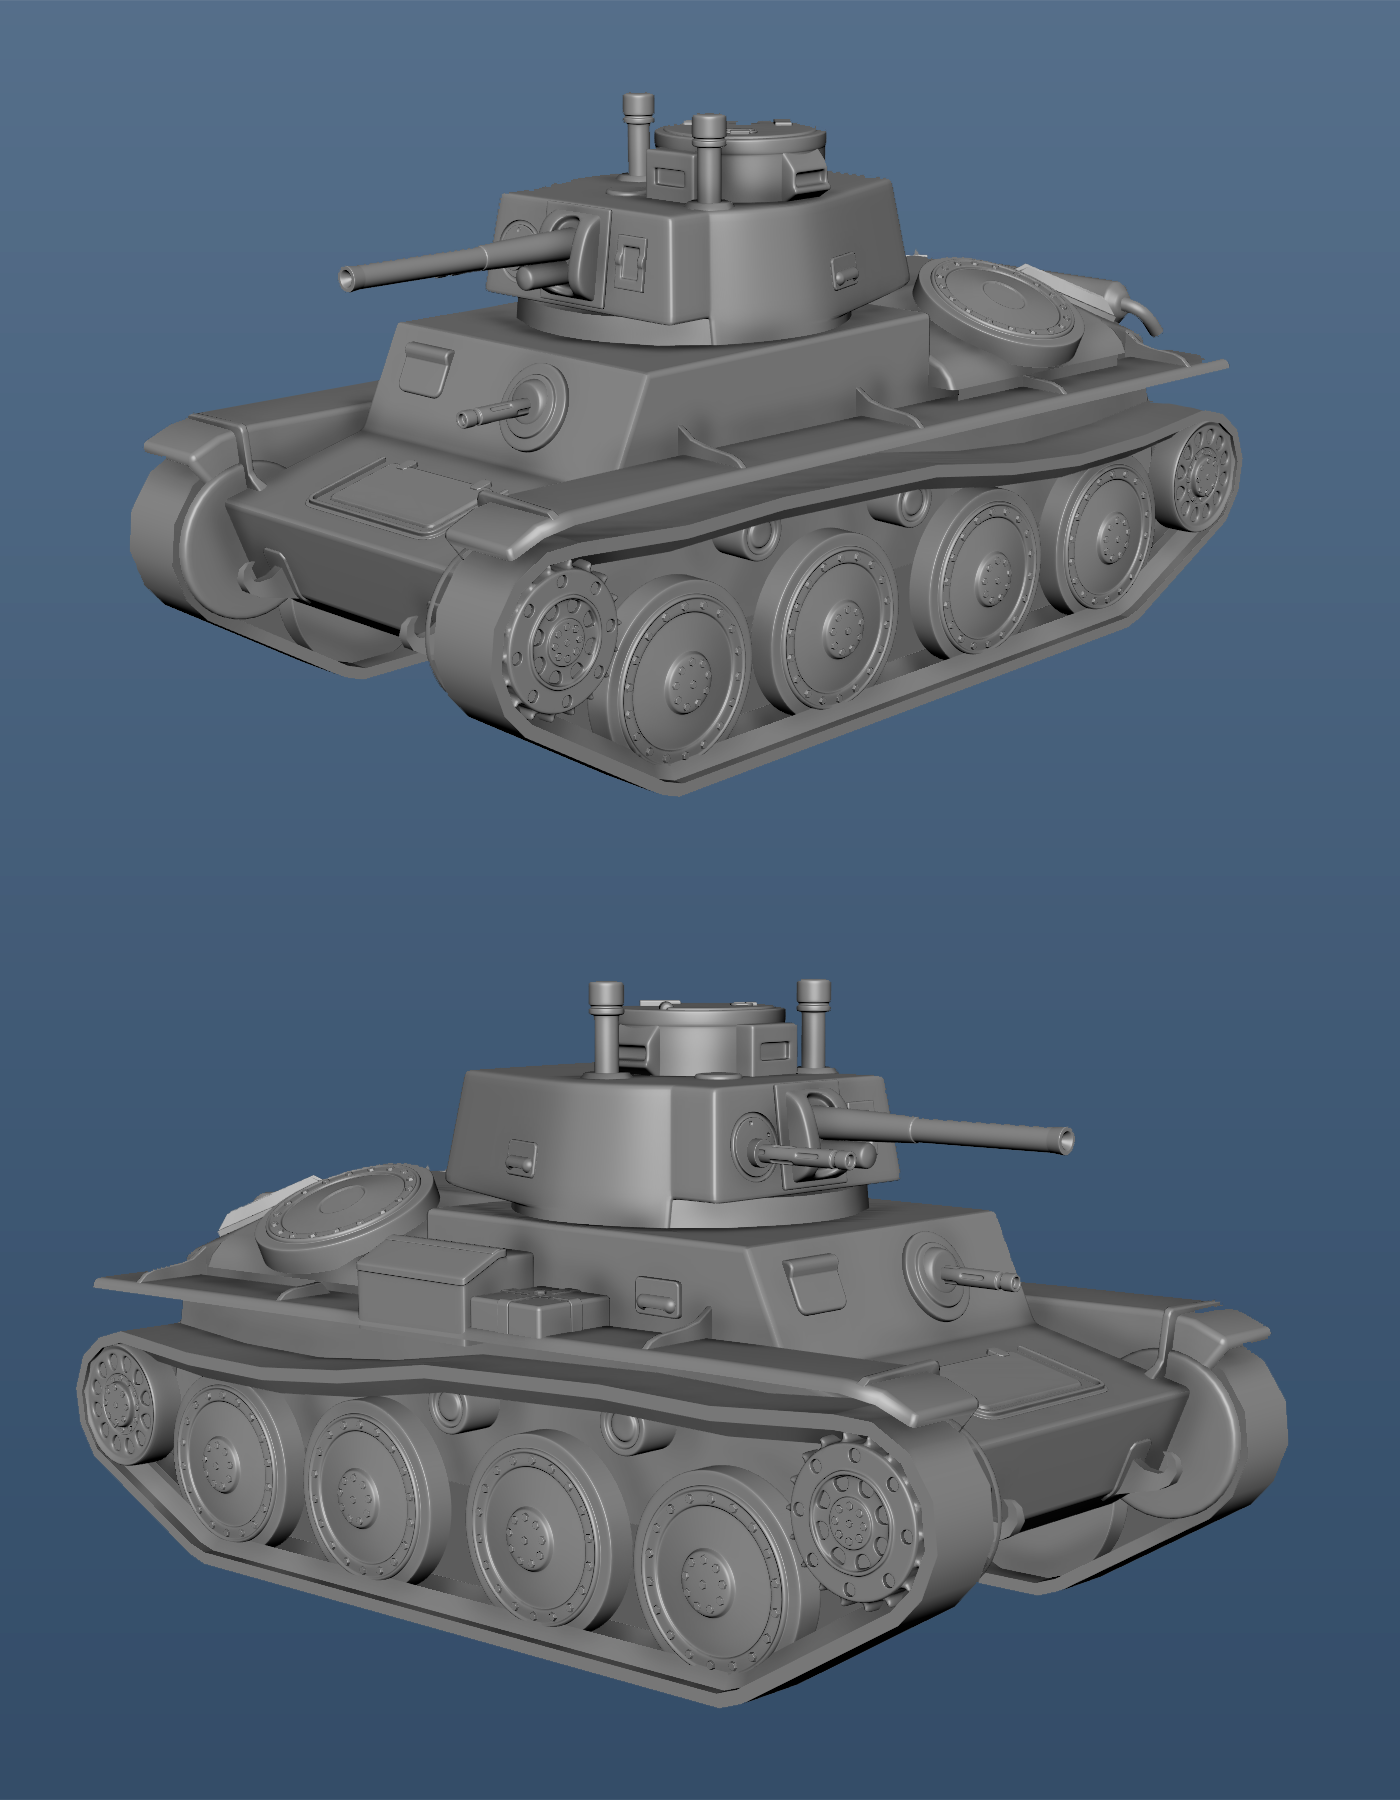
Here is the high-detail version of our tank!
It’s fun to be able to view these models up close with this level of detail so here are a few other examples of high poly models for your viewing pleasure!

Here are some high-poly models that are used for Arms Against Tyranny.
Low Poly - Making an optimized low-detail version of our tank!
Now that we have added all that sweet-looking detail to our high poly 3D model, we can go back to the block-out version of our model to make ourselves a low-detail version that will be the version that is used in-game!

I will go through the model and make the adjustments like this!
Most of the work here is spent on removing unnecessary polygons in various ways to ensure that the model is optimized. We have a polygon limit for each type of asset. We want to stay within these limits as much as possible without sacrificing too much visual quality!

Here is the low poly version for now!
I have kept some polygons on parts that will help speed things up later on when we will prepare it for animation! It’s important to remember how the model will move, so you will also have to be careful not to remove geometry on parts that will bend. This is especially important for objects with more organic properties such as the limbs of a character for example.
UV-mapping - Preparing the model for a paint job!
Before we can start adding textures to our model we need to go through a process known as UV mapping. This is where you create a 2D map of your model so that you have something to paint on. It’s sort of like cutting a paper model into different sheets of paper that you fold out so that you can paint on them.
Once you have cut your model into all of these pieces we will need to put them into a 2x2 square that will end up being our UV-map. This process is very much like a puzzle game. The actual size of the texture image that will be used in-game is quite small so different shells will be mirrored and stacked on top of each other. This is a technique that’s commonly used in games when you want to cram as much resolution out of your texture map as possible. There are limitations to doing this, it can make camouflage or dirt look repetitive in ways that are not so appealing so we will need to be conscious of how the model will be viewed in the game. Not all artists enjoy this part but I find it to be pretty fun in its own right!

This is what our UV map looks once we have sorted everything!
Texturing
If you have ever painted a miniature model in real life then this is the part where we grab our brush and start painting our model! This is honestly one of the most satisfying parts of being a 3D artist because you are no longer looking at a model without realistic materials and well.. texture!
To create our textures I will use a program called Substance Painter. I will prepare the high and low-detail models, sort the different parts by name and separate some parts from the rest of the model. After this, we will import our low-detail model into our texturing software. Once that’s done we will take our high-detail model and project it onto the low-detail model. Once this is done we get a lot of these maps with different properties that we can use for various effects when we start painting our model.
From here, it’s all about listening to your favorite music tracks (low-fi HoI anyone?!) as you add color and detail to your model. When you are texturing you will make adjustments to different values that will affect how different materials are perceived. It’s good to start with a base color and from there, add color variation as well as other properties such as how shiny or metallic the different parts should be. Working in Substance Painter is all about working with layers and masking out different parts using various methods. Thanks to the colors that we added to our high-detail model earlier we can quickly add color to things such as tiny holes as well as materials to other details such as small pickaxes and other tools. I will add some ambient occlusion to add some dark color to the nooks and crannies. This will also help separate some of the details from each other. Camouflage will be made a bit larger than in real life to make the texture appear less cluttered from a distance. Last but not least, let’s add a tiny amount of highlights to the edges to make the details pop!

A timelapse of the texturing process!
The model's appearance in the texturing software is just an indication of how things may look in the game but to know how things truly turned out we will need to put our model and textures in the game!
Rigging and animating
We can’t have our model be completely static in the game so let’s make it come to life with some animations! Like many things, animation and rigging is a science in itself so there are artists that specialize in this process alone. But in most cases, I will be able to create my animations from scratch or reuse older ones if needed.
Before our model can move we will need to add “bones” or “joints” that will be placed into the model. These can then be moved around to create our animation. We will place our bones in a manner that lets us manipulate how we want the model to move. Once the bones are in place we can move on to a process called weight painting which lets us tell the game exactly what part of the model should move together with a specific joint.

Now we will animate it by moving the skeleton we have created and pinning certain key poses. It’s important to get certain timings right to sell the weight and gravity that’s being applied to the vehicle as it moves. This can be trickier than it sounds but with some patience and minor adjustments, we will hopefully get the result we are looking for!
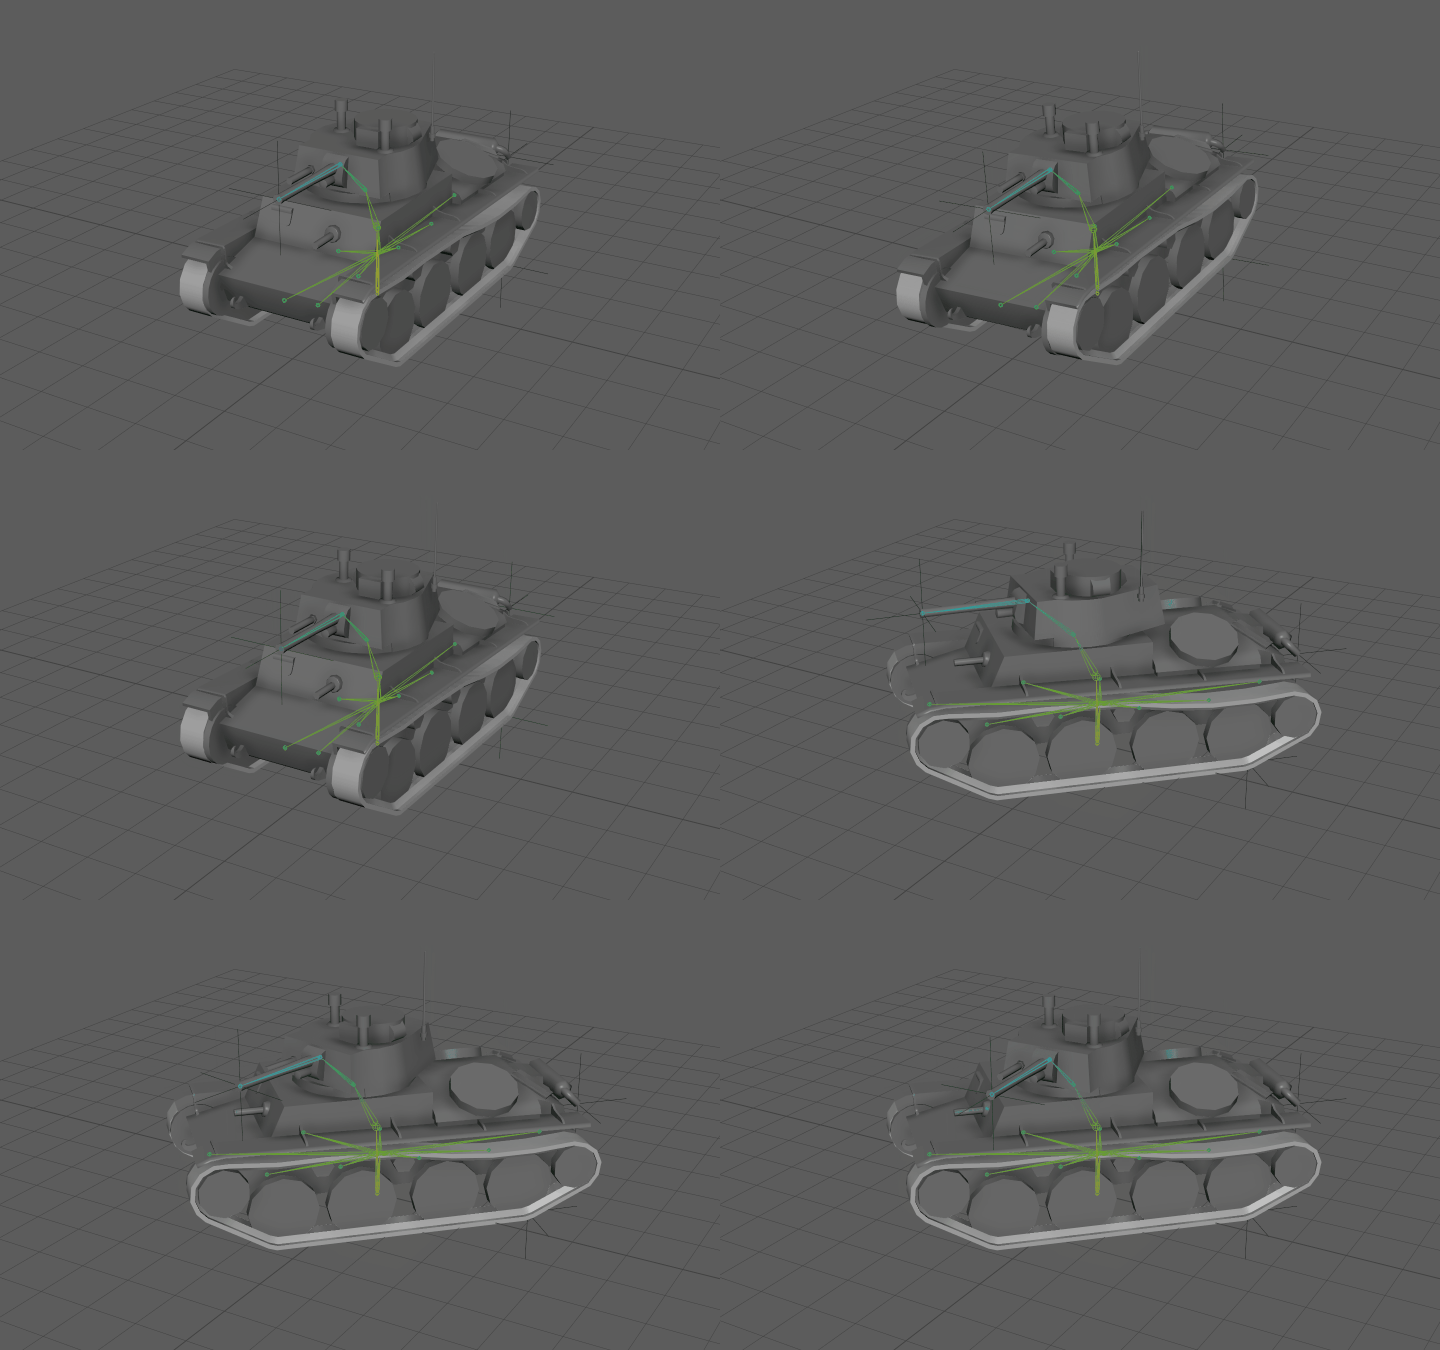
It’s alive!
Finally, It’s time to put our model, textures, and animation into the game! Once added we will make some minor adjustments to the textures and that’s that!

Tadaa!
While we are on the subject of animated assets, here is a bonus one for you! You may have gotten a peak of it if you read the Historical Finland diary!
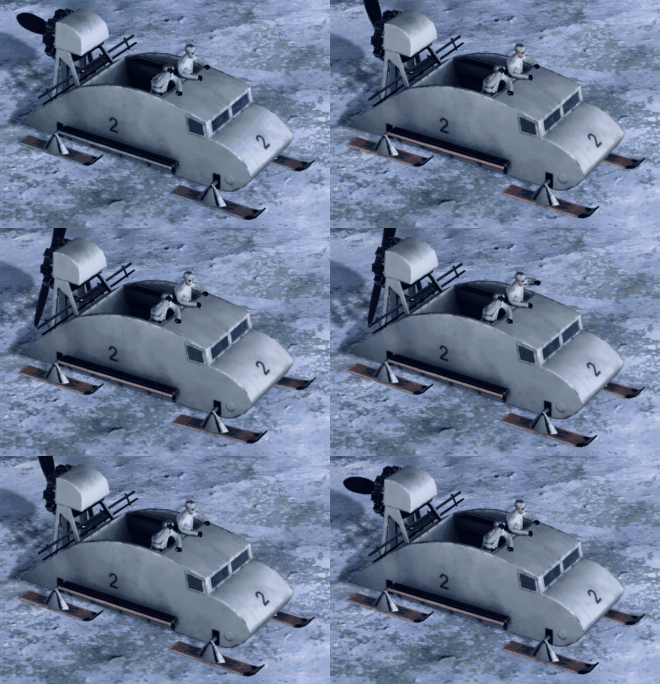
Look at them go!
And with that, our tank is ready to wreak havoc on the battlefield! Things are still under development so changes may happen here and there but I hope I was able to give you some interesting insight into the 3D art for Hearts of Iron!

Best regards,
John


