• We have updated our Community Code of Conduct. Please read through the new rules for the forum that are an integral part of Paradox Interactive’s User Agreement.
I usually never release nations, but after seeing your success here, maybe I need to. You get all that land for free basically because of no AE.

The Ottoman war was anticlimactic. Spain/Austria seems like it will be a much bloodier affair.
He gets the land for free since he doesn't use up diplo slots.

But you could use it on a smaller scale even as not-a-Shogun.

As long as one is still not too hated, the "release, vassalize, diploannex" method is probably better than the "release own province as OPM vassal - use core reclaim CB to max size the same vassal - diploannex"
 
  • 2
  • 1
Reactions:
Releasing nations and vassalising them seems to work very well for you.

I usually never release nations, but after seeing your success here, maybe I need to.

For this run, the strategy of release nation -> diplo vassalize works because I do not have to absorb those nations. In a normal run, reconquest CB is usually better, but still this is a tool that can come in handy . In this run, as steckie mentioned, reconquest CB is not an option for Daimyos .

The Ottoman war was anticlimactic. Spain/Austria seems like it will be a much bloodier affair.
I think my toughest foe will be France. Because they are allied to my allies ,Genoa and Venice , who I would lose and have to fight.
 
  • 2
Reactions:
Chapter 15: Making Rounds (1590-1600)
In the last Chapter 15: Making Rounds (1590-1600)Chapter, Oda attacked first the Ottomans, then the Commonwealth, trimming down two of the "Big Four" Empires. In this chapter, Oda will continue making her "rounds" on the Empires, and she started with Spain, via their ally the Papacy

1 dow spain via papacy.png


To maximize gains from Spain, the latter were included as a co-belligerent , which brought in their ally Austria. The Pope responded by declaring a crusade against Oda

2 crusade.png

Oda's counter was a shrug, and the recruitment of a 4-siege general from Daimyo Lebanon.
3 siege 4.png

The Odan armies then quickly invaded Austria and took the forts of Unterkarten and Wien in rapid succession, while at the same time relieving the siege of Genoa.
4 Austrian forts falling.png

While that went on, 57 year-old Hideyoshi decided to accept a new heir, playing it safe with the succession.. And he also paid attention to changes to the Middle East map, where Aq Qoyunlu got partitioned between Persia and Ottomans, and lost a few provinces to the other Qoyunlu ( Qara). The latter appeared agreeable to join the safety of the Japanese Daimyos and Hideyoshi immediately sent envoys to improve relations.
5 new heir.png

6 qoyunlus.png

Meanwhile , the war with the Papacy and Spain was proceeding quite nicely for Oda. With Austria almost fully occupied, Oda moved on to Spain, sieging their fort at Labourd.

7 labourd sieged.png


There was no response from the Spanish armies themselves, and it was assumed that the bulk of them were in the New World. Meanwhile the vassal swarm and Genoa overran the Papal States, ostensibly the leader of the enemy alliance. The first enemy to make peace was tiny Mantua, who was pillaged to improve Kyoto's development

8 Manrua.png


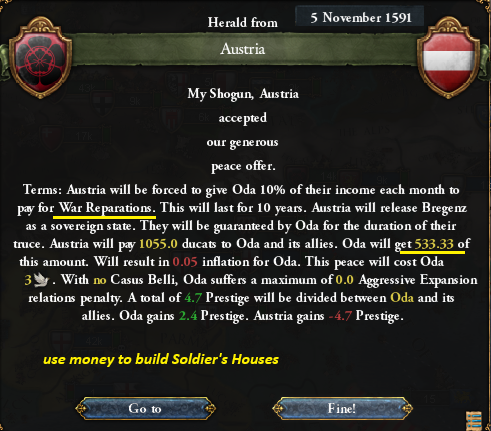
Soon after , Landshut and Austria signed peace treaties giving up money. Austria released Bregenz as an independent nation, but because they were in the Empire, there was no hope for Oda to turn them into Daimyo.

9a austria peace.png
9b Lanshut peace.png


That effectively meant that Spain and Portugal were the last enemies remaining, and the invasion of Iberia began in earnest. After the siege of Labourd took over 200 days, the Shogun recruited a new general hoping to get someone with even better skills than the Lebanese guy, and was happily rewarded with general Ikeda {6/6/3/6) whose siege skills were unsurpassed.

10 perfect general.png


With Ikeda leading the vanguard siege army, Spanish forts fell one after the other: first Navarre, then Burgos, then Madrid itself. ANd that took place in just 9 months after Labourd was taken, with no resistance from Spanish armies whatsoever.

11 to madrid.png

THe lack of resistance was partly due to the Portuguese and Spanish field armies attacking Oda's holdings near Egypt instead of defending Iberia.


12 fgighting in middle east.png


The occupation of Middle Eastern provinces did not concern the Shogun, for the Papacy was going to receive the occupations, and therefore that would not affect his negotiating position [warscore] vis-a-vis the Spanish and Portuguese. And by the end of 1593, Oda had occupied all of Iberian Spain, leaving only their colonies and the Balearic Islands and Sardinia in their hands. Feeling that further gains would be difficult to obtain, the Shogun made peace with Spain

13 peace spain.png


Spain was forced to release the old kingdom of Asturias and the nations of Navarre and Galicia. Oda took the island of Malta, with its famous Forts, and annexed the province of Labourd, giving her a border with France ( the next Empire stop on "rounds") and proximity to the newly independent North Iberian Kingdoms. Diplomats were immediately sent to improve relations with the small countries. And although Spain was the main target of the war, the Shogun continued fighting a while longer, taking on Portugal for economic and strategic reasons. And thanks to the peace with Spain, Odan troops were able to sneak into NOrth Africa, since the Spanish fleet was the one guarding the straits of Gibraltar. By the time the Portuguese fleet arrived, enough troops had crossed to liberate the Genoese province of Ceuta and begin the siege of Fez.
14 into north africa.png


The remainder of 1594 was spent sieging down the Portuguese forts of Fez , Tangiers and Marrakech ( Lisboa was already taken) until the Iberians begged for peace

15 Peace portugal.png


The most important clause in the peace for the Shogun was the war reparations which diverted 10% of Portugal's rich monthly income to ODa's coffers. In addition, Oda took one province on the North African coast to give her base of operations there, and to give proximity to Tlemcen who was released in the peace.

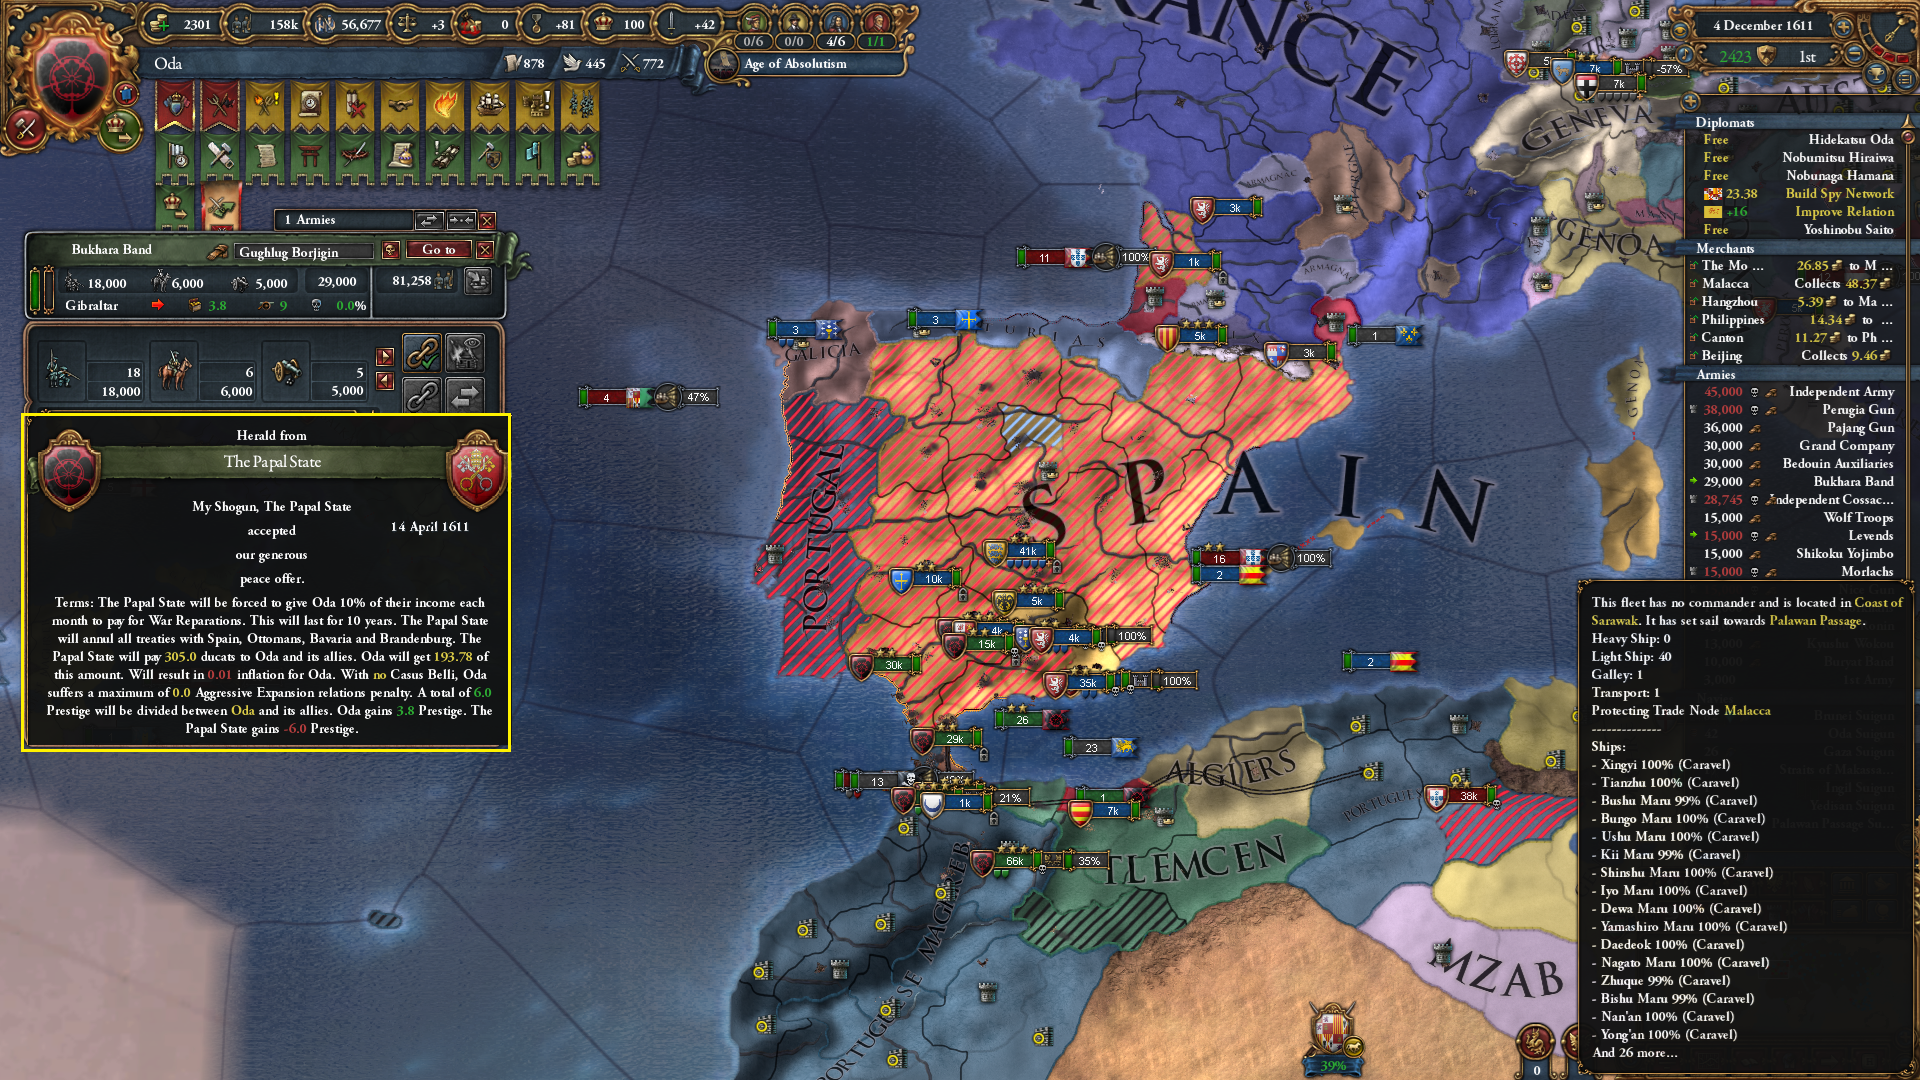
Finally, peace was made with the enemy leader, the Pope.

16 papacy treaty.png


Urbino was released as a new nation ( and hopefully future Daimyo) and Rome itself was pillaged to increase the size of Kyoto.

WIth Oda at peace, the Shogun immediately began working on turning Galicia into a Daimyo. And to help with that , he issued another Sankin Kotai edict, which improved his diplomatic reputation greatly. And that appeared to be just enough to get the Galicians to join the Odan family . Asturias and Navarre soon joined them.

17 vassalize Galicia and others.png

18 Galicia vassal.png

19 asturias vassal decline Gujarat.png

20 navarre.png


At the same time, he was working the diplomatic dance with nations released in earlier wars. Zaprozhe and Tlemcen were turned into Daimyos, while Bashkiria , Algiers and Riga were made into tributaries ( each had their reasons to refuse vassal status)

21 other natiosn.png


It was while the shogun was negotiating with Qara Qoyunlu that he passed away, leaving the regency in teh hands of Lady Razia of Tabriz ( the Shia Queen).

22 Lady Razia.png


She would continue his efforts and successfully add Qara Qoyunlu as a Daimyo, further cementing Odan control of the Middle East.
During that flurry of diplomatic activity, the military forces of Oda prepared for war with France. First, the manpower pool was allowed to replenish. Second, various armies were moved from North Africa to the areas around Labourd, taking advantage of their exiled status . Third, spies were sent to France to fabricate a claim on Saintonge and facilitate future sieges. And so on July 18, 1586 Oda declared war on the 4th large Empire .

1738478709917.png


on France's side were Oda's former allies Genoa and Venice, as well as German minors Liege and Oldenburg , and their old ally Scotland. Oda had Bohemia and the swarm. The strategy for the war was simple. Starting in Labourd, Odan armies would stick together and drive North towards Paris, taking forts on the way, while the vassal swarm was expected to distract the enemy armies . And thanks to general Ikeda and his +6 siege skills, things by and large went according to plan

24 advance to paris.png

Averaging about 36 days per siege ( barrage was used every time ) , Japanese forces did a veritable blitzkrieg across the French plain, taking Paris 7 months after war start, and reaching Metz a month later.

The rapid advance continued in 1598, with France finally counter-attacking with about 30,000 men. Oda quickly defeated that force at Labourd.

25 Labour battle.png


After the victory at Labourd, Odan siege armies completed the occupation of France, and by mid 1598 moved on to invade Genoa's Italian possessions

26 saluzzo falls.png


While this went on, the effort at turning Japan Christian was finally defeated, with the isolationists winning again ( I did not detail the intervening incident events, but in all cases the Shogun chose the isolationist position).
27 Christanity defeated.png


Back in Europe, the city of Genoa fell in September 1598 , leading the Genoese to drop out of the war .

28 Genoa peace.png


Saluzzo, Morocco, and Tripoli were released . Each was a one province minor, and all three were willing to become vassals of Oda. ANd Oda took War Reparations from the rich merchant Republic.

Next was the even wealthier republic of Venice, who was forced to release Perugia and Savoy (in Nice) and pay reparations.
29 venice.png


That left France, who still held on to territory in South England ( out of reach for Oda who did not have a significant fleet in the Atlantic), and territory in Naples. As the decade ended , Odan troops are about to cross into Naples . And the Lady Shogun was already considering peace treaties with France.

30 possible peace.png

Advisors to the regent have recommended making peace now. Part of the hurry is the need to attack the Ottomans soon. Their truce with Oda had expired and they were attacking the Mamluks again. And Oda needs to fight them before the truce with Commonwealth expires to avoid a coalition appears again.

WE will finish the customary view of Oda's growing "Empire"


31 status.png


And we note that the Aztecs are apparently an Empire, and therefore will also need to be destroyed.


Some random notes

1) In Mantua peace, I was promised 1/1/1 improvement in Kyoto for pillaging but only got 1/1/0 . I thins the game recalculates the cost after adding each Dev, and by the time they got manpower , the cost was too high . That was annoying because I really needed manpower the most.


2) I am glad I got Asturias released before their cores expired. Leon , Aragon and Catalonia may be too big to vassalize. I have similar luck with the French small Appanages that were annexed a bit after 1444, so their cores still exist. That is the benefit of moving fast towards Europe.

3) My economy is unusual for this time frame of the game. usually in 1600 trade is by far the dominant source of income, and it is not difficult to steer trade to one's home node to spawn Global Trade. But in my case I do not have full control of Malacca node, so I have not made it my home node and will therefore not spawn GLobal Trade myself. But my income is supplemented by war reparations from rich nations as well as the vassal swarm. That should continue to grow. At some point, I should be able to run simultaneous wars against two big Empires. But I will always need periods of peace to vassalize nations and add to the swarm

4) I have so far - knock on wood - not experienced significant slow down on my PC due to the vassal swarm during war.
 
  • 1Like
  • 1Love
Reactions:
And thanks to general Ikeda and his +6 siege skills, things by and large went according to plan
It's always nice when one rolls a Vauban.
 
  • 1
Reactions:
Weird that the UI lied. Must be, as you said, the cost was too high for the manpower calculation. You'd think it would just add +1 to each regardless of cost.
the Genoese province of Ceuta
How did that come about?
And we note that the Aztecs are apparently an Empire, and therefore will also need to be destroyed.
Inconvenient. Looks like you will have to get a province in the New World.
 
  • 1Like
Reactions:
It's always nice when one rolls a Vauban.
He's also a Turenne ( 6 shock , 6 fire).
That 'crusade' didn't end well for the Catholics...
Indeed. The Pope must be pulling his hair seeing how eager the new princes are to join the heathen Japanese.
How did that come about?

Best I can tell, Portugal lost it in a war - probably fighting France as allies of England.

1738556816057.png


To be honest, until this chapter, I assumed that bit of yellow was Spain .
Inconvenient. Looks like you will have to get a province in the New World.

If the Aztec are the last Empire standing, and it is not Imperialism CB yet, I may do a no CB war. If I am lucky, New Spain kills them for me first ( of course, with Oda destroying Spain, we cannot count on that ) .
 
  • 2
Reactions:
Chapter 16: The Second Rounds (1600-1610)

The last Chapter saw Oda attack Spain and France, after having attacked Ottomans and Poland . The new chapter opened with peace with France, as the Japanese were eager to move on to Ottomans again and start the second round of wars.

1 peace france.png


As has become customary for Oda, the enemy was forced to release some small nations ( in this case Armagnac, Foix, Auvergne and Bourbonnais) and cede a strategic province to Oda ( in this case Narbonne). Oda also took war reparations from the French.

The next 2 years were then spent moving the exiled troops towards the Balkans ( and carefully avoiding Oda's province of Lika and her vassal Bosnia). And cajoling the new French princes into joining the Daimyo family , And some Daimyos took advantage of that lull in between wars to start their own wars. And in each and every case, the Shogun asked the offending Daimyo leader to commit Seppuku

2 seppukuSolon seppuku.png


With the ever growing number of vassals, this has become a regular occurrence in peace time, so much that Oda came to depend on the "sacrificed" vassals as an ancillary source of administrative , diplomatic and military power. Meanwhile, the Shogunate's attention was mostly devoted to managing the 6 diplomats who were all constantly busy shuttling between capitals of new nations and Kyoto, sending gifts , influencing nations , establishing royal marriages ( when possible) and turning the small nations into Daimyos . The first two to join in the new decade were tiny Urbino and Tripoli ( a one province minor on the island of Djerba )

3 cta from persia.png


The vassalization of Tripoli was almost interrupted by Persia calling Oda to arms against Transoxiana and their allies. The Lady Regent considered this for a while. Persia had been kept as an ally to counter any threat of coalition. But now that Persia has gotten bigger, the court in Kyoto felt that further help to them would be detrimental to the long term project of Empire elimination . Just simply agreeing to the call but not doing anything was not practical, as the vassal swarm was certainly going to help Persia quite a bit even if Oda herself did nothing. And so Oda never replied, effectively declining the call to arms.
With Oda still at peace, more vassalizations came.

4 mote vassla.png


But eventually , those had to be paused to allow war against the Ottomans to proceed .

5 DOW OTtomans.png

Oda has assembled her armies near the province of Bessarabia, and from there they moved into two groups, the bulk going on the Western shore of the Black Sea towards Constantinople, and the smaller group on the East shore of the Black Sea towards Anatolia. This was because the Ottoman navy still controlled the Straits of Bosporus and Dardanelles. With the Ottoman forces busy fighting the Mamluks, general Ikeda with the artillery made it to the gates of Constantinople without resistance and took the city in 33 days. He then started the trek around the Black Sea to help with the sieges on the other side of Anatolia. But he was beaten to Asia by his colleague general Ujiie ( also +6 siege) who took Gallipoli in 77 days and then snuck a crossing into Karasi when the Ottoman navy was temporarily away .

6 constantinople and crossing.png


With Japanese forces invading Western Anatolia, the Ottomans had basically lost the war. But they had one chance at a victory in the mountains of Trebizond where over 100,000 Turks assembled to push back the Odan siege force. Seeing the odds and the terrain, the Japanese command thought about retreating, but then decided to pour in reinforcements in a gamble to end the war there and then .

7 trebizond.png


The gamble paid off. The main Ottoman field army was defeated and after that it was quick progression to conquer the remaining forts. One by one, all the Ottoman forts in Anatolia and Syria fell to the Oda with Damascus surrendering just 9 months after the battle of Trebizond.

8 damascus falls.png


By then , the Mamluks had begun to prevail against Ottomans in their war and began to occupy Ottoman provinces . The regent ordered the troops to quickly race to Cairo and take it ahead of the Mamluks to improve Oda's negotiating position at the peace table. And she also concluded peace with the Eyalet-i-Tunis ( formerly Tripoli) to further isolate the Ottomans

9 Tunis out.png


And , seeing the main Ottoman army heading West to Djerba, she ordered general Afzal to pursue them .

10 Djerba.png


After a victory at Djerba, the enemy sought refuge in the deserts of Lybia and Algeria, only to be mercilessly pursued by the Odan force and eventually annihilated.
11 desert one.png
12 desrt two.png


Once it was confirmed that the entire Ottoman army had been destroyed, the Regent decided it was time for peace. That way there was no hope for the Ottomans to recover and win their war against the Mamluks. The larger the bite the Mamluks took out of Ottomans, the faster the destruction of that Empire would be .

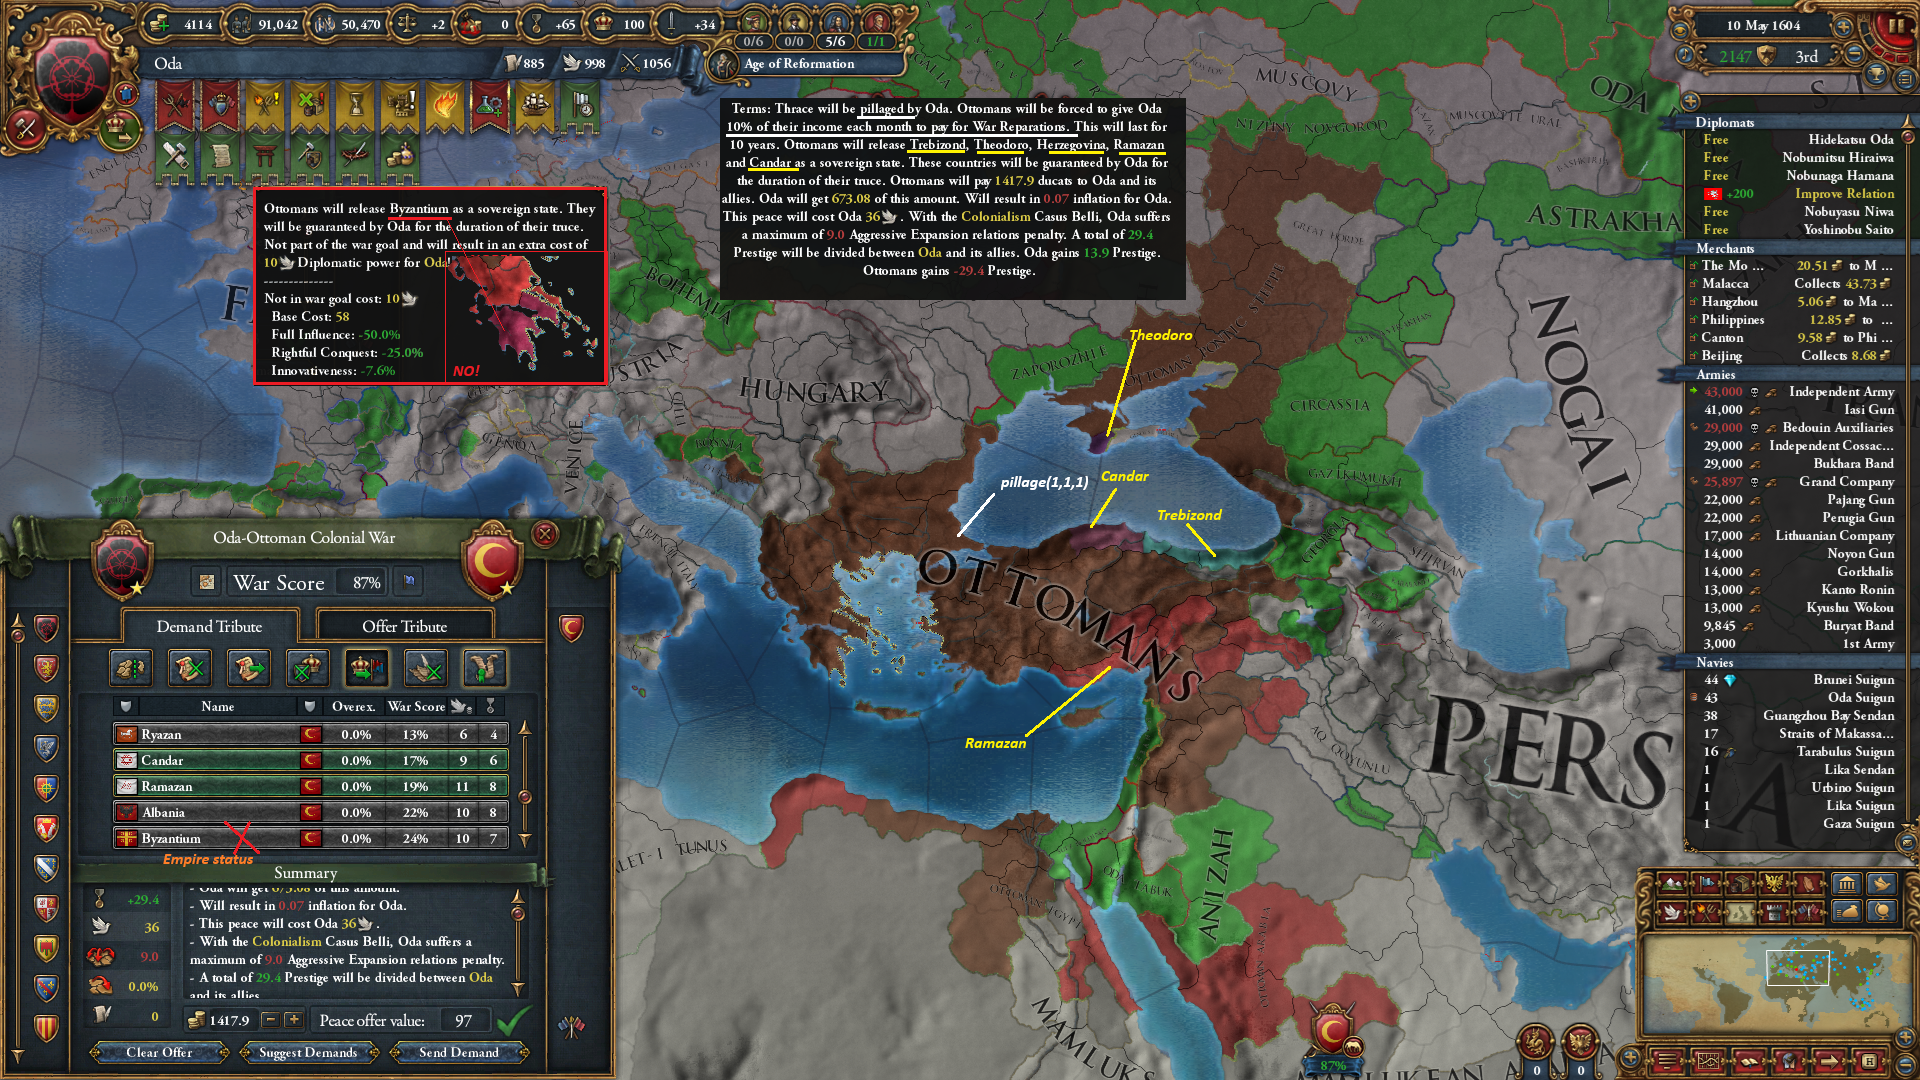
13 peace ottomans.png


The Ottomans were forced to release Candar, Trebizond, Ramazan and Theodoro. They also pledged 10% of their income as reparations and paid a hefty sum. But one clause that the Japanese avoided, however, was releasing Byzantium back as independent, and that was because the latter were likely to claim the rank of Emperor and refuse to become a Daimyo as a result. And immediately following the peace, Oda began working on making new vassals of the new nations. Meanwhile, Venice declared war on the Ottomans ( who were already at war with Mamluks).

14 Venice dows Ottomans.png


That was music to the Regent's ear as it also sped up the demise of the Turks. More good news followed as multiple nations joined Oda's vassal swarm. Perugia, Savoy, Ramazn, Candar, Trebizond, Herzegovina, Theodora , Imereti and Mzab all became vassals in the year and a half following the Ottoman peace

15 perguia.png


Of note is the last two ( Mzab and Imereti) were not nations released by Oda, but simply small countries who agreed of their own free will to join Oda ( after some cajoling with gifts, a royal marriage for Mzab, influence nation and improved relations). With that tranche of vassals secured, it was time for the next stop on "the rounds" : the Commonwealth of Poland and Lithuania

16 DOW PLC.png


The Commonwealth had its junior union partner Hungary as well as allies Sweden and England on its side. Bohemia joined Oda ( Switzerland too , who was an ally on the road to vassal status). That declaration of war was the REgent's last official action, as Yoshinobu II took over the reins of the Shogunate.
And Yoshinobu's reign started inauspiciously with a rare defeat of Odan arms at Smolensk
17 loss at smolensk.png

But soon enough , things went back to the usual pattern of Oda's siege armies capturing forts rapidly , leaving the carpet occupation of unfortified provinces to the Daimyos.
18 Warsaw battle.png

After losing a string of forts from Podolia to Stettin, including the capital Warsaw, Poland tried to counter. However, in a series of 3 battles near Warsaw , Oda was able to retain control of Central Poland .
19 battle 1 of 3.png
20 battle 2 of 3.png
21 battle 3 of 3.png


After that Oda began the invasion of Hungary . Pest was the first city to fall

22 Pest falls genoa out.png


Then all the other Hungarians forts were taken one by one. And an army was diverted to Sweden to force them out of the war . Finally in June 1609, almost at the end of the decade, Poland was ready for peace .

23 peace PLC.png


It was not a complete unconditional peace, because England was still in the fight and Oda's lack of an Atlantic navy kept them safe. But Poland was still forced to give major concessions. Kiev, Moldova and Ducal Prussia were freed ; reparations extracted and indemnity was collected.
Shogun Yoshinobu hoped that would significantly weaken Poland and maybe lead to Hungary becoming disloyal. But unfortunately, as soon as peace was done, Poland completely integrated Hungary. This meant a few more wars would be needed to completely dismantle the Commonwealth. But that annoying news was tempered by the good news that the Ottomans lost a chunk of land to both Mamluks and Venice.

24 Ottos less.png

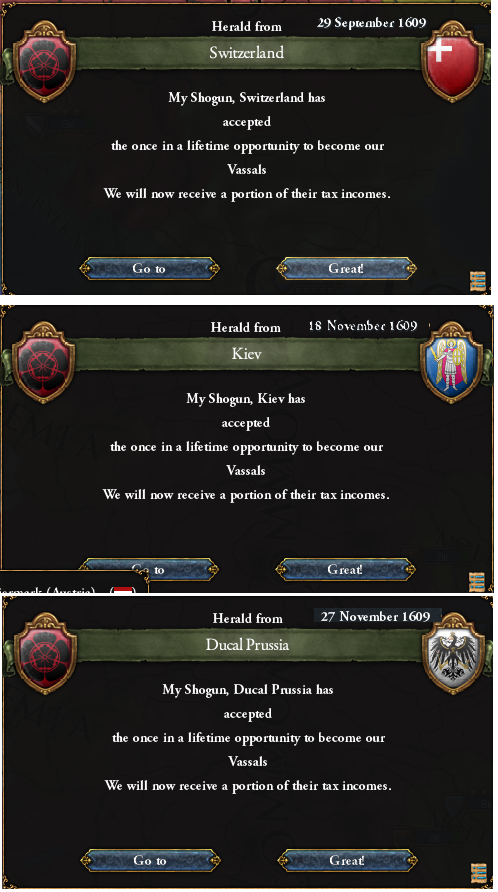
And among the lands the Ottomans lost was Iraq, who immediately became the target for Oda's vassal whisperers. And those sweet whisperers were able to convince Switzerland ( exiled to Italy and not in HRE anymore), Kiev and Prussia to join the Daimyo family. Moldova, on the other hand, was made a tributary since Oda owned one of their cores ( Bessarabia)

25 switz prussia kiev.png


And that brings us to the end of the decade. Oda is readying a war against Spain. But before we get to that and to the status map of Oda, we will note that Oda took Burgher loans to adopt the institution of Globall Trade

26 estates.png
27 global trade.png


And as we can see , the Shogun had curtailed a lot of the Estates privileges in anticipation of imposing a more Absolutist rule soon. We also note that Oda had a new merchant thanks to Global Trade. And when the Shogun was deliberating where to send him, he noticed that the merchant previously placed in Malacca node was no longer there. In fact , sometime in the last decade , Oda silently ceased to collect trade income in Malacca, which was very unfortunate since all the other merchants downstream of Nippon were pushing trade to Malacca. That happened as Europeans started to colonize in Malacca , and the Indonesian Trade Company based there lost its majority control of provincial trade power, and therefore its merchant. Needless to say the new merchant was sent there.
28 no malacca merchant.png

29 iberians in malacca.png

Finally the customary status map of ODa


30 status.png
 
  • 1Like
  • 1Love
Reactions:
Europeans started to colonize in Malacca , and the Indonesian Trade Company based there lost its majority control of provincial trade power, and therefore its merchant.
I'm guessing there'll be a war for those colonies at some point.
 
  • 2
Reactions:
Just simply agreeing to the call but not doing anything was not practical, as the vassal swarm was certainly going to help Persia quite a bit even if Oda herself did nothing.
Couldn't you have told your vassals to not engage?

Even without Persia as an ally, their time will soon come. Oda is unstoppable.
 
  • 1Like
Reactions:
Couldn't you have told your vassals to not engage?
Yes and no. Even if completely passive ( the "zzz" setting in vassal screen), Persia's enemies would waste their time and manpower sieging the Daimyos down , instead of fighting Persia. The AI appears to pick on the weaker enemy nations in war and avoid the stronger ones ( which makes sense).
Oda is unstoppable.
Shogun government is OP . IMHO, least "grinding" method to do World Conquest . If I ever attempt The Three Mountains, it will be via shogun strat.
 
  • 2
Reactions:
I played the next chapter and hope to post in next 24 hours . But before I move on i wanted to talk about the merchant loss issue and ask what people do about it.

As I mentioned I lost a merchant when my trade company in Malacca went under 50 % . My first question is if there is a message / alert that notifies about this .
My second question is whether people allocate specific merchants to a node or just treat all merchants interchangeably. Because what happened in the last chapter is that the lost merchant was the one collecting in Malacca , and all the other ones were pushing trade to him. So I had no income from any of those merchants for 3 years. I would have preferred to lose the one in Moluccas or Phillipines for example. Since that happened , I allocated the merchant I gained from global trade to Malacca ( so he will never be lost) and will send the one from trade company to a less important node like Girin.
 
  • 1
Reactions:
I played the next chapter and hope to post in next 24 hours . But before I move on i wanted to talk about the merchant loss issue and ask what people do about it.

As I mentioned I lost a merchant when my trade company in Malacca went under 50 % . My first question is if there is a message / alert that notifies about this .
My second question is whether people allocate specific merchants to a node or just treat all merchants interchangeably. Because what happened in the last chapter is that the lost merchant was the one collecting in Malacca , and all the other ones were pushing trade to him. So I had no income from any of those merchants for 3 years. I would have preferred to lose the one in Moluccas or Phillipines for example. Since that happened , I allocated the merchant I gained from global trade to Malacca ( so he will never be lost) and will send the one from trade company to a less important node like Girin.
I don't think there is a notification for it, this happens to me all the time with trade companies that are floating around 50%. Usually if I'm collecting I use one of the two base merchants that I know won't disappear, I've had this same exact thing happen to me too many times to count
 
  • 2
Reactions:
I played the next chapter and hope to post in next 24 hours . But before I move on i wanted to talk about the merchant loss issue and ask what people do about it.

As I mentioned I lost a merchant when my trade company in Malacca went under 50 % . My first question is if there is a message / alert that notifies about this .
My second question is whether people allocate specific merchants to a node or just treat all merchants interchangeably. Because what happened in the last chapter is that the lost merchant was the one collecting in Malacca , and all the other ones were pushing trade to him. So I had no income from any of those merchants for 3 years. I would have preferred to lose the one in Moluccas or Phillipines for example. Since that happened , I allocated the merchant I gained from global trade to Malacca ( so he will never be lost) and will send the one from trade company to a less important node like Girin.
I don't remember - were you unable to move market capital? Else just move your trade capital to Malacca so you always have your baseline pickup?
 
  • 1Like
Reactions:
I don't remember - were you unable to move market capital? Else just move your trade capital to Malacca so you always have your baseline pickup?
No, I have not moved the home node yet. I am not sure it is net plus. I have 90% of Nippon, but only 50% of Malacca.. So pushing from Nippon to Malacca may lose money But I guess I can always just collect in Nippon with a merchant anyways. So maybe I'll move it in next chapter.
 
  • 1
Reactions:
Chapter 17: Sailing the Western Ocean( 1610-1620)

We left the last chapter with Oda halfway through a second round of attacking the large 4 empires in the order Ottomans-Poland-Spain-France . It was now Spain's turn . But before that war was begun, the Shogun decided that the days of having naval inferiority in the Mediterranean and the Atlantic needed to end. It was time for the Pacific fleet to sail to the Atlantic. And so maps were requested from Galicia and Savoy ( Asturias, who had an actual colony in Africa, refused due to "being a colonizer" . The gall!).

1 sharing maps.png


But although Asturias did not help with the maps, their colony of Gabon was certainly helpful as a pit-stop on the long journey that the Galley fleet ( with 40 transports and the Flagship the Hisanaga) took from India to Europe. And it was during that voyage that war was declared on Spain

2 DOW spain.png


Oda troops were pre-stationed near the province of Labourd, and quickly moved to invest and capture the Spanish forts. Like usual , Spanish cities fell in quick succession so that by February 1611 , Odan forces were at the gates of Madrid . That month a new age of Absolutist rule dawned on the world. And truth be told, Oda was somewhat unprepared for it [forgot to build 5 universities]).

3 spain invaded.png


But on the military front, Oda was more than prepared. After all of Iberia was occupied, troops began moving into North Africa, thanks to Morocco holding hte African side of the Strait at Ceuta ( and Oda had parked a 30,000 strong Grand Company at Ceuta to make sure the enemy did not control the province).

4 Ibearia occupied pope out.png


And soon after the sieges of Tangiers and Kabylia in North Africa were helped by the arrival of the Japanese fleet to the waters around Iberia.
5 fleet is here.png


Meanwhile , in internal affairs, the Shogun passed the War Economy government reform, immediately lowering the cost of both regular and mercenary troops by one tenth. Coupled with the rising force limit of Oda due to more and more vassal Daimyos joining her , this effectively increased the size of the army she could field at any time.

6 gov tier 8.png


Also in internal affairs, Yoshinobu adopted his Filipino cousin Alon Toyoyomi (3/4/6) as his heir
7 alon is heir.png

Meanwhile, the war with Spain continued. Spain's allies Austria and Portugal were forced out of the war . Austria for money only, but Portugal for both money, land and also the termination of their historical friendship alliance with Spain

8 portugal out.png

Thanks to a timely reminder about the trade situation in the Malacca zone [ @StrategyGameEnthusiast ] , the Shogun made sure Oda took for herself the new colonies created in the area by Portugal ( and Odan troops had already seized directly one Spanish colony on Sumatra). Portugal also lost the provinces of Tafilalt, who would later become a Daimyo. These territorial terms were imposed in order to prevent Portugal from one day becoming another Empire.

That left Spain as the last enemy in the war. And this time, to extract maximum concessions, the armies crossed into the Balearic islands and Sardinia , thanks to the presence of the main fleet in the area.

9 fleet battle.png


The remnants of the main Spanish fleet were ejected from Cagliari and sunk in the Gulf of Bon. After that it was time for peace

10 spain peace.png


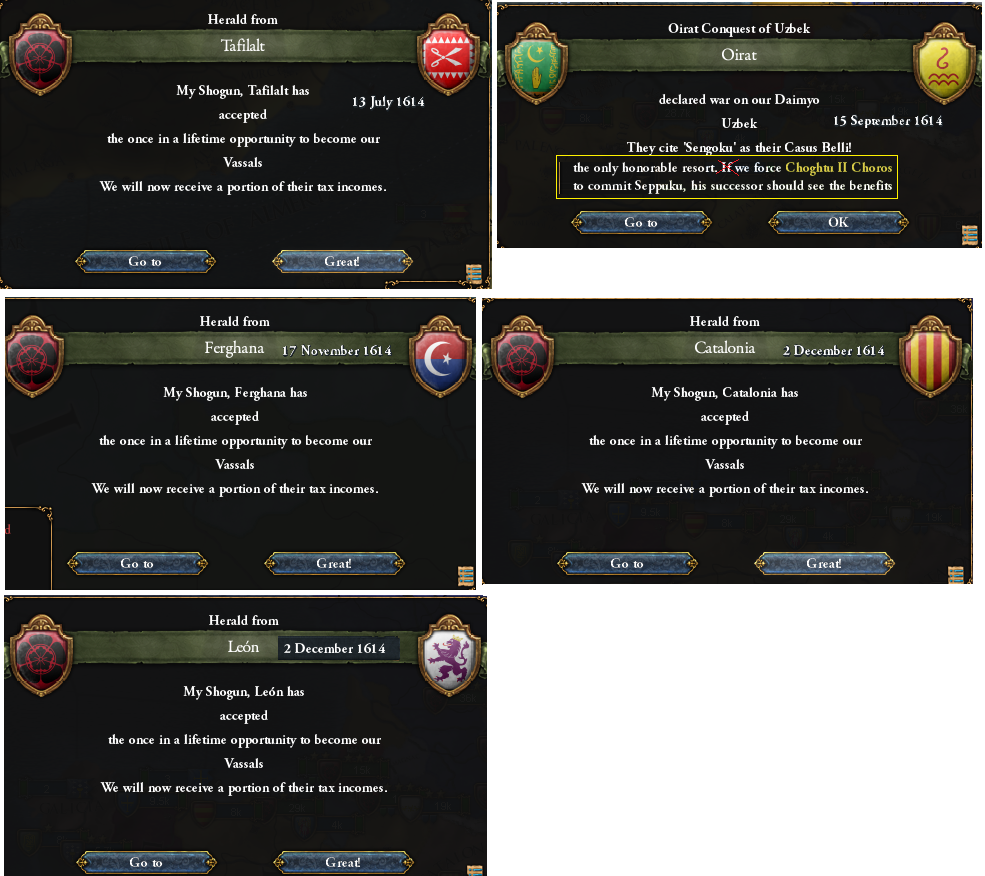
The nations of Leon and Catalonia were granted independence . And Oda got reparations from Spain as well as a new province in Central America, one that Oda hoped could be used to get at the Aztec Empire in the future.
The next Empire on the rounds was France. But first a short period of peace was needed to formalize the vassalizations of Tafilalt, Ferghana, Leon and Catalonia. That lull allowd Oirat to attack Uzbek ( which they eventually annexed). The Oirat ruler paid for his ambition with his life as he was promptly ordered to commit Seppuku.

11 vassalas and seppuku.png


After that it was time for the war on France

12 dow france.png


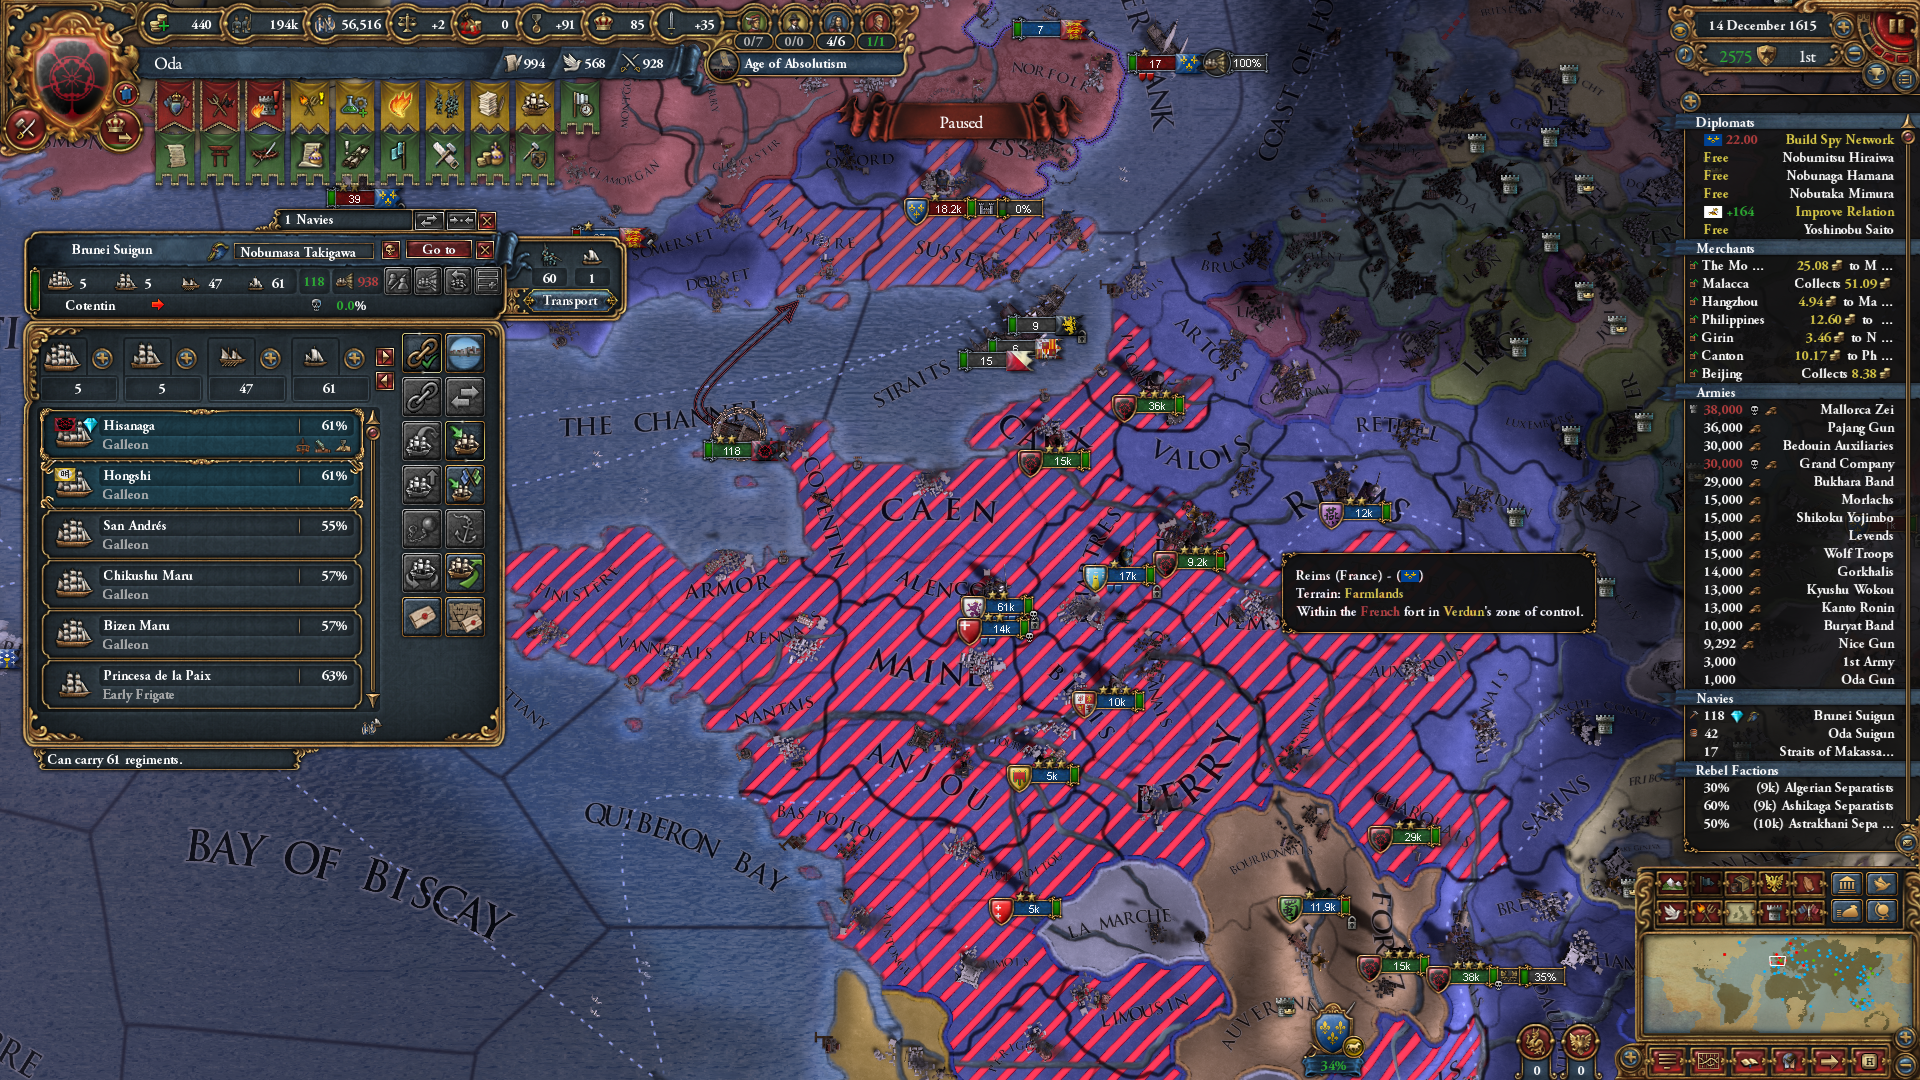
France again had similar allies to last time , including Scotland. But this time Oda had two answers to the problem presented by Scotland and French provinces in Britain. First, Oda had the alliance of England . Second , Oda had her Pacific fleet in theatre now. Just like in the last war, the French mainland provinces were quickly overrun . And then two mercenary armies, totaling 60,000 men, were able to set sail from the coast of Normandie and land in Southern England.

13 to England.png

These troops quickly helped the English turn the tide of war on their island by defeating the French army at "Domaine Francais" ( formerly London) .
14 london battle.png


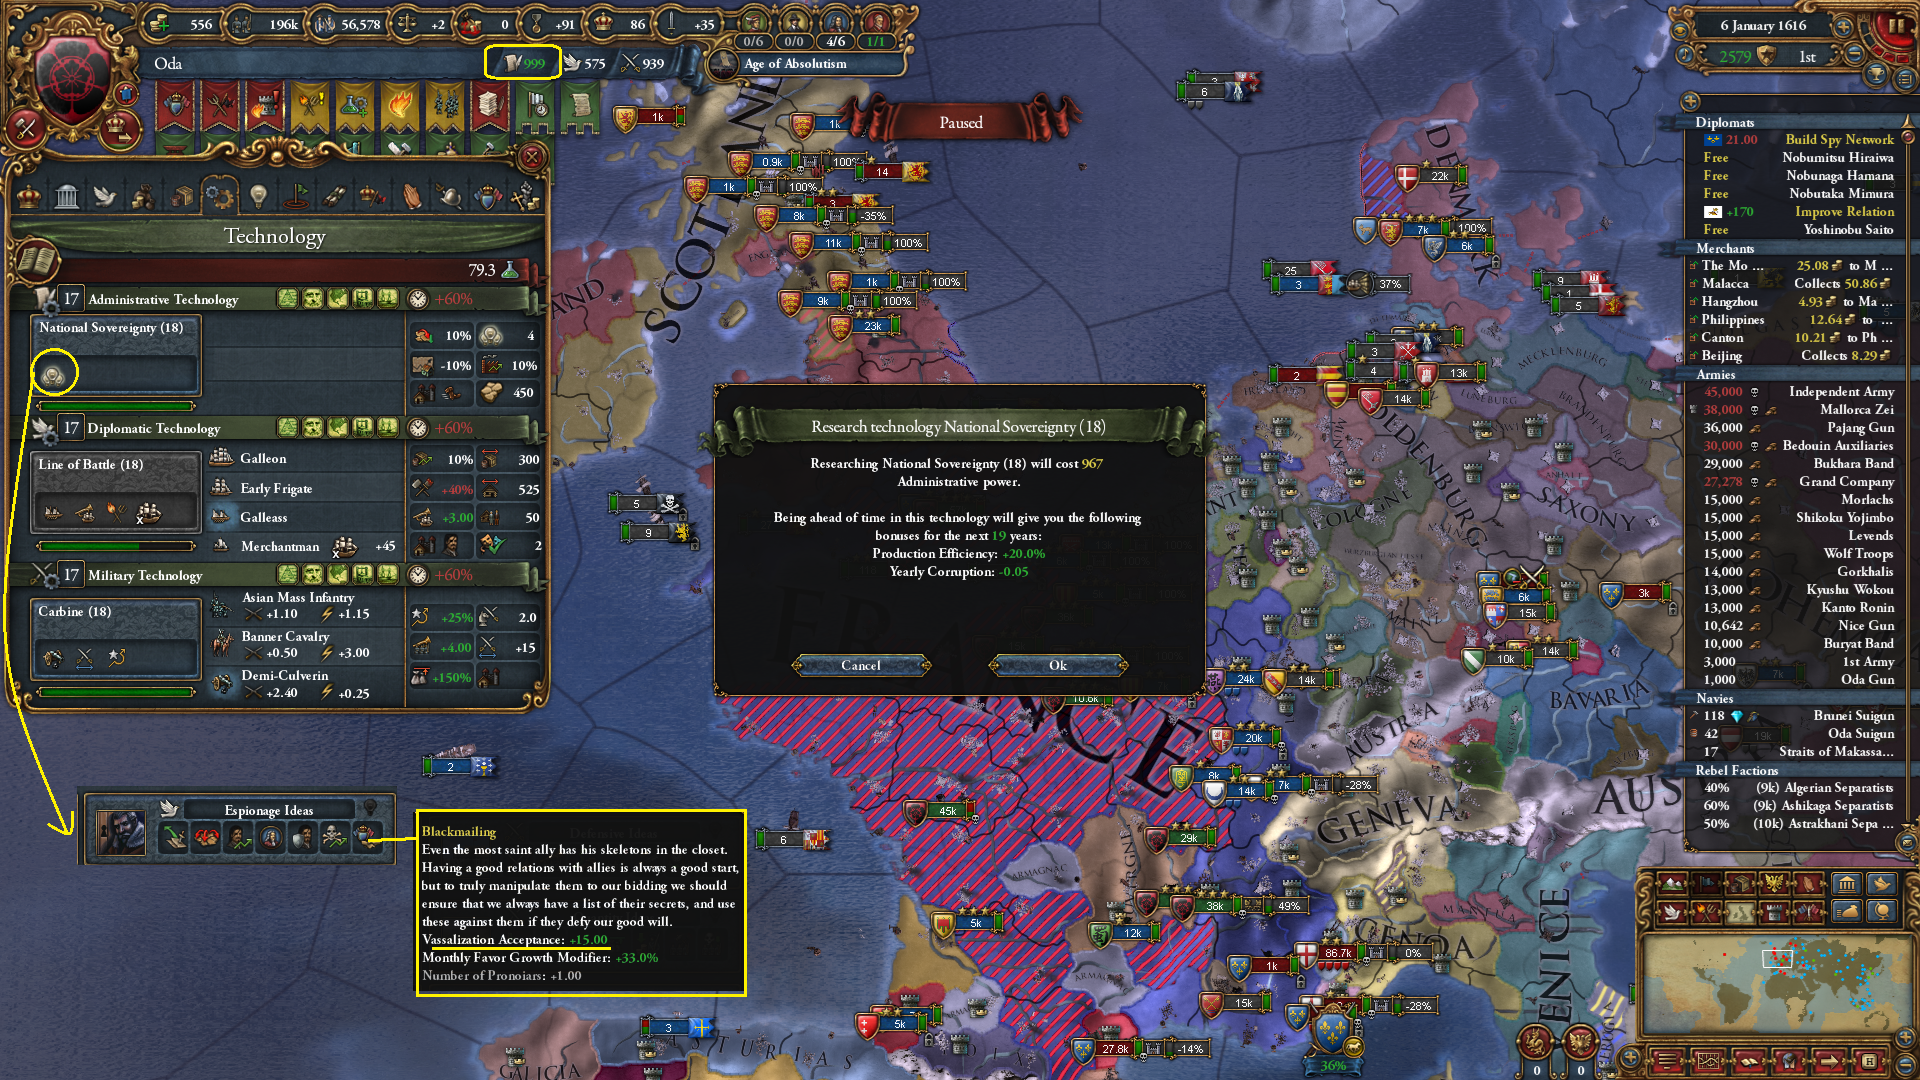
Seeing how well the military was performing, and with the bottleneck of Odan expansion becoming more and more the peace time negotiations needed to create new Daimyos, the Shogun decided to adopt Espionage Ideas over other ideas, and to adopt them earlier than expected.

15 new idea group.png


Soon after that, cousin Alon the Filipino heir died while hunting, and was replaced by a better heir [surprise!] ,with promising diplomatic skills. The heir switcharoo was clearly beneficial seeing how Oda would want to finish the adoption of Espionage ideas soon .

16 hunting accident.png

17 better heir.png

Back in the French war , Liege was forced out for money. Then Scotland was made to break her alliance with France, release three Irish minors , cede Mann to Oda , and pay reparations

18 peace scotland.png


Oda made a point in the peace to avoid giving England any land. There was no point in helping a nation that could become an Empire one day .
A similar peace was made with Genoa, taking reparations and releasing Lucca as a free nation

19 peace genoa.png


That left France and Oldenburg as the last holdouts on the enemy side. But before we get to the final peace, we note the passing away of general Ikeda, the "Vauban" of Japan, and the belated start of the Religious League war declared by Bavaria on newly crowned HRE Austria.

20 league war.png


Finally France concluded peace with Oda, accepting full terms
21 France peace.png

France was made to pay a hefty sum of money, reparations and release the 4 nations of Cornwall, Alencon, Gascony and Provence.

That completed the second round of wars against the Big Four Empires. The next round was not set to start till 1619, when the truce with the Ottomans ended. So Oda took that time to vassalize the released nations, and to force Seppuku on wayward Daimyos.

22 seppulu and vassals.png
23 lost bohemia.png
24 moer vassals.png
24b meath and more.png
24c lucca and iraq.png


And during that peace lull, troops were also moved to the border of the Ottomans. And the annexation of Smolensk, the largest Daimyo with Orthodox land was begun
25 annex Smolensk.png


The annexation of Smolensk was part of a long term plan to eventually convert Japan to Orthodox ( and in that regard, excess power was being spent on developing Muscovite culture lands instead of Japanese lands)

With those peace time activities completed, it was time to declare war on the Ottomans and begin the third round of Empire bashing.

26 DOW Ottomans.png


This war was even easier than the previous two, and we will only detail one event in this chapter, and that was the sack of Damascus .

27 Damascus sacked.png


The rich Odan military chose to maintain troop professionalism , as one would expect of such an efficient fighting machine. And that last event brings us to the end of the chapter . Oda is still at war with Ottomans. Her next target would be either Poland or Persia, who has now grown to rival the "Big Four" in size.


28 next target.png


29 status.png
 
  • 1Like
  • 1Love
Reactions:
No, I have not moved the home node yet. I am not sure it is net plus. I have 90% of Nippon, but only 50% of Malacca.. So pushing from Nippon to Malacca may lose money But I guess I can always just collect in Nippon with a merchant anyways. So maybe I'll move it in next chapter.
Or you could foward Nippon to Malacka (through Hangzhou as the merchant-cheapest route or a more convoluted one if it would be better) - non-TC pickup used to be pretty minor compared to TC pickup, and 50% trade rate in TC with a much bigger cake to slice from is defo better than 90% of a small cake.

(While your navy has a day off you can stack it all with a trade route map flagship in Malacca to get trade value from all kinds of ships and increase the profit)
 
  • 1
Reactions: