• We have updated our Community Code of Conduct. Please read through the new rules for the forum that are an integral part of Paradox Interactive’s User Agreement.
Chapter 1: Oda Shows Its Strength (1444-1450)
  • Chapter 1: Oda Shows Its Strength (1444-1450)


    On the morning of November 11, 1444 Lord Hisanaga, the 24 year old ruler of Oda, woke up with a voice in his head. That voice told him that one day his tiny nation will become the Empire slayer. Why Oda? Because Oda had a reputation as being one of the more , if not the most, militaristic Daimyos in Japan, a place teeming with nations with strong military traditions.

    1 oda ideas.png


    But his nation was also blessed with a great geographic location, in the middle of the big island Honshu, yet not adjacent to the larger Daimyos of Hosokawa , Uesugi and Yamana.

    2 Japan map.png


    So Oda had options to expand before hitting serious resistance. Although one of her neighbors possessed one the 4 Castles on the Islands, effectively blocking expansion in that direction until Oda could afford a large enough army ( 9 regiments to be exact) to siege down the fort.


    Lord Hisanagagot to work right away on Nov 11, immediately hiring an Army Reformer to boost his troops' morale. He then asked the three Estates for resource support in exchange of Crown Land. He then seized some of that crown land back. He did not grant the Estates any additional privileges to avoid them growing their influence ( similarly he did not summon the diet to avoid an influence boost to the Estates). You see, he knew that in the next 5 years Oda was going to expand, and the less influence the Estates had, the more land share would accrue to the Crown from the conquest.

    3a morale advisor.png
    3b seize land.png


    But he did grant the Bushi the privilege of Officer Rights, and immediately recruited general Ikeda , skilled in fire , shock and siege warfare . That upset the Nobility greatly [-20 loyalty], which is why Hianage was careful to seize land before hiring the general ( the reverse order would have let to a rebellion ).

    4 bushi general.png


    And still on that fateful Nov 11 day, he sent an envoy requesting marriage from his overlord Ashikaga ( to discourage the overlord from one day declaring war on Oda). And he recruited the Free Company in Owari ( Oda's capital), even though he did not know who was going to be his first target. He just wanted the troops ready as early as possible. And he tasked his merchant in Nippon with the side job of helping the spies through hostile trading
    5a married ashikaga.png
    5b hostile trading.png


    For Hisanaga knew that in any future war, the speed of siege completion was going to be the decisive factor in keeping Oda on a sound fiscal footing, and so he used every trick in the book to gain a siege .


    After all these day 1 preparations, he rested and waited the mandatory month till Oda cold declare war. In that time, he received a request of an alliance from Yamana , one of the large Daimyos . He agreed to it, figuring that some protection from a larger nation was a good thing.

    5c yamana allied.png


    With all that out of the way, Dec 11 finally arrived and Oda could look at options to declare war. WIth the Sengoku Casus Belli, Oda could choose any of her 3 immediate neihgbors. Unfortunately the two smaller ones had obtained strong allies, and were therefore not good targets. The third neighbor, Toki , had the fort of Mino which made it impossible for Oda to siege down without recruiting a very expensive force .

    6 no Ise.png


    But that did not mean Oda had to sit idle and watch the other Daimyos jockey for position. After all, the Free company was already recruited and costing the treasury money. So Hisanaga looked for potential rivals to humiliate , and he settled on Issihiki, a Daimyo on the West coast, allied to Imawaga on the East Coast. Both were valid rivals for Oda. And so ignoring the other nations that had rivaled Oda, he designated those two as enemies of Oda. And then a month later, with the humiliate CB in hand, he declared Oda's first war ( one of many , we hope) .

    7 new rivlans and DOW.png


    Oda's strategy was to first besiege Imawaga , then humiliate them [for Age Objective] and take money from them, then turn around to fully occupy Issihiki and obtain resources [Mana] from them by showing strength.

    8 first battle.png


    The first engagement of the war went according to plan. With 7,000 troops to Imawaga's 3000 , and with the benefit of the morale boost from the advisor, Oda's military traditions, and general Ikeda, it was no surprise that Imawaga's army was annihilated.
    8 first battle.png


    With numerical superiority now assured over the remaining enemy, Hisanaga consolidated his 3 regular regiments into two, to alleviate the money drain on the treasury ( and preserve manpower ) . He even lowered the salary maintenance of the regular troops ( mercenaries are not affected by that) and moved them off the siege .

    9 sustainable budget.png


    With these actions, the treasury of Oda was expected to last about 10 months, hopefully enough to complete the Imawaga siege. And to speed up that siege, he decided to call on the Merchant estate for an admiral.

    10 admiral.png


    Oda's fleet was basically equal in size to Imawaga's . But with the benefit of a skilled admiral, the Odans had the advantage and the enemy allowed them to blockade their city . But while Hisanaga's attention was drawn to that, the enemy army of Issihiki snuck up on his regular regiment stationed nearby and annihilated it

    11 stackwipe siege.png

    There was a silver lining in that defeat as the Odan army now had a total of 5 regiments, closer to its force limit of 4 . And therefore much more affordable. And it turned out that the mercenary troops alone were more than capable of wiping out the Issihiki force in a revenge engagement at Sagami.

    12 revenge sagami.png

    With the Issihiki army destroyed, Oda sent the lone remaining regular regiment to their capital to prevent recruitment of more troops. But they found it already under siege by Yamana in another war

    13 Issihiki annexed.png


    And when the enemy capital fell, Yamana annexed them completely. That led Imagawa to become the war leader against Oda. ANd when their capital fell, they surrendered unconditionally .

    14 show strenght peace.png


    In the peace, Oda showed strength over Imagawa gaining lots of resources as well as power projection in the process.

    Now in many parts of the world, one would rest after such a victory over their rivals. But in the dog-eats-dog world of Daimyo politics, such an attitude was for the weak . And so immediately Hisanaga looked for fresh war targets. And he noticed that his neighbor Tokugawa's allies were distracted and would not defend them. He jumped on the opportunity, first designating Tokugawa a rival, and then immediately declaring war.
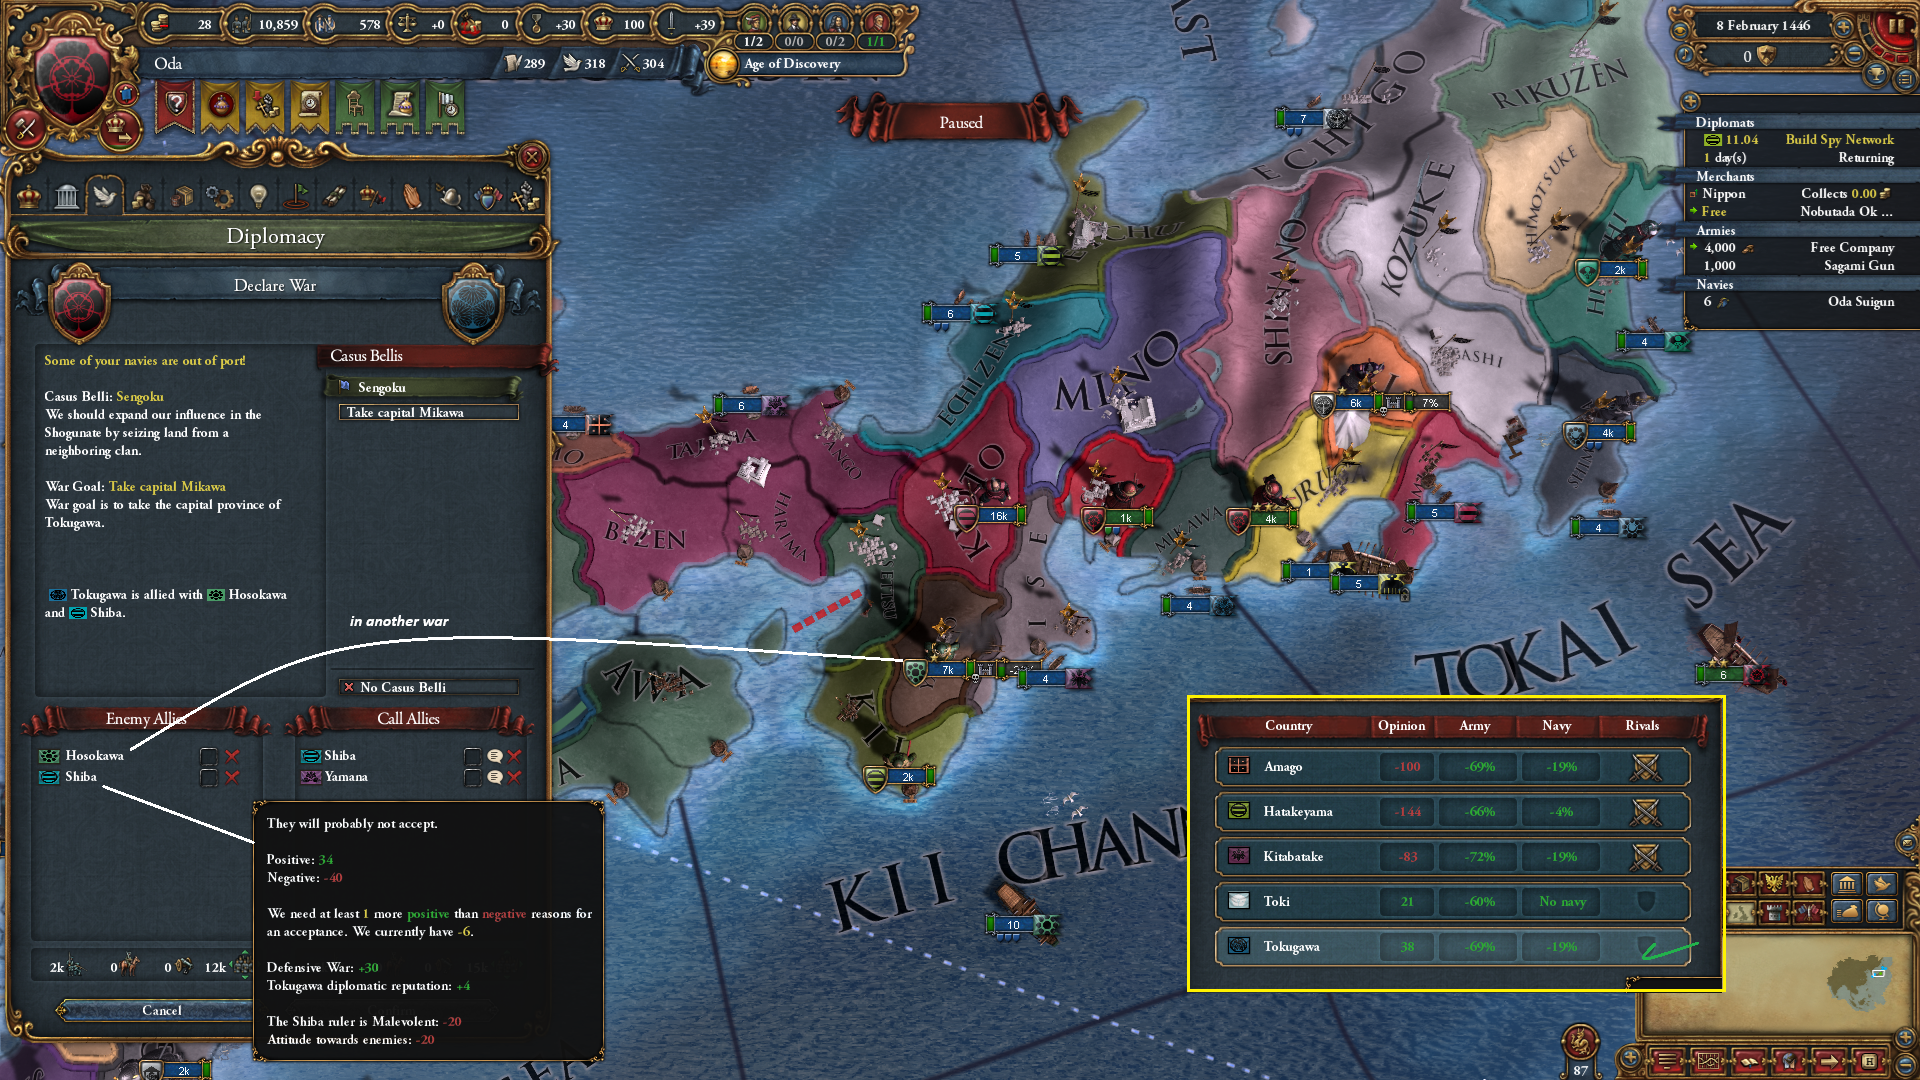
    15 Tokugawa.png


    The Tokugawan army was already away fighting alongside Hosokawa, and so the "war" was just the siege of their capital, facilitated by the fleet. After 241 days, the city fell and was promptly annexed , effectively doubling Oda's size overnight

    16 annex tokugawa.png


    During that happy war another happy event happened, namely the birth of a promising heir named Hidenobu. May he live and avoid hunting accidents!

    After that Hisanaga looked for fresh targets, and settled on the nation of Hakateyama, who owned the province of Kii that was claimed by Oda. They were allied to powerful Hosokawa, but it appeared that Hosokawa was unwilling to defend them . So Oda set them as rival and prepared for war. But when war was about to be declared, Hosokawa decided they would help them after all. Oda demurred and cancelled the attack.

    17 damn Hakateyama.png


    Undeterred Hisanaga kept searching for targets and noticed that Kitabatake to his west had no protection, as their main ally Uesugi was occupied. So he declared on them

    18 kitbatake.png


    Kitabatake was allied to Amago, who was a small minor but owned one of the 4 forts in Japan . The fighting with Ktabatake was straightforward. Their army was annihilated and their capital city of Ise taken by siege, thanks to the blockade by the fleet

    19 not humiliate.png


    But to fully annex them , Oda needed the enemy to surrender. With Amago in the fight still , that seemed impossible. Oda's leader considered a partial peace - such as humiliation and taking money - but decided against it. Ise province was part of Oda's capital area, and he really wanted to annex it before another larger Daimyo did . So he decided to be patient, and see if Amago would leave the war eventually

    And his patience soon paid off as TOki declared war on Kitatbatake which meant they could assist in the siege of Amago if it came to that. And then Amago for some reason decided to venture their army out towards either Toki or Oda, and general Ikeda was able to ambush them and annihilate them .

    20 Ikeda.png


    With the enemy capital occupied, and with the enemy out of troops completely, the ruler of Kitabatake surrendered without waiting for his ally's fort to tbe taken . Oda immediately annexed her former rival and neighbor.

    21 peace Kitabatake.png


    One effect of that annexation was giving Oda a border - and therefore the mutual Sengoku casus belli - with the powerful Hosokawa. As a token of non-aggression, Oda offered Hosakawa a royal marriag which they accepted.

    Oda had now grown to three provinces. Hisanaga felt this was a good size for now. Adding more territory meant more rebels, and he wanted Oda to better integrate the lands she already took . But that did not mean no wars. For to his Northwest lay the weak nation of Osagawara.

    22 DPW Psagawara.png


    After designating Osagwara a rival, war was declared. They were allied to Date , and together they had 5000 troops, the same as Oda ( 4,000 from free company and one regular regiment) . But Oda had better military tradition and generals . And soon had better military tactics thanks to the early adoption of Pike Square ( doubtless helped by the earlier Show Strength peace treaty with Imawaga)

    23 Pike square.png


    The superior Oda military meant no battles had to be fought in this war as first the Osagawaran capital was taken, then the Date capital without the enemy challenging Odan armies. Peace was then concluded, wth Date getting pillaged and paying money and reparataions. And with Ogasawara yielding to Oda's show of strength which earned Oda lots of resources [100 Mana each]

    24 peace with Date.png

    Hisanaga was very pleased with this peace, although his celebration was marred by the overlord Ashikaga stealing - like a dirty thief - some of Owari' development.
    25 bastard ashikaga.png

    Those events bring us almost to the end of the decade. Oda is ready for another war, but first a couple of internal items were taken care of . First, more Crown Land was seized despite the unhappiness of the estates .

    26 seizing.png


    Second, the old Estate loans were paid off and new - larger- ones were taken .

    27.png


    That meant there was enough money in the treasury to hire a second mercenary company, which can be used to finally siege down the strategic fort of Mino to the west of Oda.


    28 mercs.png


    We close the chapter with the map of Japan showing Oda, now a three province Daimyo , in the middle of it.


    29 status.png


    Some notes on the first chapter.

    * This is my first run in Japan, and I have to tell you it feels different from other starts. What I showed above was my 4th attempt, as I learned a few lessons in my first three. My first attempt ended when I declared war without setting rivals and I set up the estates wrong ( I gave them too many privileges and so had high influence and I could not get Crown Land back from conquest). The second attempt, I abandoned after I finished my first war with 14 loans due to simultaneously sieging two sea provinces without the fleet blockading . Took forever and was too much over force limit. Third attempt was very promising ( Ashikaga even gifted me 25 ducats, a huge sum equal to 5 loans at the time). but I made a blunder when I split my army to chase an enemy stack and ended up defeated on the battlefield . You cannot afford lost battles in the competitive Japan cauldron .

    * choice of Oda was relatively easy. I looked up some guides and posts on the forum, and I say the Wiki summary I put in the screenshot was spot on . The larger Daimyos are balanced by having slightly worse ideas. Since I am playing a looong campaign, the National Ideas will long remain relevant while we forget our starting position.

    * My day one moves were to hire a morale or discipline advisor and an estate general with at least 1 siege pip and 2 shock. When those did not happen, I re-rolled. I did not want to risk my above-average ruler as a general.

    * There is a debate on the forums and in the guides whether you should just blob fast, or do some "Show Strength" to get mana. I did a mix of two. I did 2 humiliation wars with Show Strength. And took land in 2 . I think I will continue to do this so that I can spawn Renaissance in Owari , but also not let other Daimyos gobble up all the land. If I understand rules correctly, the Shogun will not declare war on a Daimyo unless they hit 10 provinces. So when I hit 10 provinces, I want one of them to be highly developed.
     
    • 4Like
    • 1Love
    • 1
    Reactions:
    Chapter 2: Taking It Slow ( 1450-1470)
  • Chapter 2: Taking It Slow ( 1450-1470)

    In 1450, Hisanaga Oda decided it was finally time to annex the province of Mino with its strategically located fort. To enable Oda to besiege the fort, he recruited one more infantry unit - opting for a more disciplined but expensive Samurai unit - and a second company of mercenaries - the Kyoshou Wokou - commanded by a capable siege general .

    1 dec Toki.png


    That brought Oda's total force to 10,000 men . The price was high as the treasury was basically depleted. But Hisanaga felt it was a price worth paying.
    The war with Toki turned out to be very challenging. Not military-wise, but finance wise

    2 siege and loan.png


    The Toki military actually never challenged the siege, with their army remaining at Amago which they recently defeated. But the exorbitant cost of the troops ( double Oda's force limit of 5) meant Oda was taking a loan every 2 months . Hisanaga belatedly asked his ally Shiba for help , thinking if they joined his siege he could dismiss one of the mercenary companies . But that only led to Toki troops invading Shiba while Oda continued the siege alone.

    3 Toki falls.png


    Finally after what seemed like eternity but was really just 341 days, the fort fell . Peace was then imposed. Oda was now the proud owner of the Castle of Mino. But was also the not-so-proud holder of 4 new bank loans, to be added to the 5 estate loans for a total of 9.

    4 finances post war.png


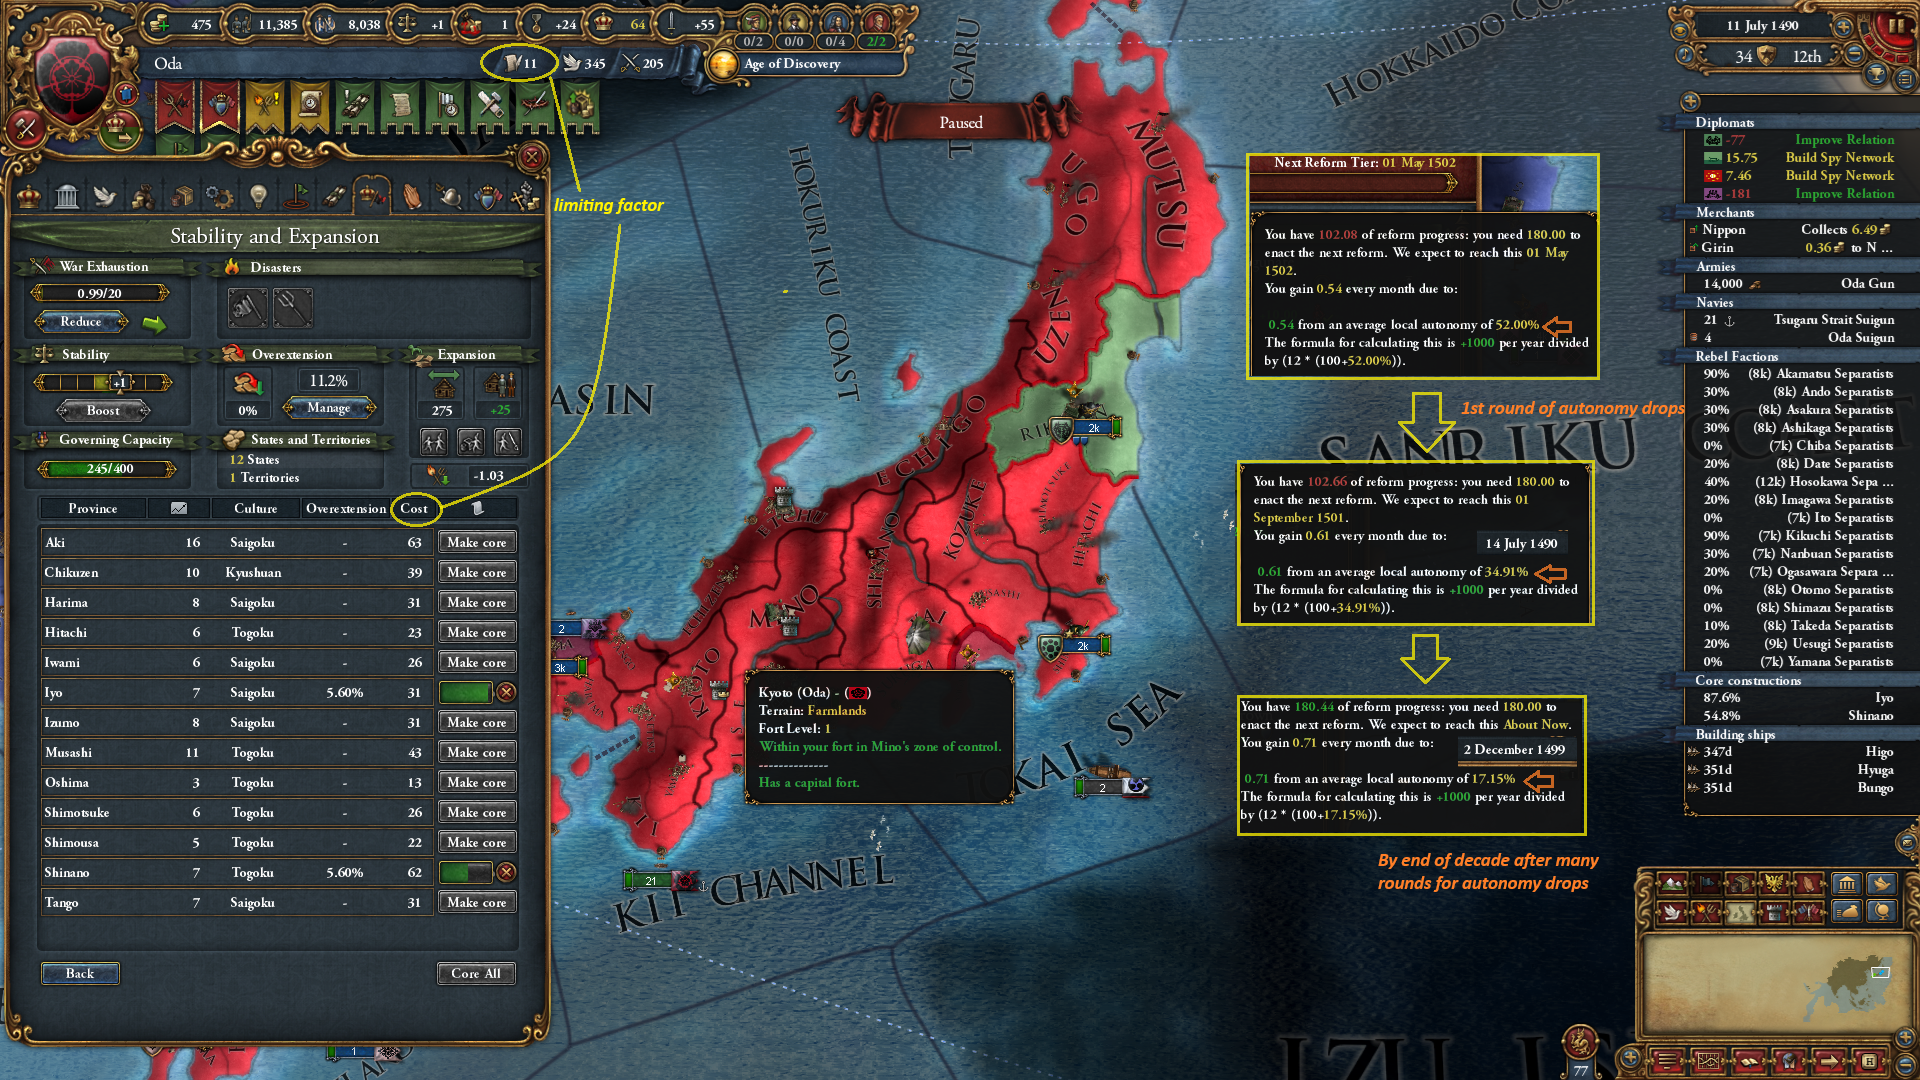
    Now the interest on the debt was not too high. And some may not consider 9 loans a large amount. But the problem for Oda was that even after disimissing the Kyoshou Wokou and lowering maintenance of the troops to the minimum, the treasury was still negative. Even paying down inflation did not help . Hisanaga considered dismissing the Free company, but he was facing imminent rebellion in the provinces of Tokagawa and Kibatake previously annexed. And a good part of the problem was the nasty Ashikaga edict of Sankin Kotai which led to increasing autonomy in the acquired provinces. So when normally one expected income to gradually increase over time, this was not the case in Daimyo world.

    5 rising autonomy.png


    The financial situation was made worse by the outbreak of rebellions in conquered provinces. The army had no trouble putting them down, but that came at the price of activating the fort at Mino, and losing about 3,000 men.

    6 rebels and no allies.png


    Now most of the fighting was carried out by the Free Company, so Oda's own manpower was relatively intact. But reinforcing the free company was not cheap. Hisanaga considered dismissing it. But replacing it with regular troops would cost at least 40 ducats. And the Oda manpower pool was not large enough to sustain new wars. And sitting idle without troops in the competitive Japanese arena was not an option either. The perception of weakness could invite an attack by another Daimyo.

    There was only one way out of this impasse: to improve the economy by developing Owari . And so adopting new diplomatic and administrive technologies was put on hold in favor of growing Owari to as large a size as possible . And that immediately improved the economic situation

    7 develop owari.png


    Seeing the improving economy, Hisanaga decided to keep his nation at peace and pay down some of the debt. And he was rewarded with a happy event of Levying more taxes. In the meantime, there was a shift in the alliances of Oda. Both Shiba and Yamana had broken their alliance with Oda, while Oda had taken up an alliance with Ouchi , a small Daimyo on the southern island of Kyushu, but who happened to own one of the 4 castles of Japan.

    8 recovery.png


    And while still at peace, Oda passed her 2nd government reform, creating the Noble Officer Corps for more army tradition .

    9 gov tier 2.png


    And then in 1458 Owari reached the threshold of 30 development, making it a large city and increasing the splendor of Oda.

    10 Owari at 30.png


    So all in all the years of peace since the war with Toki, things have been looking good for Oda internally. But as we can see from the last map above, Japan was also getting consolidated between larger and larger daimyos. And the smaller daimyos were now allied to the larger ones. So that left Oda with no easy targets. But in 1459 , after taking a fresh set of Estate loans, Oda declared war on Hakateyama, allied to the powerful Hosokawa

    11 DOW hakateyama.png


    For the war , Oda called on her allies Date and Ouchi to help soak up some of the enemy forces. And that is exactly what happened, as Hosokawa's armies sieged down Ouchi's capital and castle, allowing Oda to capture the Hosakawa capital .

    12 fort race.png


    Immediately Oda signed a side peace with Hosakawa, taking a bit of money. That made the war with the remaining small Daimyos of Amago and Hakateyama easy . And even though both small Daimyos had fortified capitals, the sieges were straightforward thanks to Ouchi and Oda combining troops to secure the necessary 9 regiments to siege each fort down .

    13 we racke Echigu.png

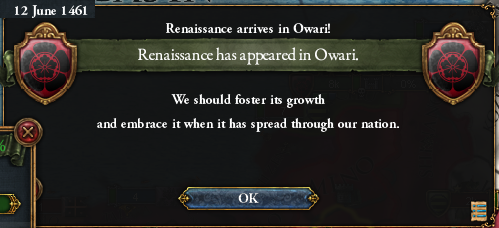
    While this was going on, another incident relating to the Neo-confucian movement in the Shinto faith happened. Again Oda chose the Isolationist option, which moved Oda's Shinto Isolationism level one step closer to full Isolation. And soon after that, Renaissance appeared in Owari thanks to continued development.


    14 neoconfucion meritocracy.png

    15 isolation moves one.png

    14b renaissance.png


    Then in 1462 , the siege of Amago completed and Oda was able to impose a full peace on her enemies.

    16 annexingf hakateyama.png


    Oda's old rival Hakateyama was no more . That meant Oda controlled the 2 central castles in Japan. And Oda's ally Ouchi annexed Amago , giving Ouchi the 2 southern castles in Japan .

    With all Japanese Castles in Oda and her allies' possession , later wars in Japan would become easier. And the first such war was waged against Yamana, one of the original "big three" daimyos;

    17 Dow yamana.png


    Oda chose to humiliate Yamana instead of taking land. Allied to Yamana was the other big Daimyo Uesugi. But the two enemy Daimyos were separated by the Central forts of Oda, so it was easy for Oda to gather her troops and those of her ally and scare the Uesugi forces away from Honshu to Hokaido, where they were blockaded by the Oda fleet
    18 Uesgi run off.png


    With the Uesugi army out of action, it was trivial to take their capital and then impose peace on them

    19 Uesugi out.png


    Oda took only money, keeping the truce length short. That way Uesugi could be attacked again - for land- in less than 10 years.

    With Uesugi out of the war, it was straightforward to defeat Yamana. Oda combined her troops with those of Date and Ouchi and won a decisive battle at Chikuzen, completely destroying the enemy troops.

    20 Hosokawa beaten.png


    Soon after that, Ito was forced out on terms of War Reparations and Money leaving Hosokawa alone. Peace with the formerly powerful Daimyo was concluded showing that Oda was the stronger Daimyo now.
    21 Hosokaway beaten.png


    That peace allowed Oda to immediately adopt new administrative technology , proclaiming its first National Idea to be that of improving Army Quality

    22 Tech 5.png


    And while Oda had her armies in the South, she took advantage of a claim fabricated on tiny Shimazu, and declared war

    23 opportunistic war on shimazu.png


    That led to the annexation of the small Daimyo fairly quickly

    24 Shimazu annexed.png


    The victories over Uesugi and Yamana led to Oda having only one remaining rival: Hosokawa, who was the strongest Daimyo in 1444. Being the last chance for Oda to declare a humiliation war, that CB was chosen over conquest .
    25 Hosokawa.png

    And with no forts to protect Hosokawa's armies, it was another easy war for the now very high quality Odan armies .

    26 Hosokawa defeated.png


    And it was on New YEars day 1470 that Oda showed strength to Hosokawa , reaping significant military, diplomatic and administrative power as a result.

    26 peace Hosokawa.png


    And that brings us to the conclusion of this chapter. After starting with an expensive war on TOki, a period of peace allowed Oda to stabilize her finances and then defeat her three main rival Daimyos . But even after 26 years of effort, Hisanaga Oda is still far from unifying Japan .

    27 status.png
     
    • 3Like
    • 1Love
    Reactions:
    Chapter 3: Breakout (1470-1480)
  • Chapter 3: Breakout (1470-1480)

    For the last 26 years Hisanaga Oda was slowly and methodically preparing for Oda clan to take over the shogunate of Japan. At age 50 he wondered if he would see that happen in his lifetime. But he certainly felt that the time had come for Oda to make her move. After humiliating all the other Daimyos, she was the strongest contender of the bunch. But Oda had truces with all the other Daimyos, and so Hisanaga had to patiently wait until the truce with Uesugi expired in 1473. In the meantime, he had Oda adopt the third quality idea and the first national idea , increasing the production of goods in all the nation .

    1 first national idea.png


    HE also took that time to pay down debt and to suppress some rebellions. And used the diplomats to spy on the other Daimyos and fabricate claims . That period , however, was marred by the death of beloved heir Hidenobu 5/3/4 , who was replaced by his younger and less capable sibling Nobuyuki 2/3/3.

    2 heir dies.png


    Then finally in September 1473, the truce with Uesugi ran out and war was declared immediately

    3 dow Uesugi.png


    Uesugi was again allied to Yamana, whose army was annihilated soon after war start by the Odan main army. Oda then proceeded to occupy Yamana unfortified provinces, and letting her ally Ouchi siege their capital. Oda's army then moved into Uesugi land, and was not surprised to see the enemy avoid engaging. For Oda's military prowess was now well known [.

    4 Uesugi scared.png

    And to keep Oda's military superiority, Hisanaga enlisted the services of a foreign Ronin, despite losing out on some financial assistance. In fact, Oda was in such good financial shape that loans were all paid off despite being at war

    4a ronin service.png


    5 pay off loans.png


    And soon enough , Uesugi was completely occupied. First Yamana was peaced out for money and reparations. Then Usuegi was almost completely annexed, except for one province that was occupied by Oda's ally Date.

    6 peace Usuegi.png


    So unlike previous peace treaties, where Oda annexed very little land, this time Hisanaga went all out. He figured that now that Oda was larger than 10 provinces, and therefore the Shogun Ashikaga had a Casus Belli on her, there was no point in holding back. The best way to deny Ashikaga help from other Daimyos is to make sure those other Daimyos did not exist. Furthermore, in case Ashikaga declared war, Oda would have access to much larger loans thanks to her much larger size now.


    Oda then rested for a few months until the truce with Ito expired. During that time Oda adopted free war taxes and another government reform, opting for Representatives of The Crown . This was done in anticipation of having vassals in the future, since all the benefits from that Reform were inapplicable at this time for Oda.

    7 tier 3 and war taxes.png


    Then Oda prepared for war against Ito in the South. The army was parked next to Ito , and was just waiting for Ito's last province to be claimed before declaring war. But then Oda's ally Ouchi beat her to the punch and declared on Ito first , calling in Oda literally as the diplomat was returning from his spy mission.

    8 refuse CTA.png


    needless to say, Oda refused the call and then declared her own war on Ito .

    9 DOW Ito.png


    With the army already nearby, it was easy for Oda to get ahead of Ouchi and occupy all the Ito provinces first. And as luck had it , the Ito capital finally fell to siege just as the provinces previously annexed from Uesugi became cores of Oda.
    10 perfect timing.png


    Oda hten proceeded to fully annex Ito, removing another Daimyo from existence.

    12 expanded Oda.png


    The rapid expansion of Oda meant the Shogun had a valid CB on her. But surprisingly, that expansion did not significantly affect Ashikaga's opinion of Oda, so there was no real fear of a sudden declaration by the Shogun.

    The next war for Oda was against Shoni, at the southern tip of Japan. BUt that declaration was delayed while Oda waited for a large Uesugi rebellion to ignite ( Oda chose not to provoke the rebellion to keep it at 12,000 instead of 18,000 men ). But once the rebellion started, Oda declared war on Shoni and their ally Hosokawa.

    13 DOW SHoni.png


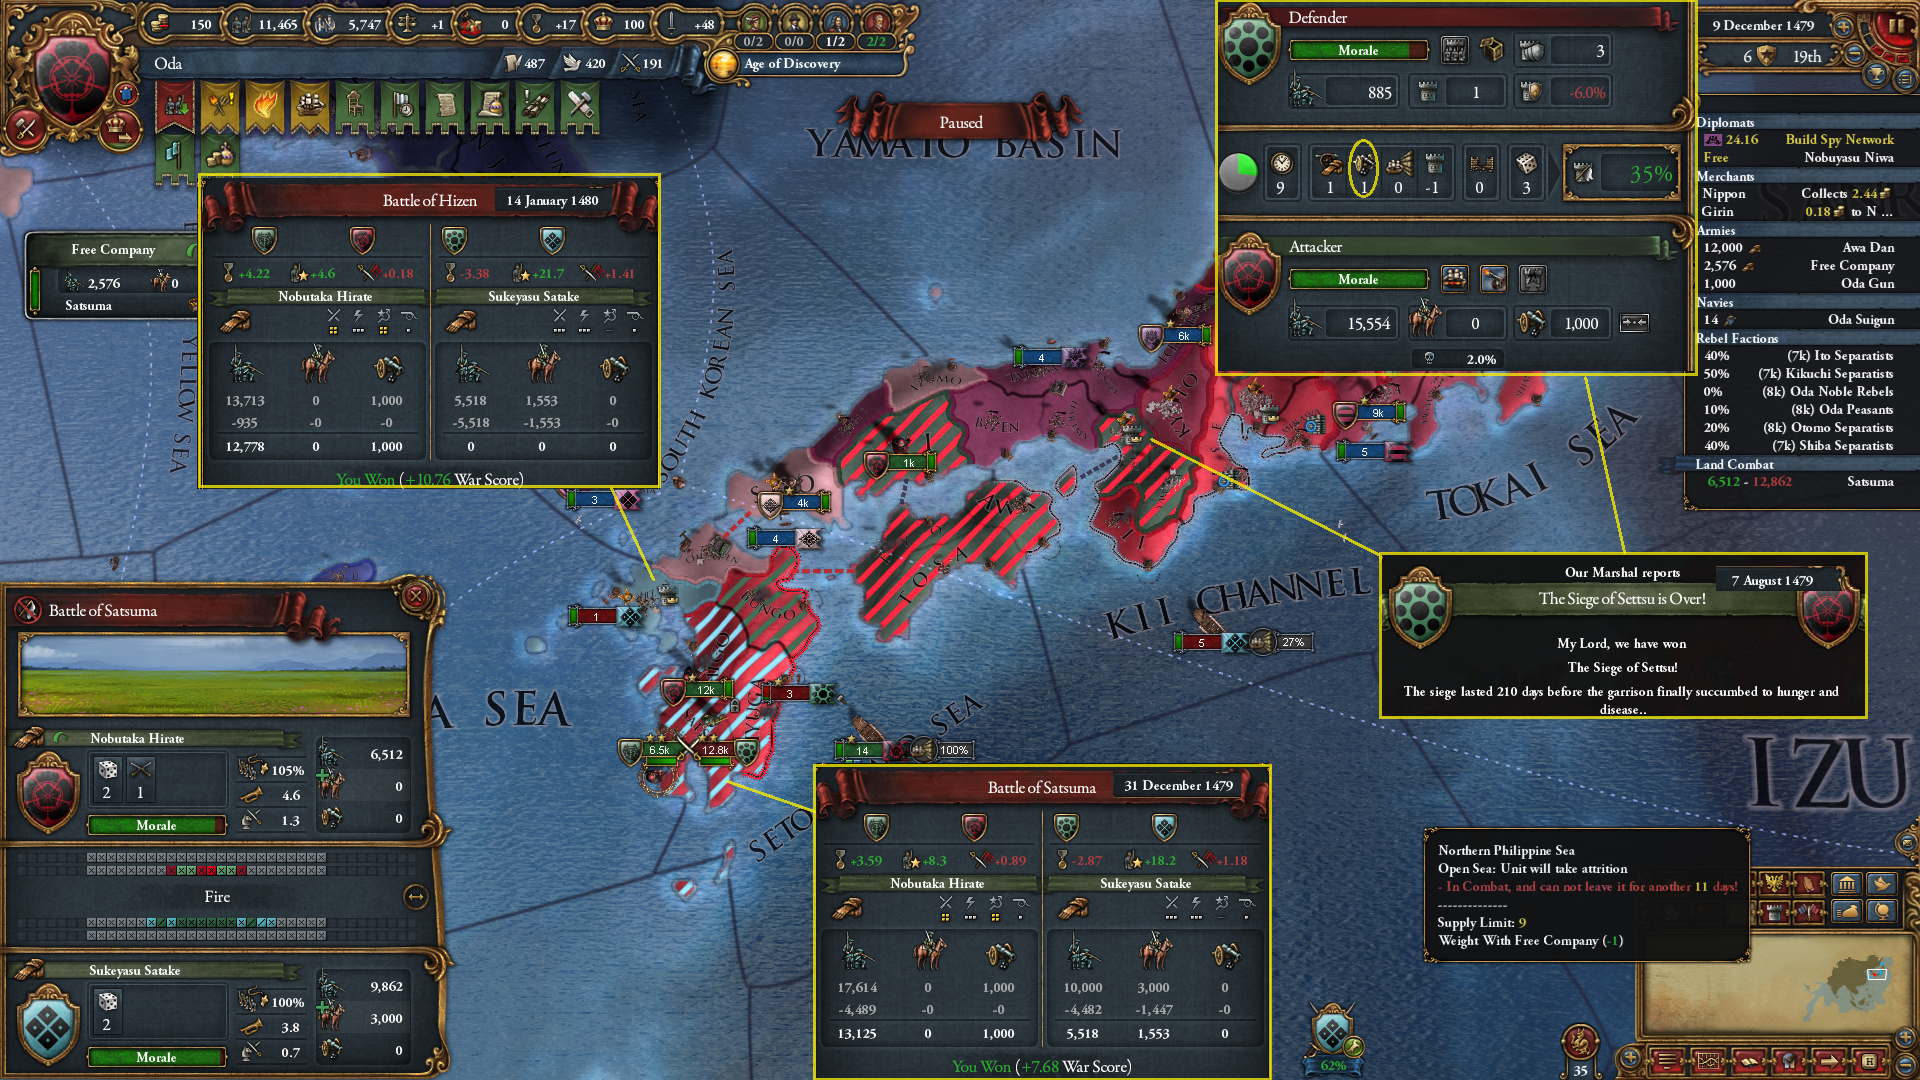
    Then the entire Oda army marched south and besieged Settsu, the capital of Hosokawa who was allied to Shoni. It was during the siege of Settsu that Oda used Cannons for the first time.

    14 Satsuma battle and Settsn.png


    After taking Settsu, the army continued south and faced the enemy who had withdrawn in fear to Satsuma. From there they were chased to Hizen and annihilated.

    And that brings us to a new decade. Oda is winning a war against Shoni and Hosokawa, and has plans to annex Shoni completely and also take land from Hosokawa as well. That would leave her former ally Ouchi, her current ally Date, her former rival Yamana and Ashikaga the Shogun as the last standing powers in Japan .

    15 status.png


    The truce with Ouchi expires soon. After that it will be Yamana, and then the Shogun .
     

    Attachments

    • 11 full annex Ito.png
      11 full annex Ito.png
      109,3 KB · Views: 0
    • 2Like
    • 1Love
    • 1
    Reactions:
    Chapter 4: An Old Man's Dream (1480-1490)
  • Chapter 4: An Old Man's Dream (1480-1490)

    The last decade was a breakout decade for Oda who accelerated her geographical growth after years of slow, patient buildup. The decade ended with Oda occupying Hosokawa's lands and besieging Shoni's capital. The first action of the new year was a separate peace with Hosokawa, taking all their provinces on the island of Honshu

    1 hosokawa.png


    Soon after that, the truce with Ouchi expired. Oda did not wait long before declaring war on them , citing Sengoku

    2 dow ouchi.png


    Date wa allied to both Ouchi and Oda, but because they were already in the war against SHoni , they stayed neutral in this fight. The war was of course easy for Oda who had more and better quality troops than Ouchi. But after annihilating the Ouchi army, and taking Chikuzen fort, Hisanaga ordered the army to hold back, and not besiege the enemy capital


    3 holding back on ouchi.png


    That was certainly an unusual move. But Hisanaga was aiming to drag the war longer, till he was ready to make his move for the Shogunate. You see, Hisanaga had been studying the rules of the Shogunate, and he learned that having several vassal Daimyo's at peace would earn the Shogun some nice benefits.

    4 daimyo benefits.png

    So instead of aiming to have most of Japan annexed directly to Oda, he decided to leave each existing Daimyo as a one province minor , preferably separated from the other Daimyos so that they would not be warring together all the time. The simplest way to do this was to annex all the land from each Daimyo, leaving them only one province. But if Oda did this for all the Daimyos, and then at the end declared war on Ashikaga, he would face a swarm of Daimyo armies that could be a problem ( and would leave him many cities to siege). After some thinking, Hisanaga decided that the only way he could have his cake and eat it too was to drag the war with all the Daimyos until he he was ready to declare on Ashikaga. And to drag those wars, he could not occupy the enemy capitals lest a call for peace would come out. So he left only one regiment besieging the Ouchi capital, while waiting for the truce with Yamana to end.

    Unfortunately for Oda, he could not drag out the war with Shoni because his ally Date progressed the siege until their capital fell. So he concluded peace taking money from them .

    5 peace Shoni.png


    After that Oda waited for the truce with Yamana to expire. In the meantime, claims were fabricated on as many provinces as possible to facilitated the creation of core provinces later on. Finally in March 1683, the truce with Yamana expired. Oda declared war, making a point of NOT calling in her ally Date

    6 DOW Yamana.png


    That was another easy war, and Oda quickly occupied all the enemy provinces but did not capture the capital.

    While that went on, Oda's heir Nobuyoki died. And here Hisanaga had two choices: he could build a church in the memory of his dead son, or accept as heir the bastard child of a maid. This was a difficult decision, as the bastard was very promising (4/6/6). BUT, Hisanaga was already an old man of 63 and his Lady was even older. Should they both die before the new heir reached adulthood, a regency council would take over. So Hisanaga chose the temple.


    7 Heir dies.png


    At that point Hisanaga Oda considered declaring the war on Ashikaga.

    8 not yet ashikaga.png


    But decided to wait a bit longer in order to put down a rebellion in the South. And also to break the alliance with Date so that they would be on the Ashikaga side in the upcoming war. He also had Oda accumulate some administrative power to help mitigate the stability hits that would come with war against the Shogun. And of course he needed to finish the sieges of Yamana and Ouchi's capitals.

    Finally when the Yamana capital fell, he declared war on Ashikaga .

    9 DOW Ashikaga.png


    On the enemy side was the Shogun himself, and also all the other Daimyos except the 2 already at war with Oda. In addition, Oirat and her vassal Mongolia were on the Shogun's side, but those troops were not going to make their way to Japan.

    The first action of the war was to destroy Shoni's army in the South.

    10 new heir and battle.png


    During that battle two events happened. First a new heir was born ( Yoshinou 6/0/1). Second, Haixi declared war on Oirat, Ashikaga's ally . That would certainly help Oda by making it easier to eventually make peace with Oirat.

    Now that war not a cakewalk by all means. Ashikaga and the other Daimyos had plenty of troops. But their armies were separated by the central forts of Mino and Echizu that Oda held. So ODa's strategy was to focus on destroying the enemy armies in the South, before moving on later to the north. But first Oda finished her wars with Ouchi and yamana, taking all their provinces except one.

    11 peace ouchi.png

    12 peace Yamana.png


    And Oda also adopted Free Oarsmen as her naval doctrine, anticipating difficult naval engagements with other Japanese nations, and also with Korea and Ming in the future. And then Oda destroyed Hosokawa's army at the battle of Mino before wheeling south and occupying all of Hosokawa's lands including their capital.
    13 mino battle.png


    And about the same time kyoto itself fell.
    14 kyoto fell.png


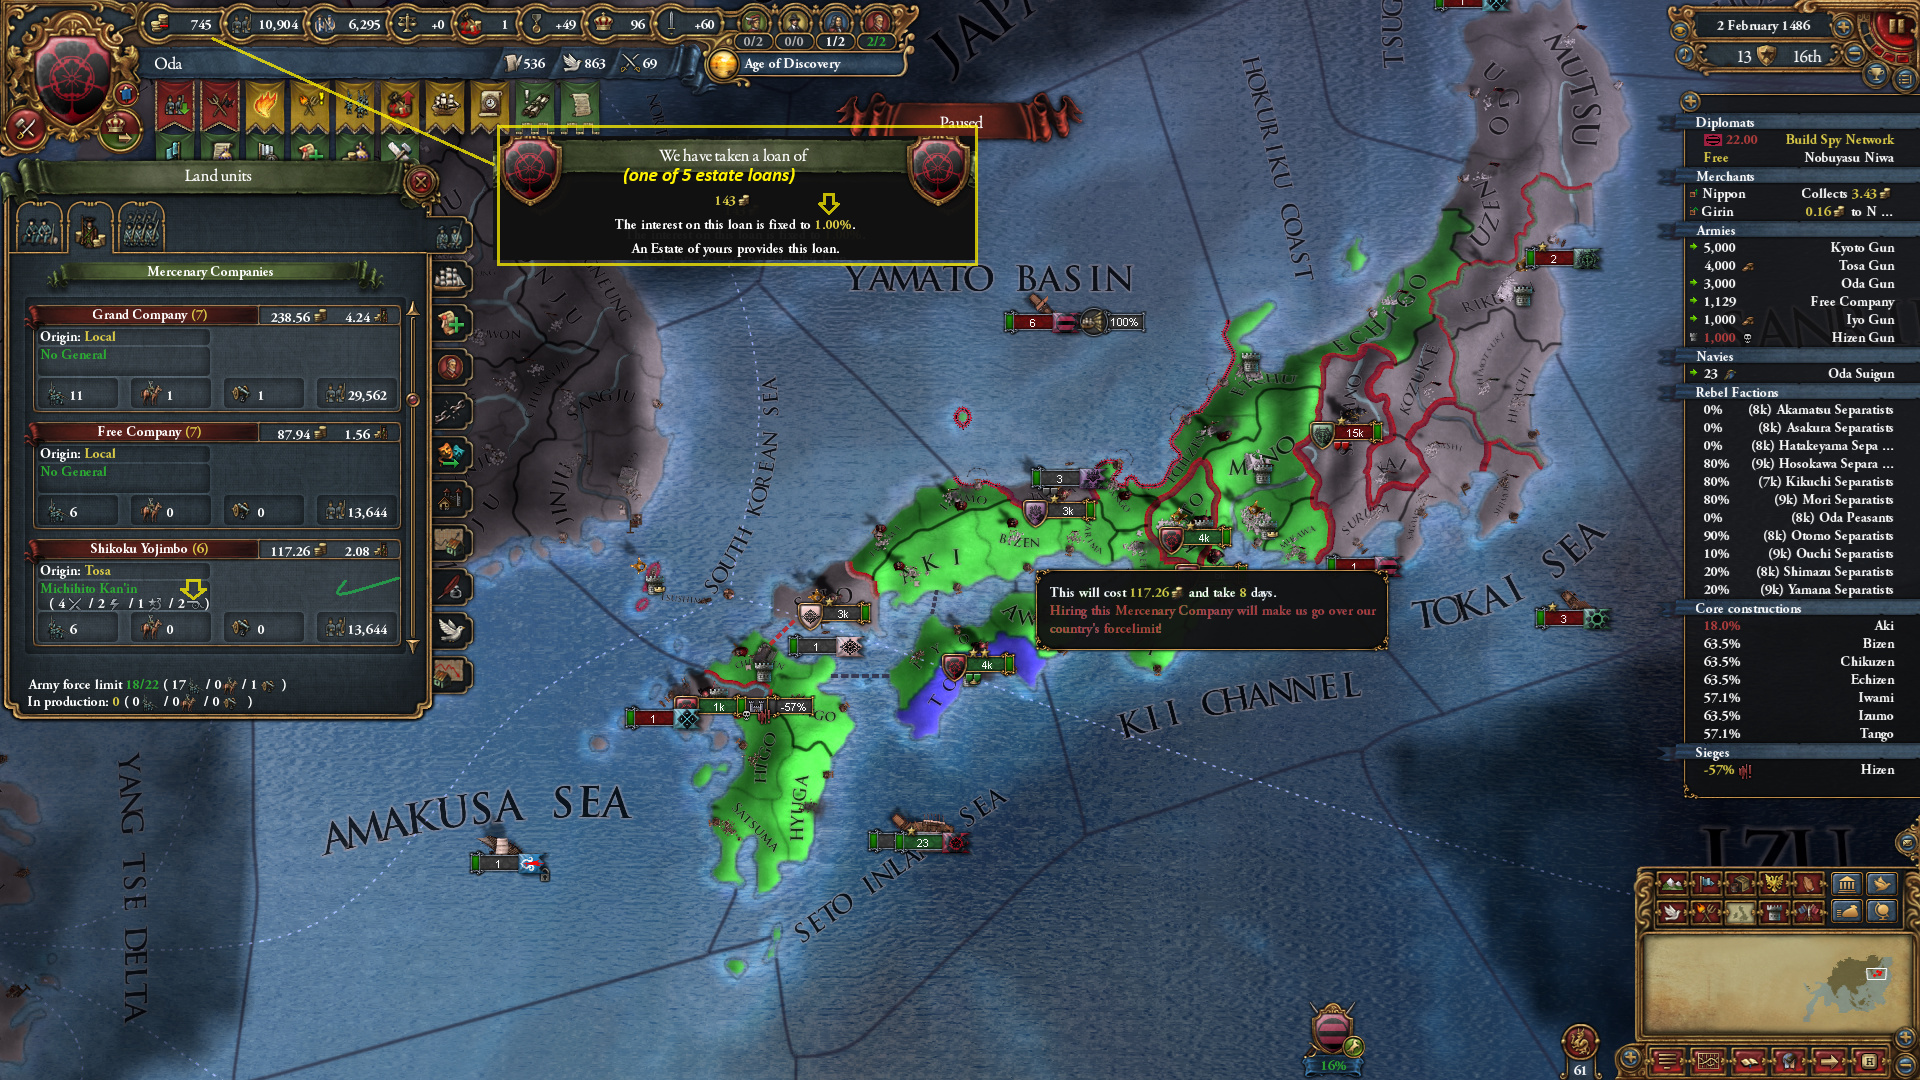
    With the South of Japan in Oda's hand, the armies turned north. But here they found that Date and Ashikaga had consolidated their troops and taken a defensive position . Hisanaga did not want to risk a battle without clear superiority. So he called on the Merchant estate for 5 cheap loans and then recruited the Shikoku Yojimbo company to take the place of the Free Company ( the Free Company had become ineffective due to lack of manpower).

    15 merc again.png


    With these new reinforcements at hand, Hisanaga ordered the whole bunch towards Rikuzen. The enemy avoided battle and withdraw first to the mountains of Mutsui, and then later to the Island of Hokaido.

    16 they avoid battle.png


    The Odan force followed the enemy to Hokaido, and then all the way to the last island accessible by land , where Ashikaga's army was destroyed

    17 last battle.png


    At that point Ashikaga had no more allied troop on the main Japanese islands. So Oda disbanded the new mercenary unit, and waited for Oirat to get tired of the war to exit it.

    18 ashikaga no troops.png


    In the meantime, a new administrative technology was adopted and Oda had the choice of adopting a new group of ideas. Oda chose Influence ideas, anticipating that the Oda Shogunate would have a large number of future Daimyo vassals.

    19 influence.png


    Finally in late 1488, Oirat agreed to a white peace ( they were being occupied by Haixi which helped their decision). And with Oirat out of the war, Ashikaga was forced to accept a complete peace:

    20 peace ashikaga.png


    In the peace , Oda took all the provinces held by Ashikaga and his Daimyos except for one province each . This way Oda became the new Shogun, and had 7 Daimyos , each one a single province. And no two Daimyos shared a border, so they did not have the Sengoku casus belli on each other. This way Oda hoped that the Daimyos would remain at peace, leading to more benefits for ODa.
    21 new vassals.png


    At long last, Hisanaga had achieved his dream of ruling Japan . But he was now an old man of 69. ANd he had to think hard about the succession. Fearing that his death and that of his very old wife would lead to a regency council, he decided to disinherit Yoshinobu and hope that a more capable noble will accede to the Crown when the time came.

    22 siinherit.png

    And as the decade ended , he surveyed his realm and was very pleased with what he had achieved in the 46 years since 1444 .

    23 STATUS.png
     
    Last edited:
    • 2Like
    • 1Love
    • 1
    Reactions:
    Chapter5 : Consolidation (14901-1500)
  • Chapter5 : Consolidation (14901-1500)

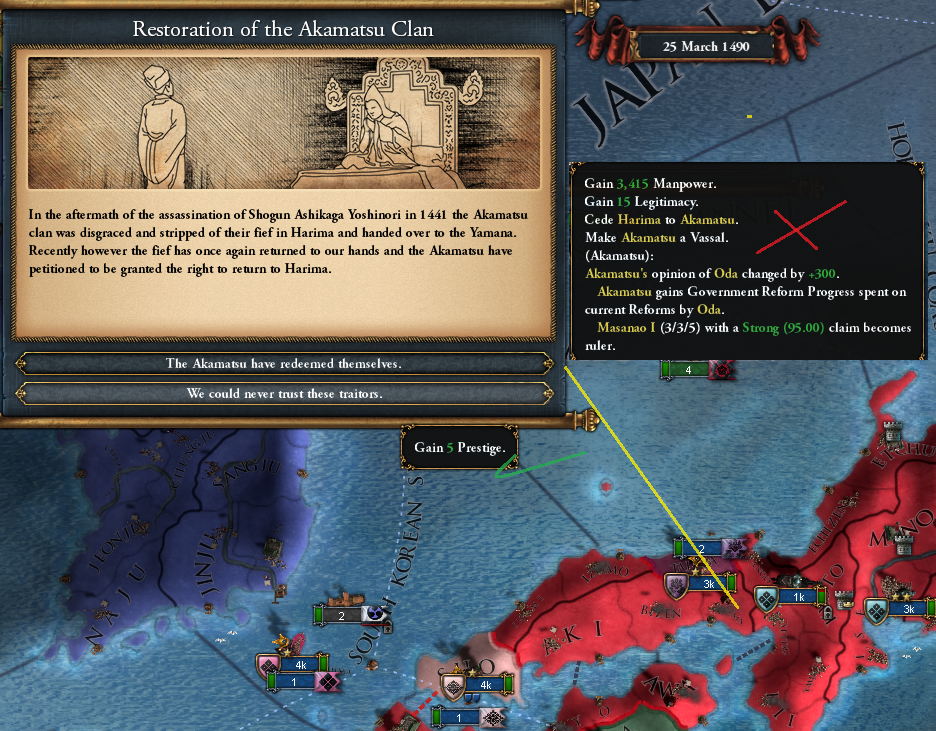
    We ended the last Chapter with Hisanaga Oda ruling Japan, and leading 7 Daimyos. And one of the first questions posed to him as Shogun was whether he would return the province of Harima to the Akamatsu clan, turning them into the 8th Daimyo.

    1. no harima.png

    And to that he answered a resolute no. Oda was going to keep all the land she annexed . And this question would come up again a couple of times from other defunct clans, and his answer was the same: no additional Daimyos in land that Oda already turned into core provinces. And to improve the value of the lands Oda annexed he turned all provinces into States and lowered the autonomy on all of them ( autonomy was generally high everywhere because the previous Shogun Ashikaga was fond of the Sankin Kotai edict.
    2 autonomy lowering.png


    Needless the say , the lowering of autonomy did not sit well with the local populace and the resulting unrest accelerated rebellions by separatists.

    3 rebels rebels everywhere.png


    The many, many rebellions throughout the decade meant that Oda could not underake any foreign adventures and had to keep the Army on the home islands to deal with the rebel scum.

    But on the bonus side, the lowered autonomy meant a healthier economy, and Hisanaga began paying down the loans taken during the war on the former Shogun. But then he was presented with expensive plans to build Azuchi castle, with a nice reward of increased legitimacy. At first, he deemed it expensive and told his advisors "maybe later" . But on further inquiry [wiki check], he realized that the chance will never come again, and he opted to build the palace.

    4 azuchi castle.png


    Then on January 29, 1492 Hisanaga gave his last breath. He had ruled for almost half a century and set Oda on the path to greatness.
    He was succeeded by a young noble Nobuhiro 2/4/2 aged just 18. An average ruler but destined to have a long reign ( or so would one suppose).

    5 nobuhiro.png


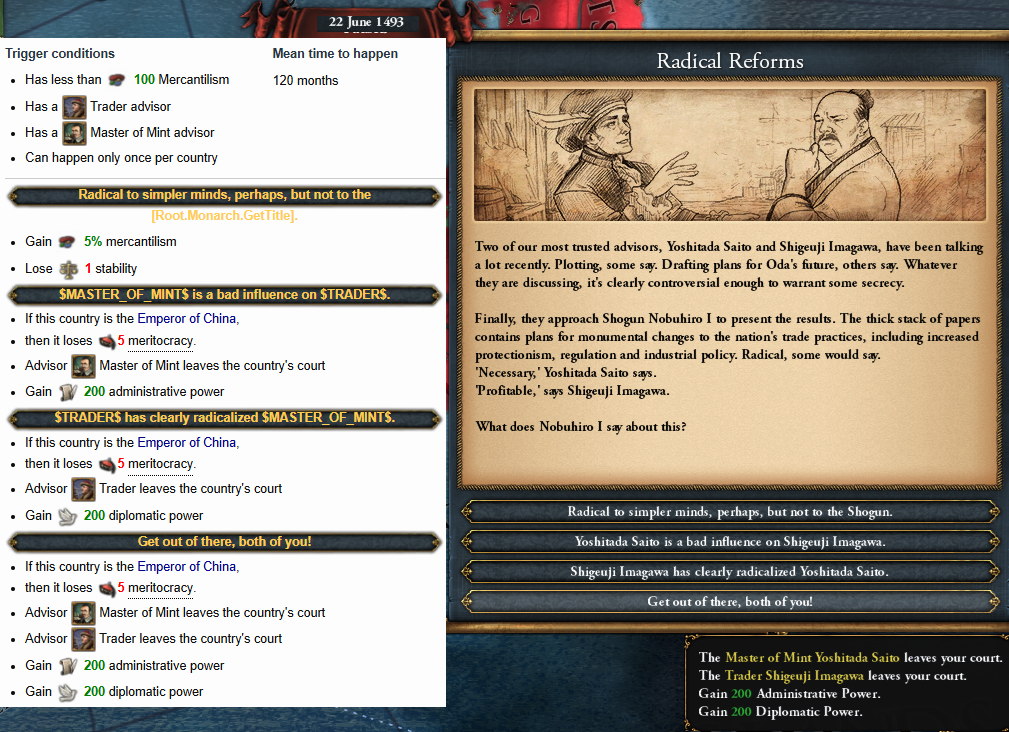
    And one of his first actions was to take advantage of the chance to fire his Trader and Master of Mint advisors for some nice administrative and diplomatic power.

    6 radical reform.png


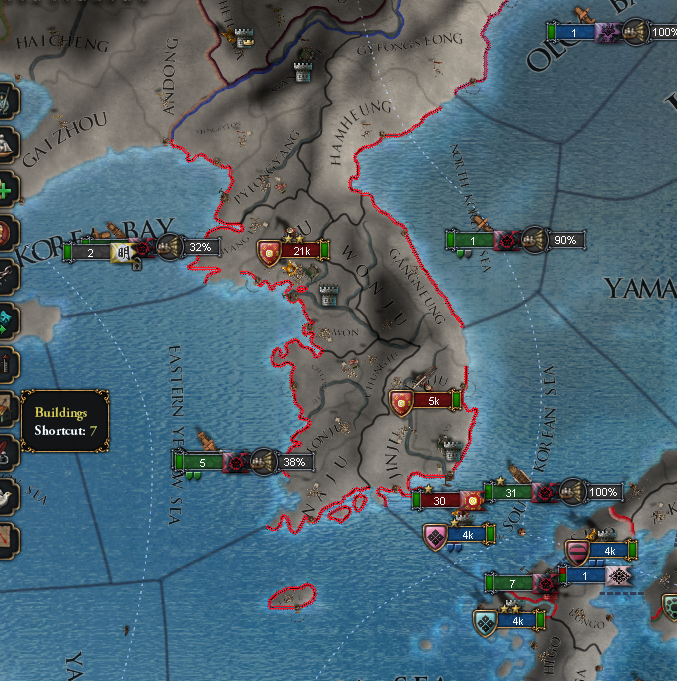
    Now as we mentioned above, the Shogun did not feel that an external adventure could be undertaken with all the unrest occurring in Japan. But that did not mean absolutely now foreign wars. It just meant no "land" wars. And so in 1494, Japan declared "Trade War" on her rival Korea

    7 dow korea.png


    That was a war where the Japanese navy, recently augmented with many galleys, had to blockade the Korean coast. The Japanese army remained on the home island to deal with rebels.

    There were only 2 naval engagements with teh Korean navy. The main one was a brief encounter in the Yamato basin, where the Korean navy withdrew quickly adfter losing just 2 ships. The second one was in the Kii channel where the Korean trade squadron was desotryed

    8 battle.png


    After that , Japan instituted a near-complete blockade f Korea . I say near total, because the highly developed Korean provinces were difficult to blockade. And the Daimyos were completely useless in that endeavor as they had lost their tiny navies to the Korean trade squadron early in the fight.

    9 near total blockage.png


    Soon after that our very young ruler tripped down the stairs and died ( balancing out the long reign of his predecessor !) . He was succeeded by another young noble, Katsunaga 6/1/2 , aged just 20 and already with an heir and spouse.

    10 new shoguin.png


    The new Shogun continued the war of his predecessor on Korea, and began building a spy network on the Ming Emperor as well. And thanks to more ships being built, the blockade on Korea was made complete, boosting Japan's income while hurting that of her rival ( and at this point, although the country is still officially Oda, I may being to refer to it as Japan for convenience) .

    11 full blockage.png

    And Katsunaga also used his high legitimacy to extract military power from the Daimyos by calling fo aSword Hunt

    12 trade legtimacy for power.png


    And then, as the decade drew to a close, Oda signed peace with Korea
    13 peace Korea.png


    Kora was forced to divert her trade to Japan, and pay war reparations as well as a lump sum. In other words, Korea was going to fund the buildup of the Japanese army that will conquer them in the next war. And as for Katasunaga, having tasted the sweet reward of a Trade ConflicT war, he was now salivating at another round, this time with a much richer target.

    14 DOW MIng.png


    15 sTAUS.png
     
    • 3Like
    • 1Love
    Reactions:
    Chapter 6: Toehold then foothold (1500-1510)
  • Chapter 6: Toehold then foothold (1500-1510)

    The first action of the new decade was recovering the stability of the nation after the passage of the comet

    1 raise stab.png


    This was made slightly easier by the 7 Daimyos who lightened up the administrative cost. This had to be done during peace time to get that help (h/t @Steckie ). And only after doing that , did Oda declare war on Ming

    2 DOW ming.png


    The Japanese navy was larger than the Chinese navy . And the latter remained at port in Beijing, blockaded by the main Oda fleet.

    3 trapped in beijing.png


    Oda then sent small squadrons to blockade the other provinces of Ming

    With the war on Ming going well, Katsunaga felt emboldened enough to declare war on Orochoni, who had annexed Ainu and the island of Hokaido

    4 dow orohoni.png


    Japan cited conquest as the casus belli, and quickly moved to occupy the province in question. The Shogun was planning on a simple passive war with the Odan army sitting on the war goal He had no intention of diverting the fleet from China to attack the Orochoni . But what he did not count on , however, was the size of the Orochoni fleet which turned out to be 17 ships, with several galleys.
    At that size, the Orochoni fleet presented a danger to the small Japanese squadrons blockading the Chinese coast. So Katsunaga ordered the fleet to reassemble and chase the Orochoni.

    5 fleet chases orochoni.png


    However, the slow galleys prevented the Odan navy from catching her enemy who retreated back to their home water. But on the way back, the fleet ran into the Ming fleet which had ventured out. That was the only naval battle in the war, and was a clear Japanese victory .

    6 naval battle with ming.png


    After that the Chinese fleet withdrew to Ningbo and never ventured again . And Oda proceeded to blockade all the Chinese coast except their southernmost provinces ( which were out of supply range of the Japanese navy) .

    7 money from blockage.png


    The blockade had a beneficial effect on Oda, who collected a nice monthly sum of around 8 to 11 ducats from this . And had a detrimental effect on the Ming Emperor's mandate through the effect of devastation of the coastal provinces ( h/t @jak7139 ). This effect was minor at this time, but would certainly rise as time went on and devastation increased.

    As for the war on Orochoni, the Odans got a nice assist from Haixi who declared a tribal feud war on the Orochoni.

    8 Haixi dows orochoni.png


    Oda hoped that with Orochoni mainland provinces occupied by Haixi the former would be more ready to negotiate away their holdings on Hokaido . But what actually happened is that Haixi annexed a chunk out of Orochoni.

    9 Haixi partially annexed.png

    And although omens in the sky ( a second comet in just 3 years!) were unfavorable, Katsunaga considered this a propitious event. Because the Orochoni were now at a size that can have them become vassals ( and therefore the 8th Daimyo) of Oda.
    Meanwhile on the internal front, Oda completed her 4th national idea, the Influential Stronghold , permanently adding siege skills to all her future generals .
    10 siege idea.png

    And then another development in the Orochoni situation happened : Jianzhou declared war on the beleaguered Orochoni.

    11 Jiazhou dows orochoni.png


    That event gave significant urgency to Katsunaga's plans to vassalize Orochoni. That was because Jianzhou was a tributary of Ming, and so was relatively safe from an Oda attack. And if Jiangzhou annexed all the mainland provinces of Orochoni, then Oda would lose the chance to gain a foothold on the Asian continent. But if Oda could vassalize Orochoni before Jianzhou completed her war on them , then Oda would get to fight Jianzhou in a defensive war as Orochoni's overlord.


    So the Shogun quickly wrapped up the war with Ming, taking only money

    12 peace ming.png


    The premature end to that war meant that the devastation brought by the blockade, which was just starting to get felt in Beijing, would not drastically affect the Emperor's mandate of heaven . But on the positive side, Oda got a large sum of money, enough to pay off all her loans and then some . And with the fleet free from blockade duty in China, the army was quickly transported to the Orochoni mainland. And in a stroke of good luck, the Odan army managed to reach the enemy capital Oroch just before Jiangzhou made it there.

    13 land on orochoni.png


    And after the fall of the enemy capital, peace was imposed on Oroch

    14 Orochoni peace.png


    Oroch became a Daimyo of Oda ( and a loyal one at that) and Oda annexed all of Hokaido and the Kuril islands. And Oda became war leader against Jiangzhou

    The war against Jjangzhou was easy for Oda. But Katsunaga feared the effects of that war on Oda manpower, and so decided to spend some of the left over Ming money on hiring the Grand Company mercenary company .

    15 prosecuting war on jiang.png

    Between the mercs, the help from Orochoni, and the regular troops, the enemy was quickly overwhelmed. And after their capital fell, were quickly turned into the 9th Daimyo.

    16 Jianzghou peace.png


    Oda started the war on Orochoni with hopes of taking Hokkaido and establishing a toehold in Asia. But now thanks to vassals, she had a good foothold on the Continent. And she has grown enough to eclipse her former rival Korea

    17 ruval ing.png


    At that point Oda looked to see if she could expand her continental holdings more. Unfortunately Haixi was a tributary of Ming. And Oda did not feel strong enough yet to attack Ming. So instead, Katsunaga began the preparation for the invasion of Korea when that truce would run out in 1509. The armies that had just conquered Jianzhou were stationed in the land of the new Daimyo and prepared to invade Korea by land . And in support of that effort, Katsunaga declared the mission to "Win Political Supremacy" complete and obtained claims on Southern and Eastern Korea as a result ( plus a good bit of power thanks to prestige being quite high).

    18 preparing for Korea.png


    But before we get on with the narrative, we will mention the beginning of a second Shinto religious incident: the arrival of the Wokou pirates

    19 wokou arrive.png


    Katsunaga followed in the footsteps of Hisanaga and took the isolationist view of the pirates.
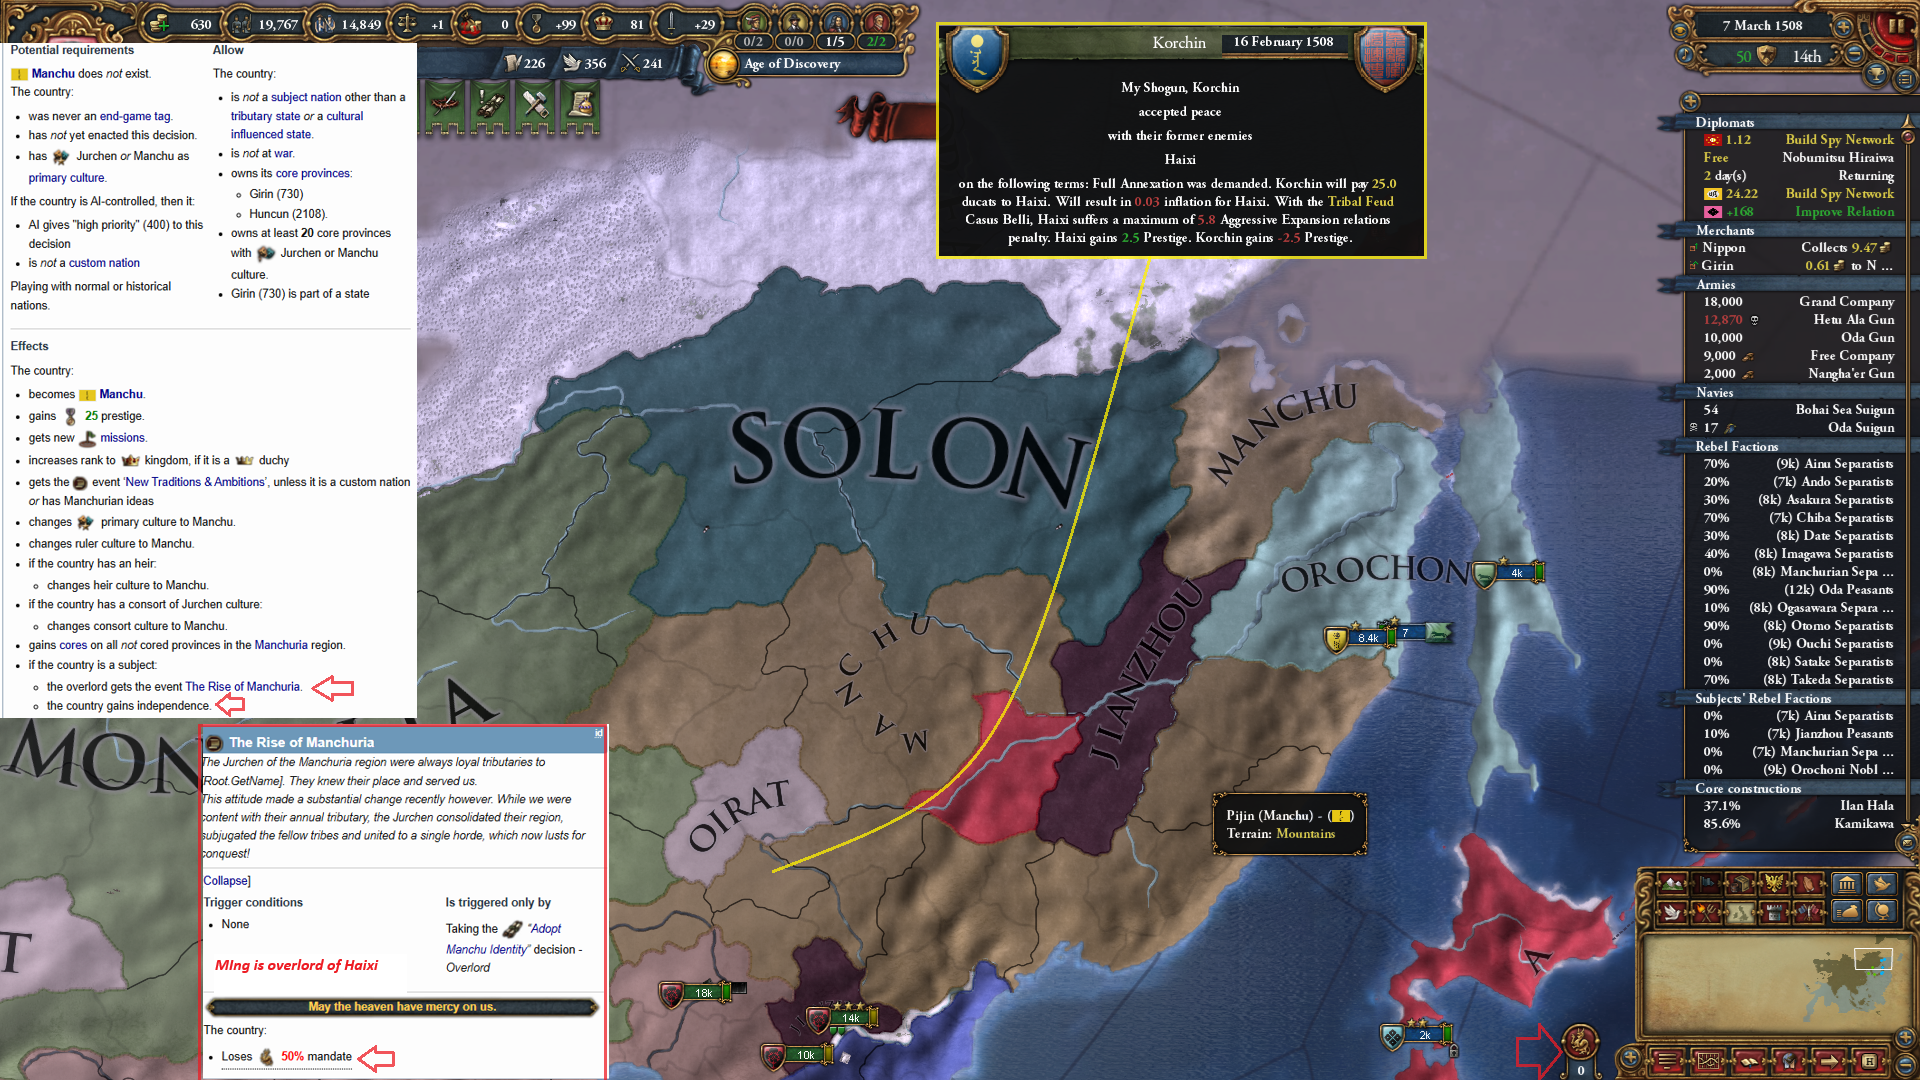
    After that his attention returned to foreign affairs. And in February 1508 he received the Ho-hum news of Haixi annexing one province minor Korchin. He did not pay much attention to that. but the next month there were dramatic changes in the map. Haixi renamed themselves to Manchu and broke off their tributary relation with Ming. And the latter suffered a collapse in their Mandate .

    20 manchu.png


    That presented new opportunities for Oda . With no mandate , the Chinese were ripe for an attack . But unfortunately, Japan was still bound by a truce with them . Manchu, on the other hand, had no such truce with Oda. And with no overlord, and no allies, Manchu was particularly vulnerable to an attack by Oda. So taking advantage of the the troops already positioned to attack Korea, Katsunaga immediately declared war on Manchu and began the Japanese invasion of Manchuria.

    21 DOW Haixi manchu.png


    The Odan armies quickly marched on the enemy capital of Girin. And after a siege of 131 days it was taken. The two forts to its west followed suit

    22 rakinc cities.png


    During that time the Manchu armies did not challenge Oda's force, and instead spent their energy on Oda's vassals Orochoni and Jianzhou. And when the Odan forces approached them , they promptly withdrew to the Siberian wilderness, leaving all Manchuria and their vassal Solon in Japanese hands.
    23 war ongoing.png


    And that brings us to the end of the decade.

    24 status.png


    Oda's finances are in the red currently due to the use of mercenaries . Her troops are not at force limit thanks to contributions from her vassals. ANd this will only get better as the Influence Ideas are completed. BUt a lack of manpower may force Oda to continue using mercenaries . And Katsunaga has a few big decisions to make soon.
    First, should he attack Ming instead of Korea next?
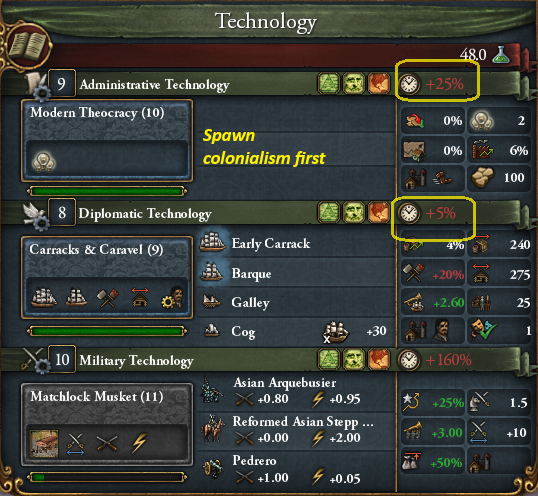
    Second, should he pause the advancements in technology and ideas to spawn Colonialism , or is getting the next idea group a higher priority?
    Third , what should that idea group be ?
    Fourth, should he declare a Golder Era now or save it for later?
     
    Last edited:
    • 3Like
    • 1Love
    Reactions:
    Chapter 7: Growing and Culling A Swarm (1510-1520)
  • Chapter 7: Growing and Culling A Swarm (1510-1520)

    The first event of the new decade related to the Wokou pirate incident. It appeared that foreign nations were complaining about those pesky Japanese freelance pirates, and the Shogun promised to curtail them, and earned some nice relations boost with foreign nations.

    1 wokou event.png


    The Shogun passed up the opportunity to get some gold or some diplomatic power in exchange of moving Japan's Shinto stance sharply towards isolationism.

    Two months later, the Manchu were ready for peace

    2 peace manchu.png


    Manchu lost all the lands of their vassal Solon, who was then released back as a new nation under Oda [directly transferring vassal cost 200 DIP]. Oda also released Nivkh as an additional Daimyo, and fed Jianzhou the castle at Huncun . Oda kept for herself the Center of Trade at Furdan, and the province of Hulan near Oirat, in order to fabricate claims on the latter [I cannot use Daimyo claims or reconquest CB to declare war, unlike regular vassals. so I have to fabricate claims myself].

    Katsunaga at that point thought about a war with Ming, whose Mandate of Heaven support was low . The truce was going to run out in under 2 years. BUt after much internal deliberation, he decided to go ahead with the Korean war first. He hoped that that war would be quick enough that Oda can turn around and declare on Ming before they recovered more Mandate.

    3 DOW KOrea.png


    The strategy for the war was very straightforward. Korea was protected on her land side by the mountain fort of Ganggye. So Oda sent her regular troops with 6 artillery regiments and a skilled siege general [+2 pips] to take the fort and set the Grand Company directly behind them in support.

    4 siege of ganggye.png


    The combined size of the Odan armies was enough to dissuade the Koreans from attacking . The fort fell after 272 days, opening the road to the Korean capital. There the Koreans did make a stand ( they could not see the supporting army) and were easily beaten by the superior Odan force.

    5 hanseong.png


    Hanseong fell in August 1512 and that opened the road to the south of Korea. By then Oda's manpower had dwindled down to under 5,000 men ( out of a potential pool of 28,000) . And that was because of the Korean decision to call up the "Righteous Army". But luckily the last fort fell after a brief 72 days siege.

    6 completed influence.png


    And that happy news was soon followed by the completion of Influence ideas and the adoption of the Integrated Administration policy, which increased the income from Oda's vassals and made it easier to annex them .
    With the fall of their last fort, the Koreans agreed to comprehensive peace.

    7 peace Korea.png


    Oda annexed to herself all of the provinces in South and East Korea that she had claims on. But instead of taking the island of Jeju, she took the fort of Ganggye so she would not have to deal with it again in the next war [but that prevented me from completing the "Conquer Korea" mission]. THe annexation of Southern Korea catapulted Oda to the ranks of the Great Powers of the World

    8 great power.png


    And after that the Shogun went back to dealing with the Wokou pirate issue, choosing yet again an Isolationist stance.

    9 more isolationism.png


    This forced Oda to remain at peace for a while to recover her stability, and also to integrate the Korean provinces as core provinces of the nation. So Katsunaga took advantage of that lull to annex some of the Daimyos on the islands of Japan, starting with Ouchi

    10 annex Ouchi.png


    Thanks to granting the "Bushi Integration Policy" privilege, Oda did not suffer a hit to her diplomatic reputation with the annexation, which took just a few months. But there was still a penalty to the relations with all the other Daimyos, which effectively limited how many Daimyos Oda could annex in this round . And in the end, Oda chose to start the annexation of both Date and Shoni , leaving the other Japanese Daimyos till later. Meanwhile MOngolia had gained independence from Oirat .

    11 mongolia free.png


    In their independence war Mongolia gained a province adjacent to Oda and on which Oda had a claim already . And so the new nation presented Oda with three diplomatic choices: Declare war, offer alliance, or make Mongolia a tributary. And Katsunaga did not hesitate ( well maybe a little) in making a choice for war, before Mongolia became a tributary of Ming like the other nations in the vicinity .

    12 dow and peace mongolia.png


    That war was straightforward and we will not detail it. But during the fighting , the Wokou pirate incident ended, and Oda moved her Shinto practices to fully closed , granting her a boost in rising prosperity and lower development cost [by my count my isolation level should be 3 not 4 , not sure how this happened but I am not complaining]

    13 wokou ends.png


    And also during the Mongolian war , our heir Yoshunobu followed in the footsteps of other heirs before him and decided to die. And again the maid offered her bastard son as an heir. But the SHogun said "meh, does not justify the low legitimacy" and decided instead to build a temple to the dead heir.
    14 heir dies.png


    FInally by mid-decade, Mongolia was ready for a "dismemberment" peace.

    15 peace monglia.png


    Oda snaked a way through Mongolia to get a border with Uzbek in the west, and gave all the intervening lands to her new Daimyos Korchin and Chahar, created out of the Mongolian annexation. And thus , just as Oda was culling her Daimyos in Japan, she was adding more on the Continent to take their place.

    Soon after, the Korean provinces became core provinces of Oda and were promoted into states. And since the cost of turning them into full core provinces was high, Katsunaga decided this was a good time to declare Oda's Golden Era (h/t @Steckie ) .

    16 golden era.png

    And to provide fireworks in celebration of this new Golden Era, Katsunaga declared war on the Ming Empire, who was low on Mandate and was two full military technological levels behind Oda.

    17 DOW Ming.png


    And the first events of that war were the capture of the forts of Shenyang and Beijing without any opposition

    18 shenyang dalls.png


    After that Katsunaga ordered the armies south, deep into Chinese territory bypassing the mountain forts to the West. This is when the Chinese armies finally appeared in the rear of the Odan force.

    19 deep strike.png


    Katsunaga ordered the lead army to continue the siege of Nanjing, and had the supporting army wheel back to face the Chinese. Despite splitting her force, Oda was able to easily handle the Chinese stacks in back to back battles at Jinan and Heijian

    20 stackwipes.png


    The elimination of the Chinese field armies led to the destruction of the Chinese fleet which was forced out of its hiding. And after the fall of Nanjing, Oda moved to siege the next city ( Huizhou) .

    21 nanjing dalls fflagship.png


    And these events bring us the end of the decade. Ming is on the run. And although a total victory is still a ways away, Katsunaga is already contemplating what such a victory would look like

    22 potential peace.png


    He is hoping that annexing land in Southern China would open a new avenue for expansion into Indochina and from there into the Malacca node , then into India and to the lands of Empires further west

    23 world currently.png


    As for Oda's internal situation, she is in great shape.


    24 status.png


    24b subjects.png

    14c tech.png

    Japan and now Korea form a core of well developed states that will be the basis of a strong economy and army. Adn the growing Daimyo swarm on the continent means rapid expansion will accelerate. The only hurdle for now is the institution of Colonialism . After that , Oda will be ready for the adoption of a very crucial idea group. [take a guess which one I decided on. hint: the group will certainly fill a need, but it is the policy I am after]
     
    • 3Like
    • 1Love
    Reactions:
    Chapter 8: A Cartographer's Nightmare (1520-1530)
  • Chapter 8: A Cartographer's Nightmare (1520-1530)

    WE ended the last chapter at war with Ming. The Chinese Emperor was losing, and quite badly, to the point they appeared to have no troops whatsoever

    1 no ming troops.png


    So it was only a matter of time before they unconditionally surrender to Oda. And after Oda captured Huizhou, her armies laid siege to the coastal city of Fuzhou. Soon after that city fell, the joyful news of the birth of a new capable heir (Yoshinobu 5/5/5) filled Kyoto.


    2 555 heir.png


    But then things took an unexpected turn ( well actually it should have been expected). The Ming Empire began to collapse, with the Southern Kingdoms of Wu and Yue breaking away

    3 ming loses the south.png


    This event upended the Shogun's plans ( presented in the last chapter) of creating a number of Daimyos in South China. The Shogun had to adjust his plans. And he immediately sent diplomats to spy on the new nations. But to fabricate claims on them , he needed to own a province in South China. And that meant it was time to make peace with Ming

    4 peace ming.png


    Oda annexed a large swath of land from North china, turning it into the Daimyos of Qi and Yan . She kept a couple of provinces, including Fuzhou in the South, for purposes of trade and claim fabrication. And also took a large sum of money while Ming could still give a big payout.

    After this great victory, the Shogun turned his attention to the issue of Colonialism. During the war with China, Prosperity had been achieved in the capital Kyoto . And so he issued the Development Edict for the state, and then summoned the diet and passed the Merchant Guild's agenda to earn their support in developing the province.

    5 develop kyoto.png


    With Colonialism now present in Kyoto, it was only a matter of waiting for it to spread. These events caused Ming to drop as a rival of Oda, who , for now, had no valid rivals.

    6 ming no rival.png


    And in further celebration of Kyoto's growth, the upgrade of the Imperial City there was begun.

    7 upgrade monument.png


    And while the Shogun waited for his claims on Wu to be ready, he decided to declare war on Uzbek.

    8 DOW Uzbek.png


    Uzbek had fallen on hard times and had no allies, and was small enough to vassalize in one war. So the Shogun figured this would be a quick war that can be completed without delaying the expansion in South China a lot. But what the Shogun did not really take into account was the distances involved in Central Asia, distances that had to be traversed by land. And it would be whole year after the war started before the Uzbek capital fell

    9 Uzbek capital falls.png


    Unfortunately, the Uzbekis still refused to accept vassal status . So Oda had to occupy more of their land, which was even further West . And some of it appeared to be in terra that was incognita to Oda. And so it was another year before those lands were occupied

    10  occuping more uzbek.png


    While that was happening, Ming began to disintegrate and lost its southern lands to Dali, and then got declared on by Manchu. But even after occupying more Uzbek land, the Uzbekis still refused to accept peace. That meant they had more provinces inside the terra incognita. And using some cartography skills [on diplomatic map mode, look for a hint of red] , the Japanese thought they were able to find the last province.

    11  into terra incofnita.png


    After asking Transoxiana for military access, Odan forces occupied the Uzbeki province. Only to find out that was not enough for peace. Which meant there as *more* Uzbek land in the terra incognita. And so Katsunaga finally did what he should have done to begin with, and that is ask for maps from one of his Horde vassals. Chahar was happy to oblige.

    12 ask map.png

    12b Uzbek gound.png


    ANd with the new maps in hand, Oda was able to find the last Uzbek provinces and occupy them. And with that, finally, Uzbek agree to become a vassal of Oda.

    12c peace Uzbek.png


    The "short" war to vassalize Uzbek took almost 4 years and now had Odan armies deep in Central Asia. And so instead of starting the troops on the long trek back to Eastern China, Katsunaga decided to expand Oda's presence in Central Asia. After all, the Uzbek provinces near the Urals were not connected to Oda's other holdings and therefore would be hard to defend . And so without much fanfare, war was declared on Oirat, allied to Nogai, Kham and Kara Del.

    13 DOW OIrat.png


    THe first move for the Odan troops was to invade Oirat itself and capture their capital Kuznetsk [ that name is as Russian as the province would get in this run!] . The armies then moved further west towards Nogai , who was Oirat's most effective ally ( their military technology was up to date, thanks to their proximity to Europe) ,

    14 Kuznetsk taken.png


    Meanwhile, back in China , the collapse of Ming continued apace as they lost all of their Manchurian holdings to Manchu . And thus North China became a bordergore jumble of nations , most of which were subjects of Oda.

    15 Ming exploding.png


    Back west, the Nogay capital was finally taken and - to the Shogun's delight- Odan troops venturing into the unknown lands of the Ural mountains hit upon the strategic province of Bashgird, home to a gold mine and a mountain fort.

    16 Bashgird reached.png


    On the other side of that province lay a hitherto unknown nation, with a pale beige map color [not green!]. Odan forces had now ventured to the edges of her known world. But that meant it was up to the vassal swarm to hold the line against Oirat on the Eastern front. And in that regard they were doing poorly , as they failed to combine their tiny stacks into one large force. And so Oda had to help them. But instead of marching the troops back from Nogai , a time consuming process, Katsunaga decided to hire a new mercenary company. And in that regard, he was greatly assisted by the fact that Oda had just recently adopted Mercenary Ideas and implemented the second idea of a War Council, which lifted the trade range limit on being able to hire mercenaries

    17 kazakh recruited.png


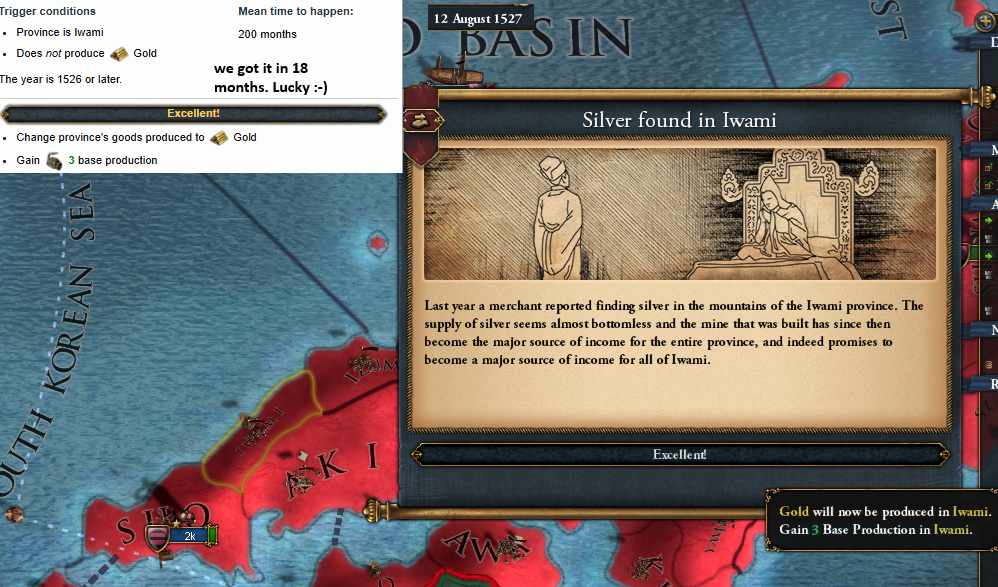
    Of course the new mercenaries were going to cost the treasury. But as luck would have it, just then silver was discovered in the province of Iwami , alleviating the strain on the treasury

    18 silver in iwami.png


    And speaking of gold provinces, Oda would soon gain her second Gold province by annexing Bashgird in a separate peace from Nogai.

    19 Bashgird annexed.png


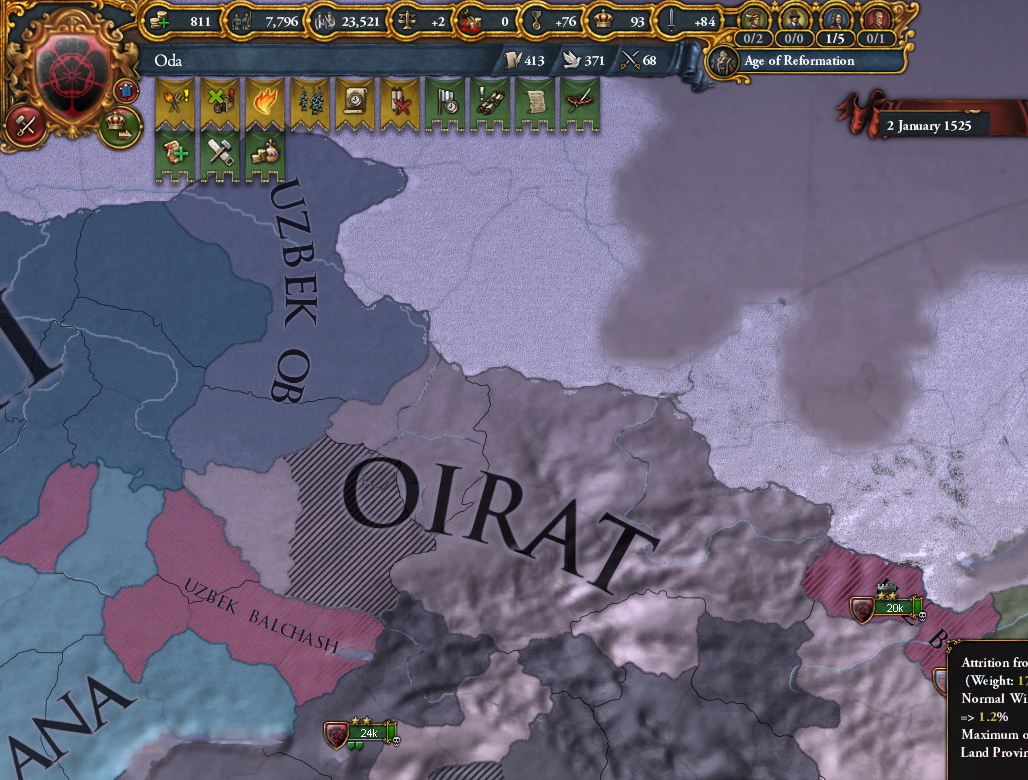
    ANd thanks to maps stolen from Chagatai, Oda learned about her new neighbor to the West, a nation called Muscovy that followed strange customs and a strange God. And soon enough he learned that Muscovy had been defeated in war by a very powerful nation called the "Ottomans"

    20 muscovy defeated.png


    Something told Katsunaga that one day Oda and the Ottomans would become mortal enemies . But that day has not come yet. And his focus went back to winning the war on Oirat. The troops were ordered from Nogai towards China to help the beleaguered vassal swarm. And during that time, he had Oda pass her 5th government reform, relating to military matters

    21 Bushido code.png


    By choosing Bushido Code, he planned for Oda to have the highest military tradition so as to continue to produce excellent generals, among other benefits. This reform also allowed Oda to recruit more Samurai. Katsunaga told his advisors that his long term plan was to have Oda recruit just Samurai and artillery units, and use her vassal swarm and mercenaries for all other military tasks. This way the acute shortage of manpower would not be as painful [ @jak7139 correctly identified this bottleneck]

    Back in the war , the armies returning from Nogai finally took the capital of Kara Del and made them into the newest Daimyo, while the Kazakh company was busy suppressing Ming and Korean rebels.

    22 Kara del vassalaized.png


    After Kara Del , the armies moved to Kham in the tibetan plateau . And this is where we leave as the Chapter ends

    23 Kham sieg.png


    And so what started as a "quick war" against Uzbek ended up dragging Japan deep into Central Asia, and within a stone's throw of the Empires of the West . And as the final act of the chapter, Katsunaga asked the Uzbeks to share their maps of the Pontic Steppe, which allowed him to learn more about those Empires. And since he was the Shogun of the one and only legitimate Emperor ( that of Japan ) , he swore an oath that those Empires had to die.

    24 Empires.png


    As for Oda's status, it is , as usual, great .

    25 status.png

    26 the swarm.png
     
    • 2Like
    • 1Love
    Reactions:
    Chapter 9 : Back to the East ( 1530-1540)
  • Chapter 9 : Back to the East ( 1530-1540)

    The last Chapter saw Japan venture far into Asia, reaching the fort of Bashgird in the Ural mountains. We left her at war with Oirat, trying to establish a continuous corridor of vassals between the Far East and the edge of Europe. IN that war , Oirat still had their ally Kham. BUt when Kham's capital fell and their army was destroyed, they agreed to join the growing Daimyo family

    1 kham peace.png


    That left Oirat all alone. And despite their large size, they also got to join the family .

    2 oirat paace.png


    Oda took jus two provinces for purposes of claim fabrication. With Oirat a vassal, Oda could move armies easily from Manchuria to Central Asia . But there remained a one province gap between Bashgird and Uzbek. And the Shogun set about correcting that problem. But before he did that, knowing that Japan will be tied up in the west for a while, he threatened Korea with war over the island of Jeju. The Koreans , lacking any allies, agreed to cede the province.

    3 Jeju easy.png


    And after that Oda established her first ever Tributary with the nation of Kazan in Europe

    4 Kazan tributary.png


    The Kazanians were to contribute manpower to Oda, about 1 month worth , so not negligible. But the main purpose of this relation was to prevent Muscovy or the Ottomans from annexing Kazan, until Oda herself was ready to swallow it into the swarm .
    And now Oda was ready to declare war in Central Asia to complete the land corridor to Bashgird . And the ideal target of such a war would have been Transoxiana. But unfortunately they were allied to the Ottomans. So Oda had to attack Chagatai and Nogai instead

    5 DOW Chagatai.png


    The main aim in that war was Nogai, who held a key province separating Oirat form Oda's land in Bashkiria. But war with Nogai meant that progress on turning Oda's new provinces into core provinces would he stalled for a while. Nevertheless, the Shogun proceeded with the plan . And it appeared that the Gods were happy with that decision because soon after Echigo began producing Gold

    4 gold in etchigu.png


    That was the last notable event of Shogun Katsunaga's reign, as he succumbed in 1531, ushering in the regency of Lady Tama Kan'in 4/2/4.
    6 regency.png


    The regent continued the prosecution of the war, which was going slowly due to the distances involved. But eventually Nogay city fell and the Odan armies wheeled East towards Chagatai and Delhi in India.

    7 war status nogay falls.png


    Once in India, the Grand Company - augmented by 6 artillery regiments- took the fort of Bhera, and then proceeded towards the capital Delji

    8 In india.png


    With troops deep in India, the regent had to resort to hiring new mercenaries when a Korean rebellion broke out

    9 korea mercs.png


    Her late husband's decision to adopt mercenary ideas for Oda certainly seemed to have been a good one.

    And on the internal front, Lady Tama improved her legitimacy by clamping down on smuggling of exotic goods from the Kazan tributary. As a result she was able to call for a Sword Hunt and increase the military power of the state.

    10 sword hunt taken.png


    Now back to the war. After 3 long years of occupation, Nogai finally agreed to give maximum concessions in a side peace.

    11 nogai peace.png


    Oda took from them one province to connect Bashgird to Oirat. And then several provinces on their western border , so that Oda obtained more borders with Kazan and Muscovy, and a new - tiny - border with the Ottomans. lady Tama hoped that one day these provinces would form a Japanese forward base of operations ( to recruit troops and mercenaries , fabricate claims and obtain alliances) . As for India, the fall of Delhi led to a monetary peace giving Oda a nice windfall and reparations for several years

    12 india.png

    After that, the war dragged on for another 2 years as Oda sieged down the remaining Chagatai forts ( the slow progress was due to the fact that Oda only had one siege army, something that needs to be remedied going forward)
    13 Chgatai forts.png


    Finally Chagatai surrendered unconditionally .They were too large to turn into a Daimyo, but they were made to lose a lot of land. And most of that land was turned into the new Daimyo of Yarkand

    14 chagati peace.png


    Lady Tama had come to the conclusion that larger Daimyos are better than smaller ones, as the small Daimyo armies kept getting picked off during war. And so she made sure that the annexation from Chagatai led to a viable subject. But Oda still kept strategically located provinces in the Himalayas that allowed her to claim Delhian land for future expansion into the Indian subcontinent.

    She followed that peace with the controversial decision to declare the powerful Ottomans as rivals of Oda, mainly to preserve power projection

    15 Ottomans rivaled.png


    The experience from the last few wars in Central Asia showed the flexibility of the vassal swarm and how easily it allowed Oda to expand rapidly . But it exposed a key weakness, which was the poor performance of the small Daimyos in battle. In all of the wars of the last decade or so, Oda had to do the heavy lifting herself and the main role of the Daimyos was to soak up the siege armies of the enemies. Lady Tama wanted to remedy this by strengthening the existing Daimyos. And she chose Manchu as the target since they had no allies.

    16 DOW Manchu.png


    That would be the regent's last official act, as soon after her capable son Yoshinobu 5/5/5 came of age and took the reigns of power [amazingly he made it!].

    17 Yoshinobu.png


    The new SHogun's first action was to dismiss the Grand Company and the Free Company , whose manpower had been depleted severely, to make space for fresh mercenary companies and new artillery regiments. But during that period of low troop numbers, a coalition against Oda began to form .

    18 Coalition.png


    Luckily as soon as the new troops were recruited, the coalition members saw the error of their ways and disbanded the coalition


    19 no coalition.png


    Still, that episode was a warning to Oda to pay some attention to her aggressive expansion . As for the war on Manchu, we will not detail it as it was a mostly lopsided affair ( although again he Daimyo troops fared badly in battle ) . Eventually in late 1538 , Manchu agreed to peace terms

    20 mancuh partitioned.png


    In the peace, Oda apportioned the provinces according to culture. The Korchin culture went to Korchin, the Mongol to Chahar, and the Chengdong to Yan. Jianzhou ended up with the Manchu culture provinces, which were the lion's share . And those events bring us almost to the end of the decade. But there was time for one more war, against Shun + Korea.

    21 Shun Korea.png


    The true purpose of that war was the annexation of more Korean land. Especially that Oda had an abundance of administrative power that would assist in turning Korea into core provinces. And Korea was included as a co-belligerent , but the war leader was designate as Shun , so that an initial separate peace can be made early with Korea before going on to partition Shun among new and old Daimyos.

    That war is obviously ongoing as we speak. Already the first Korean fort had fallen, and their capital is under siege. But before we show that progress, we note that the Ottomans decided to rival Oda, just before they embarked on a conquest of their old rival the Mamluks, a conquest that could turn out to be final one given the Casus Belli they used.

    22 Ottoman invasion.png


    As to the war with Korea, it is going well for Oda.

    23 war with Korea.png


    The Korean capital is under siege, and the SHun armies have been defeated. But just to a put a little twist in our narrative, Shun finally got the Mandate of Heaven as the decade ended.

    24 Shun has the mandate.png


    as for Oda herself, she is doing well but dealing from a lot of war exhaustion

    25 status.png


    25b overextension.png


    25c mondy.png

    As soon as possible, Yoshinobu will switch his focus from military to diplomatic affairs to help alleviate the war exhaustion problem.
     

    Attachments

    • 22 Otto rival.png
      22 Otto rival.png
      128,5 KB · Views: 0
    • 2Like
    • 1Love
    Reactions:
    Chapter 10: From Sea to Shining Sea ( 1540-1550)
  • Chapter 10: From Sea to Shining Sea ( 1540-1550)

    We left the last chapter at war with Shun and Korea. The fighting was going well but war exhaustion was taking its toll in Oda and diplomatic power had to be spent to address that

    1 wat exhaustion.png


    And further west, the Shogun followed with interest the war between his rival the Ottomans and their nemesis the Mamluks.

    2 mamluk collapse.png


    It appeared that the Ottomans were planning on turning the Mamluks into their vassals, which would for sure make them a more formidable enemy.
    Meanwhile, Oda was slowly turning her Ural provinces into cores. But we stress the *slowly* part here.

    3 coring slow.png


    At that rate, the most westward province would not be cored till 1556, which meant continued over-extension strain on Oda's government.

    In contrast to the slow coring progress, Oda made good progress on her national ideas, adopting the last mercenary idea in July 1540, giving her mercenary companies more manpower ( something they needed sorely ) . And this immediately allowed the Odan military to improve the discipline of the mercenaries [mercenary finisher] , to increase the total manpower pool [7th national idea], to increase the fire skills of future generals [ national ambition], and to adopt the Client State Act allowing creation of client states and increasing the vassal contribution to force limits [Influence-Mercenary policy]. Yoshinobu considered these multiple bonuses well worth the price of a slight delay in the adoption of the next military technology.

    4 finishing last idea.png


    As to the war with SHun and Korea, a big milestone was reached in October 1540 when the Korean capital Hanseong fell, and the Japanese troops encountered the ancient Tripitaka Koreana [don't know why this event did not trigger in the previous war].

    5 tripitaka.png


    The Shogun was asked what to do with this ancient document collection, and some urged him to burn it. But he wisely decided to bring it back to Kyoto where he hoped it would help with the adoption of new institutions and give more splendor to his government. He followed that success with a peace treaty forcing the Koreans to cede much of their remaining land, reducing the once populous nation to a rump state

    6 peace korea.png


    The annexation of North Korea significantly exacerbated Oda's over-extension, which was still dealing with the uncored provinces in the Urals.

    7 over extended.png

    The Shogun worried that rebellions would start to pop everywhere as a result, which would put more strain on Oda's dwindling manpower reserves. SO he decided to remedy this problem quickly by giving his westernmost Ural provinces to a new vassal ( Astrakhan) . And that meant he had to make peace in a hurry with Shun. And in that effort, he made a minor mistake when he signed a separate peace with Shun's ally Ning, taking money and reparations, instead of simply negotiating with Shun who was willing to end the war right then.

    8 ning mistake.png


    The peace with Ning gave up the only provinces that Oda still occupied in the war, and so Oda had to occupy a few more enemy provinces to convince Shun to sign a white, a process that took a few months.

    9 white peace Shung.png


    The good thing about a white peace was the short truce, which meant Oda would get to attack Shun a second time this decade . And now with Oda at peace, the provinces in the Urals west of the Bashgird gold mine were given to Astrakhan, solving Oda's over-extension problem.

    10 astrkhana born OE under 100.png


    After that, Oda spent some time at peace in order to improve relations with the original Japanese Daimyos, and then began the simultaneous annexations of So, Ashikaga and Yamana ( they had to be simultaneous, otherwise as soon as the first one completed, the relation hit with the others would prevent starting the next annexation). THat lull in war was apparently enough to give Jianzhou the chance to attack their fellow Daimyo Orochoni. And as far as we know, that was the first instance of an Odan vassal declaring Sengoku on another one.

    11 vasslas managed.png


    The Shogun immediately reacted by ordering the Jianzhou leader to commit Seppuku. That did not stop the war, but it did improve the Oda's governmental resources. This was followed by the adoption of a Religious Wars as an ability fitting this age of religious turmoil.

    12 splendor war score.png


    Oda chose that because she was surrounded on all sides by non-Shinto nations, and this would make annexation of future land easier. And the heathen land that Oda coveted was that of Orthodox Muscovy

    13 DOW Muscovy.png


    This was a good time for Oda to attack the Muscovites. They had no allies, and were militarily backwards . And Oda wanted to take advantage of the fact that Muscovy's Christian neighbors had no knowledge of Oda and could not join any coalitions against her if Oda annexed too much land.

    The war was managed by the SHogun carefully. The distances to Russia were vast and reinforcing with a fresh army from the home provinces would be difficult , so Oda could not afford to lose any battles . But before we detail that war, we will note an important international event

    14 Ottomans.png


    The Ottomans decided against turning the Mamluks into their vassal, and instead opted for annexing more land. The Shogun, who was obviously very fond of having loyal vassals, wondered why the Turkish Sultan would chose such a course. But it certainly was the better choice for Oda

    Now back to the war in Russia.

    15 kazan to moskva.png


    The first major event was the fall of the fort of Kazan to the Odan siege army ( which was backed up by two mercenary companies) . The siege was made shorter thanks to skilled generalship and plenty of artillery. The armies immediately moved onto the enemy capital Moskva, sticking together in case of enemy counter attack. THe main Odan force took Moskva after 141 days while small Daimyo armies started arriving and occupying unfortified provinces in the Perm area. Meanwhile the Russians were counter-sieging the fort at Kazan.

    16 Moskva to kazan.png


    The Odan army hurried back to relieve the garrison of Kazan. But an unlucky breach had the city fall to the RUssians just before help arrived [fell at 21%]. The Muscovites then moved on from Kazan to wipe out the small Daimyo armies to the East. That unlucky siege probably lengthened the war by a whole year as it allowed the Musvoite main army to escape. But the outcome of the war was never in doubt. Oda went back to sieging Russian cities, taking Novgorod in August 1544, while the Muscovites wasted their time chasing the Daimyos in the Urals.

    17 novgorod.png


    And after the fall of Novgorod, Odan armies moved on to Luki, taking that fort and exterminating the Russian force hiding behind it in Ostrov.

    18 luki and end.png

    A few months later, peace was concluded

    19 Muscovy.png


    In the peace, Oda took land all the way to the Baltic and White Sea, making the Odan Empire stretch from the Pacific to the Atlantic. She also took land just north of her Ottoman rival to cut them off from further expansion North into the Russian region . Almost all the new land was given to the new Daimyos of Novgorod and Nizhni Novgorod. The Shogun planned to annex those vasals - particularly Novgorod- as soon as possible, so that Oda would have her own port [and cores] in Europe. Amazingly, this was all done with the neighboring Swedes and Poles not really knowing who was the new Asian power absorbing all that land next door.

    With his western borders expanded, the Shogun turned his attention South, towards Persia and India. And here he eschewed the methods of war, and chose the diplomatic route. First an alliance was concluded with Persia ( although they are an empire that Katsunaga swore to kill, they can be a useful ally for a while) .


    Persia was Oda's first ally since the assumption of the Shogunate many moons ago . Persia was chosen as a counter-weight to the Ottomans and potential helper in any expansion in Central Asia. The Shogun then assessed the situation in India. There was no strategic imperative for Oda to invade INdia. But there was concern that a successful nation there would one day become a so-called Empire. And in particular the nation of Bahmanis seemed to be the most concerning .

    20 Deccan problem.png


    Bahmanis was allied to Delhi and Bengal, both strong nations at the other "corners" of the Indian "triangle" . Neigboring Bahmanis were the weaker nations of Vijayanagar , Jaunpur, and Gujarat. Without intervention by Oda, Bahmanis was very likely to unify Southern India and become the Deccan Empire. To prevent that , Oda allied bahmani's neighbors. Hopefully that diplomatic action would be enough to prevent the Deccan Empire from rising .
    21 Alliances in India.png


    Those events coincided with the start of the Ikko-Ikki Shinto incident, where free land Buddhism began to take hold in Japan. The Shogun took , again, the maximal isolationist view against it [to get Sakoku law achievement].

    With no war planned in India, the Shogun waited for the truce with Shun to expire. Here he had a strategic imperative to destroy that decrepit so-called Empire and the Gods of the game clearly egged him on .
    22 end that empire.png


    BUt the Shogun's plans were not telepathically transmitted to his Yan Daimyo, who decided to declare war on the Qi Daimyo. Needless to say, such internecine squabbling among the Daimyos was swiftly punished by Seppuku.

    23 seppuku Yan.png


    In addition to ordering Seppuku and reaping power rewards, the Shogun milked his vassals for generals. And when he saw that Chahar had an excellent siege general, better than Oda's best, he conscripted him into his armies

    24 siege pip five.png


    With an excellent siege general and some fresh artillery recruited, it was time to declare war on Shun

    25 Dow shun.png

    But before we describe that war, we detour to the West where Sweden and Kazan took advantage of Muscovy's defeat at the hands of Oda. As a result , Muscovy lost more land and Oda gained a new neighbor , Perm, who was willing to become a tributary of Oda. But the Perm question will be left for the next chapter

    26 muscovy.png

    .Oda reacted to these events by improving relations with Sweden, who still had an unknown attitude towards Oda.

    Now back to the Shun war. The two forts in the South of Shun, including their capital, were quickly taken by Oda's conscripted Chahar general .

    27 shun sieges.png

    The siege armies then wheeled north, helping the Daimyos finish the siege of Datong west oF Beijing, then continued towards Korea

    28 jinaimachi.png


    That coincided with another event from the Ikko-Ikki incident, and again the Shogun took the isolationist stance. After that, the Korean capital fell and Oda annexed even more of Korea, leaving just one province remaining.

    29 korea peace.png


    A peace with Shun followed a few months later.

    30 shun peace.png


    Oda took a lot of land from Shun, most of which ending up in the hands of the new Daimyos Liang and Jin and the older Daimyo Yan. As usual, Oda kept a few provinces for purposes of claim fabrication.

    And those events bring us to the end of the decade. But we will cover the first day of the new decade, as the new institution of Printing Press spawned in Bern . And Oda happened to be sitting on a large amount of military resources. And so instead of waiting to get Novgorod annexed and then allying somone with the institution in Europe, the Shogun decided it was simpler and faster to get Printing Press by developing Settsu, just next door to the capital.

    31  printign in settsu.png


    When developing Settsu, military resources were used so that Settsu became the leading province in manpower in Oda. And thanks to the presence of the Tripitaka Koreana next door in Kyoto, the institution is expected to be adopted in the capital very soon .

    And that brings us to the end of the chapter. Oda sits at the top of the Great Powers table. And she has only one rival ( for now ) .


    32 status.png

    The ODan empire stretches all across Eurasia and thanks to strategically obtained claims ( red arrows on map), Oda has various avenues of expansion. But the Shogun has told his advisors that Oda will not expand just for expansion's sake. Any expansion has to be justified in the service of the ultimate aim of eliminating all other Empires. And so expansion into India is not necessary, at least not yet. Expansion into Europe is much more helpful in that aim. But before Oda can take on the larger European powers, she needs a stronger economic base. And for that, the best place to expand is likely the Philippines and the East Indies. THese are areas where Japan can build trade companies and obtain additional merchants. And if she adopts trade ideas next, she will doubtless have the income to wage war on the powerful Empires of Europe.
     
    • 2Like
    • 1Love
    Reactions:
    Chapter 11: Island Hopping (1550-1560)
  • Chapter 11: Island Hopping (1550-1560)

    The last chapter saw Oda reach the Baltic sea. She was now poised to being intervening in European affairs. But first, the shogun wanted to put his economic affairs in order. And the best way to raise large sums of money was to improve Oda's trade situation. And that meant expansion into the island of the Philippines and the East Indies, where Oda could create trade companies and earn more merchants who can collect money for her. And to get claims on those islands, Oda needed to occupy the intermediate island of Taiwan, held at the time by Yue.

    1 DOW Yue.png


    The war on Yue was relatively easy for Oda. Using two siege stacks , the enemy forts were quickly taken after their field army was defeated and withdrew to Macau.

    2 war on yue.png


    And when Canton fell, Oda had the option of sacking the city for some dough. But Yoshinobu chose to pay the price to improve the professionalism of his army

    3 Sack of Canton.png


    Yue was ready to negotiate, but Oda had to wait a bit longer till Yue's ally Ning agreed to join the Daimyo family . Meanwhile, the Shogun had his spies building a network in Pangasinan in the Philippine Islands, ready to create a claim as soon as Oda annexed Taiwan island. And anticipating that futher island hopping in teh East Indies would require fresh claims, he hired a spy advisor at a high price

    4 spy.png


    Meanwhile, the last event of the IkkoIkki incident happened, with the Shogun choosing the most isolationist view. That triggered an armed rebellion by about 32,000 zealots, and required the hiring of the Grand Company to put it down.

    5 ikkoikki rebellion.png


    That event reiterated the need for a higher income for Oda as mercenary hiring and firing, while flexible and spared a lot of manpower, was expensive.
    Back to the war with Yue. Oda concluded peace with their ally Ning first, making them another Daimyo. Then made peace with Yue.

    6 peace Yue.png

    Oda took all the Centers of Trade in both Canton and Huangzhou trade nodes as well as any needed provinces to establish connections to those centers. Any such provinces were then fed to Daimyo vassals, so as to minimize the strain on Oda's government capacity which was already over limit. But even with the addition of two new Daimyos, Oda found herself over-extended due to the highly developed provinces in China. And so the Shogun resorted to a different type of vassal, the Client State

    7 after distributions.png


    Instead of giving the Centers of trade of Huangzhou and Ninbon to a Daimyo, he created a client state to hold them temporarily for Oda ( aptly the client was named South China Holdings). Although the client state occupied a diplomatic relation slot , Oda could rest assured that no other Daimyo would annex those provinces until Oda could integrate them ( and as a corollary, Oda was assured that South China Holdings would not expand on its own like other Daimyos could, forcing Oda to integrate unwanted provinces later) . After that , Oda moved on to the Philippines, thanks to a claim fabricated via Taiwan.

    8 DOW Pagasinan.png


    that war on Pangasinan and Madyas was easy, and we will not detail it. Suffice it to say that during that time the Ikko-Ikki incident completed and Oda remained at the maximum level of Shinto Isolationism .

    9 Ikko Ikki ends.png


    As for the war in the Philippines, it ended with the full annexation of both Madyas and Pangasinan, and the vassalization of Kutai.

    10 after peace with Pangasinan.png


    Yoshinobu used the new conquests to fabricate claims on Cebu and Mindanao and then created the new Daimyo of Tondo giving them all land except the Center of Trade of Pangasinan . He then started spying on Brunei in anticipation for the war *after* the next war. And the next was was predictably against Cebu and Mindanao

    11 DOW Cebu mindanoa.png


    Cebu was allied to Maguindano, Maynila and Sulu, basically all the remaining nations in the Philippine Islands. And between them they held 4 centers of trade. Oda was after all of them . ANd in a replay of the last war, ODa quickly sieged and captured all the enemy capitals, thanks to her very powerful navy and excellent siege generals ( the one conscripted from Chahar as well as homegrown ones )

    11 DOW Cebu mindanoa.png


    In the eventual peace, Oda pretty much annexed all of the Philippines except a couple of provinces left for Maguindanao. A new Daimyo, Lanao, was created out of provinces that di not have centers of trade. It was then time to move on to the next island, that of Borneo where Brunei held sway. But before we get to that, we detour all the way to the far west, where it has been 10 years since Novgorod was reborn out of Muscovy's defeat. And now it was time to integrate Novgorod into Oda .

    13 annexing Novgorod.png


    And to speed up the annexation, the SHogun resorted to the edict of Sankin Kotai, an edict that he rarely used. And also reactivated the Integrated Administration Act policy. Those actions put the estimated completion of the annexation of Novgorod before the end of the decade. And before starting the next war, he created Trade Companies in the Philippines and Canton trade nodes, and with the appropriate investments
    14 trade merchants.png


    Now back to the East Indies. War on Brunei was started using Kutai as a base of operations .

    15 DOW Brunei.png


    In addition to Brunei, Oda dragged in Sunda who was allied to Banjar. The aim was to annex as much as possible in one war and leave less for the next war. Fanning out of the base in Kutai, Odan armies quickly overran the island of Borneo, then moved on to the island of Java

    16 battles nrunie.png


    It was during that war that Oda embraced the Printing Press and soon upgraded her military, administrative and political technology.

    17 adopting tech 13.png


    Thanks to the Shogun's personal skills ( 5/5/5) , Oda had no difficulty maintaining a good technological advancement pace. Amd being he first Great Power to adopt hte new institution, Oda was considered, for a while at lease, a nation without peer rivals.

    18 eclipsed ottos.png


    And this was followed soon after by adoption of General Estates as the next governmental reform . The Shogun was already looking towards a day when he would start to remove privileges from the Estates, and that reform would greatly assist in that regard.

    19 gov tier 6.png


    Feeling that ODa was a in a very good position, the Shogun felt confident ( maybe over-confident?) to start another war before finishing up with Brunei. ANd that was against Transoxiana, who held a geographically strategic position in the center of EUrasia.

    20 DOW Transioxiana.png


    The Shogun recalled that years ago the Transoxianans were allied to the Ottomans. But somehow that alliance was lost. He worried that the alliane would be renewed. And Transoxiana had just finished a successful war with Oirat and was without allies. So he decided to strike at that time, and he also wanted to test how his Daimyo vassal swarm would fare without any help from Oda directly , so he did not direct the Odan armies in Russia to help out.

    Back in SE Asia, Yoshinobu made peace with Brunei's allies separately . HE annexed Jambi to allow fabrication of claims on Malacca. He took one province from Banjar to fabricate claims on the remaining Moluccas center of trade provinces, and he annexed the three centers of trade owned by Sunda.

    21 peace Sunda and jambi.png


    He then made peace with Brunei itself, taking their capital which wa a center of trade in Malacca node, and turning htem into another Daimyo.

    22 peace Brunei.png


    Obviously these aggressive actions led many countries to take an outraged attitude towards Oda. But the Shogun figured that no one would dare start a coalition against Oda, who was supported by over 20 vassal Daimyos at that point. But his estimate would turn out to be wrong. A few weeks later, tiny Pagarruyung started a coalition against Oda.

    23 Coalition forms.png


    The Shogun immediately took notice [I hit pause]. He was a bit surprised, and wondered if the fact that his strongest ally ( Persia) had just declared war on another country influenced the formation of the coalition. Or maybe the fact that his vassal Daimyos were losing against Transoxiana had led Pagarruyung to realize that the vassal swarm was a paper tiger . Regardless, this presented a problem for the Shogun. Not because he feared a declaration of war from the coalition, but because it complicated his expansion plans in the Malacca node. So before the coalition added any members from his Malacca target list, he took pre-emptive action and declared war on Malacca.

    24 DOW malacca.png


    And in that declaration of war he made sure that every nation owning a trade center in the region was included ( save Ayutthaya). Obviously the fact that Oda was now in 2 wars at once encouraged more nations to join the coalition, and the notices of countries joining the coalition became an annoying announcement at the Shogun's palace in Kyoto.

    25 colaition and early moves.png


    But that did not prevent Oda from effectively fighting the war and her armies already in Borneo quickly dispatched Lanfang's force and put their capital under siege. Similarly the armies on Java quickly besieged the Majaphit capital. And it appears those quick victories seemed to convince the coalition members of the futility of resisting Oda and her swarm.

    26 colaition strts to go away.png


    And to add to the happy news in Kyoto, Prospering Times led to the growth of the city of OShima on Hokaido, and Yoshinobu adopted Hideyoshi Toyotom

    27 Hidyoshi.png


    But then news started arriving again of the coalition growing back
    28 coalition back.png

    And then news of the coalition shrinking came right on their heels.
    29 coalition gone again.png


    And this back and forth of coalition notices - sometimes growing, sometimes shrinking- kept arriving to Oda for the remainder of the decade. The Shogun learned to ignore them , but this was certainly annoying and distracting him from the conduct of the war. And speaking of the war, a great assist came to the armies of Oda with the ability to deploy Flotaing Batteries, hastening coastal sieges significantly

    30 age ability.png


    And in Oda's other war against Transoxiana, the Shogun finally decided to bail out his flailing Daimyos and had Odan armies directly drive to the enemy capital

    31 Bukhara taken.png

    32 Lanfang vassalized.png

    The remainder of the year saw Oda continue to take fort after fort in the Malacca area, and we will not list all those sieges. But we will call attention to the completion of the annexation of Novgorod in late 1559 .

    33 Novgorod annexed.png


    Apparently the annexation of Novgorod gave Oda all the former's maps [is that a known thing? ]. And so the Shogun learned that there was another Emperor in the West, called Holy and Roman although he was an Embezzler and a Czech. He learned that the French king was considered a de facto emperor, but not so the rulers of Spain and the Polish Commonwealth. He learned that the Europeans had this strange custom of a "personal union" whereby the Emperor of France was also the King of Naples, and the King of Poland was also the King of Hungary. And he also learned that the weak ruler of Ethiopia customarily called himself Emperor, even though he clearly did not deserve the title. But the Shogun did not have much time to dwell on the future fate of these fake Emperors. He had two wars to win. And as the decade drew to a close, he was near concluding peace, andwas thinking about potential terms.


    34 possible berus peace.png

    35 possible transox peace.png


    As for the status of Oda, she is prospering and trade is increasingly and important part of her eonomy.

    36 status.png
     

    Attachments

    • 12 end of cebu.png
      12 end of cebu.png
      1,8 MB · Views: 0
    • 1Like
    • 1Love
    Reactions:
    Chapter 12: Speed Bump or Brick Wall ? (1560-1569)
  • Chapter 12: Speed Bump or Brick Wall ? (1560-1569)

    We left the last chapter with Oda at war with Malacca and friends and at war with Transoxiana. A coalition had formed, but it was unstable , with countries joining and leaving . The Shogun started the new decade with peace treaties with some of Malacca's allies

    1 malacca side peaces.png


    While that was going on , an important date came and passed and that was the expiration of the truce with Muscovy. The Shogun was eyeing that date to start a new war with Muscovy, before Sweden or Poland's own truces with Muscovy ran out. But as Oda was occupied elsewhere , he did not act on it. And just a few weeks later, Muscovy joined the coalition .

    2 muscovy truce.png
    2b muscovy coalition.png


    That closed off any possibility of direct attack on Muscovy, at least until the coalition dissipated. And the Shogun hoped that once Oda concluded her two wars, the coalition would disappear. So first he finished the war with Malacca and her remaining allies

    3 Malacca final peaces.png


    Malacca and all her allies became vassal Daimyos of Oda. And Oda took 3 provinces ( Siak, Malacca, Palembang) that hosted centers of Trade in the Malacca zone. Of course, the vassalization of more countries worsened Oda's reputation for aggressive expansion . And instead of the coalition dissipating now that Oda had one less war, it appeared to strengthen.

    4 coalition worse.png


    The fact that the coalition persisted and actually grew after the peace gave the Shogun pause. At that point almost every country in East and South East Asia that was not truce-bound with Oda had joined the coalition ( plus Muscovy of course). And the Muslim nations of India appeared to be on the brink of joining . So instead of continuing the previous policy of expansion without regard to international reaction, the Shogun decided to conclude a non-threatening peace treaty with Transoxiana, releasing Ferghana as an independent nation but not taking any land for Oda herself.

    5 transoxiana peace.png


    Transoxiana was Muslim, and taking land from them risked jeopardizing Oda's alliances with the Muslim nations of Persia, Gujarat and Jaunpur, and putting the Ottomans in the large coalition . With Oda finally at peace, she had a the chance of choosing new rivals, and here only the Commonwealth was considered a worthy opponent. Wanting to continue to project power, Yoshinobu designated the Commonwealth as a rival.
    6 rival PLC.png


    The Shogun then settled down with his advisors to decide what to do about the coalition, which seemed to continue growing, with Malwa and Nagaur soon joining it . And he eventually decided that Oda could not let more countries join it. So anyone who was not in it , and on whom Oda had a casus belli, was to be declared on . And the first target was Perm

    7 DOW Perm.png


    Perrm was conveniently allied to Muscovy, and that gave Oda a way to get to Muscovy before Sweden and Poland did . And this declaration was soon followed by war on Xi, who had not joined the coalition because they were in a war with Lan Na.

    8 DOW Xi.png


    For the war on Xi, Oda used the claims of her Client State "South China Holdings", a benefit of client states that Daimyos did not give.
    We will not detail those two wars, as Odan armies overwhelmed the enemies and captured fort after fort without difficulty . By Spring 1583. ODa was ready for peace. First with Xi

    9 Xi peace.png

    Oda was able to annex a lot of land from Xi. But Oda could not hold that land, because Oda was already suffering from shortage of governing capacity, which negatively affected her administrative efficiency. And that in turn exacerbated her aggressive expansion reputation, among other nefarious effects. This was a problem external observers had suspected [h/t @jak7139 ]. And Oda was trying hard to remedy it by building as many Courthouses and State Houses as her economy could afford. And of course Oda had to offload the new annexations to new and existing Daimyos, lest the governing capacity problem got out of hand. But first she had to make peace with Muscovy and Perm.
    10 Muscovy side peace.png


    In the side peace with Muscovy, Oda went for maximum land, trying to cutoff the Commonwealth from being able to expand north into Russia. And the Shogun approved this peace without asking his diplomats how it was going to affect relations with Europe. But when notice arrived that tiny Yaroslavl joined the coalition, he realized that the aggressive peace with Muscovy may have been a mistake. And sure enough, it appeared that his large rival, the Commonwealth, took a very dim view of Oda's action and was about to join the coalition .

    11 take  break.png


    The Shogun's diplomats had assumed that annexing land from Orthodox and Russian Muscovy would not upset the Catholic Poles too much. But forgot that taking land in side treaties was frowned upon [non co-belligerent doubles AE]. So the coalition, which Oda saw merely as a speed bump so far, was potentially turning into a brick wall as PLC and Sweden were set to join it. The Shogun took a few days of rest and meditated about this situation [I quit the game and went to bed]. He had previously formulated plans to attack the coalition by targeting one of its weaker members ( like Luwu who was on an island in SE Asia) , quickly occupying the target and letting his Daimyo vassals soak up the coalition attack until the target agreed to a white peace. But with PLC and Sweden joining the coalition , such a strategy was fraught with some risk. So he decided to continue the previous policy of attacking anyone NOT in the coalition And if those nations were in Asia or SE Asia to force them to join the Daimyo family [AE was hopeless in East Asia, so might as well kill that group]. But if those countries were Muslim, Oda would remain circumspect in the peace to avoid angering the Indian and Ottoman Sultans. And soon enough Oda was presented with a good chance to tackle a country without involving the coalition, namely Sweden .

    12 peace perm.png


    The malevolent ruler of Sweden had let it be known that they were about to attack Muscovy ( still allied to Perm by the way) . Oda reacted by first making sure Sweden could not get to Perm by annexing the one Permian province bordering Sweden, and then issued a guarantee for Muscovy, giving Oda a chance to face Sweden in a defensive war. In the peace with Perm, Oda limited her gains to just the one province to keep the truce short with Perm so that if Perm remained allied to Muscovy, Oda could get back at the Russians in short time.

    Then with Oda finally at peace, territory was rearranged in China and Russia to offload the excess land ( and governing cost) on Daimyos . In China, Shu and Wu were released, and in the west Tver and Pskov received the Muscovite lands.

    13 daimyos created in China.png


    And then two months later the anticipated attack by Sweden on Muscovy materialized, and Oda was called to help as the guarantor of Muscovy.

    14 CTA for muscovy.png


    The Shogun waited a bit on the call, wanting to know if Sweden's allies - particularly the Commonwealth - were going to join her. but after one month elapsed , and the PLC remained out of the war, he honored the call and had Oda join Muscovy's war with Sweden. But just before that happened, our vassal Kham declared Sengoku war on Dali. That gave the Shogun the chance to enforce Seppuku on the wayward Daimyo. Curiously, the new heir was a militarist. This seemed to answer the question asked by some observers [ @StrategyGameEnthusiast ] whether Seppuku actually affected Daimyo behavior [apparently it does not ].
    15 Seppuku.png


    The war with Sweden was an easy one for Oda. The regular army already in Russia quickly took Viborg Castle. A new mercenary army, the Independent Army, was recruited to make sure Sweden could not counterattack. And both armies eventually trekked around the Gold of Bothnia towards Sweden's home provinces, while smaller stacks and the new Daimyos occupied all the unfortified provinces ( a feeble attempt at forcing a crossing via Aland islands using the small navy inherited from Novgorod was met with defeat).

    16 to stockholm.png

    During that fighting, the truce with Shun expired. And continuing the policy of preventing any more countries from joining the coalition, Oda declared war on the dying Chinese Empire

    17 DOW Shun.png


    Shun was conveniently allied to Korea, who had been reduced to one last province. So this was a chance for Oda to finish them off . And while these wars raged, Oda had to contend with rebels popping up everywhere . But these were easily handled by shuttling mercenary armies around to the point where both the Kyushu Wokou and Shikoko Yojimbo companies ran out of manpower . Eventually Odan forces reached and took Lund, at the southernmost tip of Sweden ( and discovered the Swedish army hiding in Denmark, out of reach) .

    18 Lund.png

    And that meant it was time for peace. The Shogun worried that any further fighting risked having Muscovy conclude peace with Sweden on her terms ( recall that Muscovy was the war leader in the fight against Sweden) . And Oda could already get what she needed from Sweden in that war, namely an extended truce to keep them out of the coalition, and to detach Finland and Karelia from them.

    19 peace.png


    Oda did not directly annex land for fear of angering the Christians of Europe. Rather she had Finland and Karelia both released as free nations. Since both bordered ODa, it was expected that both would agree to become tributaries after the war. And in fact , not only were they agreeable to become tributary , but also agreeable to become vassals.

    20 finland post war.png


    ODa immediately proceeded to improve relations with the two tiny nations . Meanwhile, Oda got a nice boost from Yoshinobu's reform, improving her internal situation

    21 Yoshinobu reforms.png


    Meanwhile back East, Japan finally completed the annexation of Korea, a fitting bookend of the Golden Era of Oda which soon came to a close.

    22 end of an era.png


    Those 50 years sure passed by quickly . And soon after Oda took care of old business with Manchu . In a separate peace as part of the Shun war , Oda took 3 provinces that contained Manchu's forts, making it easier to conquer in the next war.

    23 peace manchu.png


    All these provinces were later returned to Orochoni Daimyo. This was again part of the new strategy to kill off all the East Asian nations that could join the coalition. Finally, peace with Shun was done, taking the provinces furthest from India first to avoid extending the coalition there

    24 peace shun.png


    The annexed provinces were distributed among existing Daimyos ( Chahar, Jin and Shu) and new Daimyo Qin , mostly along culture lines

    With Oda again at peace, alliances were made with Karelia and Finland and after some gold gifts, both agreed to become vassals of Oda. While that went on, Oda adopted the administrative technology of Scientific Experimentation [tech 14] enabling her to begin incorporation of Aristocratic ideas in her military .

    25 admin 14 early.png

    26 karelia finland vassals.png


    After that, the truce with Yue, now reduced to a single province, expired. And Oda immediately declared war before they could join the coalition

    27 Yue anneed.png


    Nine months later they joined the family of Daimyos. Similarly, when Maguindanao's truce expired, they found themselves at the receiving end of a Japanese declaration of war ( obviously the Shogun had prepared for these truce expirations by fabricating claims)

    28 Maguindano war.png

    And 10 months later Maguindanao and her ally Ternate were both fully annexed into Oda . The Shogun chose full annexation to allow him to fabricate claims on the rest of the Moluccas and Spice islands, although in the case of Ternate he was planning on eventually releasing them as a vassal so that they can begin colonizing the area ( their neighbor Tidore had just begun to do that ) .
    During the war with Maguindanao , the truce with Perm expired and Oda immediately declared war. Sadly Perm had lost her alliance with Muscovy and so they could not be used as a hook to get to the latter.


    29 Perm war.png


    A few months later , Perm became a Daimyo. Again this was following the same strategy of absorbing anyone not yet in the coalition who could potentially join it. And that about exhausted almost all targets for Oda within reach, and so the Shogun was waiting for the decade to end and then decide on whether to declare on the coalition or not [ I was going to present that option as my final screen]. But then a great opportunity presented itself to Oda. Her rival the Commonwealth declared war on the Holy Roman Emperor, the King of Bohemia.

    30 PLC dows bohemia.png


    As it so happened, Oda had previously improved relations with Bohemia ( and any nation the Commonwealth had claims on, for that matter ) . And when the Shogun had his diplomats go to improve relations again to see if Oda can intervene in an "Enforce Peace" capacity, he was pleasantly surprised that Bohemia was willing to accept an alliance with Oda. The question then became , should Oda ally Bohemia and get into a defensive war against her rival Poland? That strategy sure helped against Sweden earlier. But this is where we will leave the narrative, as it is almost the end of the decade.

    We will close with the customary status view of Oda.


    31 status.png

    31b ideas.png

    32 tech.png

    33 subjects.png

    So, dear readers, should Oda take the plunge and ally Bohemia?
     
    • 1Like
    • 1Love
    Reactions:
    Chapter 13: Preparation (1570-1580)
  • Chapter 13: Preparation (1570-1580)

    We left the last chapter considering an alliance with Bohemia. That alliance was concluded and immediately preparation for the war with teh Commonwealth were begun. A loan was taken and the Independent Army raised again. And soon enough the call to arms arrived and Oda honored it of course.

    1 ally bohmia recruit merc.png

    2 cta.png


    On Poland's side was her personal union junior partner Hungary. On Bohemia's side were a couple of German minor princes. So Oda' entry was going to drastically change the balance of power. But as some readers noted, the outcome of the war would depend on how quickly Poland would overwhelm Bohemia. So to prevent an early Bohemian collapse, the Shogun directed his forces towards the fort of Smolensk, beyond which was an open road to the heart of Poland .

    3 path to warsaw.png


    And in sieging Smolensk, Oda got a big assist from the introduction of the military technology of the Tenaille, which made the fort obsolete . And Oda spies began building networks inside Poland not only to help with the sieges, but also to mitigate the aggressive expansion reputation hit after the war [ht @Nikolai II ]


    4 smolensk falls.png


    And in another happy event for Oda, veterans began to flock to her mercenary companies, replenishing their manpower.

    5 veterans flock.png


    After Smolensk fell, Odan armies raced to Warsaw and placed it under siege, while Polish troops were still tied up with Bohemia in the West. And in that contest, Poland clearly had the upper hand, handily defeating Bohemia armies on multiple occasins

    6a bohmia loses.png

    6b kotor.png

    Oda quickly took Warsaw and moved west, taking Krakow in record time as well, to take some of the pressure off the Bohemians

    7 warsaw falls.png


    And in that effort , Oda was successful. Maybe too successful as she managed to draw almost the entire Polish army back east, where they converged on the Independent Army in Mazyr.

    8 mazyr.png


    The Odan troops held till the very end , soaking up a lot of enemy fire . But eventually the Odan line broke and the Independent Army withdrew, at half strength, to Warsaw. The Poles pursued. The Odan high command, seeing that the independent Army was not in fighting condition anymore, ordered the troops to withdraw further west , towards the Bohemian lines siging Poznan .

    9 Poznan.png


    And seeing that Poznan was about to fall, the Odan artillery and siege general joined the effort and helped Bohemia take the city . After that the Odan troops paused and waited for the Independent Army to replenish. And after the mercenaries got some more discipline thanks to Oda's splendor [Age Ability] , the mercenaries combined with the regular troops and began a counterattack. At the battle of Warsaw they successfully pushed away the Poles

    10 warsaw counter.png


    After Warsaw, Odan armies moved back East to cover the multiple sieges and occupations undertaken by the Daimyo swarm. And again they encountered a Polish field army. And this time they emerged victorious at Severia - but with very heavy losses .

    11 Severia.png


    At that point the Shogun decided that ODa had helped Bohemia enough, and needed to start looking at what gains could be obtained from Poland. He ordered the armies to move towards the Lithuanian region forts of Kovno and Riga, leaving the Bohemians to fend for themselves for now. And he had the diplomats periodically check peace options with Poland.

    While that was going on , the truce with Sunda in the East Indies expired . Unfortunately, Oda did not have a claim on Sunda [I forgot to fabricate one]. Not wanting to let Sunda join the coalition, and seeing that Oda had an excess of administrative power, the Shogun declared war without a Casus Belli

    12 no cb sunda.png

    That war was mostly handled by Daimyos and a local army and did not affect the conduct of the war with Poland at all.
    Back in Europe, Odan armies took Riga and Vilna, and repulsed another Polish attack at Warsaw. And those successes allowed Oda to obtain a very favorable peace from Poland
    13 riga and peace.png


    Oda took pains to avoid exacerbating her aggressive expansion reputation .Only the province of Mitau was annexed. But Poland had to release Estonia and Latgalia. And both nations were willing to become vassals of ODa, following in the footsteps of Finland and Karelia . Another benefit of the peace was Oda obtaining access to the Lithuanian mercenary company thanks to owning Mitau in the Baltic region [yes, that was intentional].

    14 lithuanian company.png


    With Poland in a truce with Oda, the coalition members apparently realized they would never be able to defeat Oda, and the coalition began to dissolve . And this time, it did not come back .

    15 coalitoin dissolves.png


    As for Bohemia, they continued their war with Poland alone, without Oda's help. And they lasted many years, before they finally ended up ceding a few provinces to their enemy. And in international news that would become relevant later on, the Ottomans completed the annexation of Rhodes, taking one province from Venice in the process.

    16 ottos annex kinights.png


    And back in the East Indies, the war of Oda Aggression against Sunda ended with Bali, Blambagan and Sunda all incorporated in the dominion of Oda.
    17 peace in sunda.png


    WIth Oda at peace, she was then able to complete the vassalization of Estonia and Latgalia.
    18 18a estonia.png

    18b latgalia.png


    Oda was now free of the constraint of the coalition. And she could take care of some unfinished business, and annex the last remaining center of trade in the Moluccas, owned by Luwu

    19 luwu war.png


    The war with Luwu and Buton was easy and finished with Oda taking the center of trade at Makassar, turning Luwu into a Daimyo and annexing Buton and later releasing it as a Daimyo.

    At that point Oda had secured all the trade centers in SE Asia, and had no coalition to contend with . It had defeated its rival the PLC and took Estonia and Latgalia from them. So it was a good time for the Shogun to reassess the long term strategy in the service of the ultimate goal of removing all Emperors from Earth. And with all of Eurasia known to Oda, a comprehensive list of all these Emperors was available

    20 empires.png


    There were the two titular Emperors , those of China and the Holy Roman Empire. Then the large de facto Empires of Poland, France, Ottomans and Spain (the big four). Rounding up the list was the middling power of Persia and the Emperor-in-name-only of Ethiopia. On that list, it was the big four that would clearly require the most effort . Oda had already fought one of them. It was now time to fight a second one.

    The closest Empire to Oda was obviously the Ottoman Empire. In fact, Oda had a border with them , and was able to fabricate a claim on them ( via the still-uncored province of Simbirsk, kept in Oda's direct possession specifically for that purpose) . But one does not attack such an Empire without preparation. ANd it was not just the war with them that concerned the Shogun . He was more concerned with the post-war peace. HE knew the war would be hard , and therefore the peace had to be worth it. But annexing land from the Ottomans in the Western Steppes ( or whatever one called the plains North of the black Sea) would be difficult because those provinces were out of coring range for Oda. And unlike the situation in Asia, where Oda could annex distant land, give it to a vassal Daimyo and then core a province next to it- those provinces lay in Europe and therefore could not be treated the same .


    21 Mid east.png


    So the Shogun had his diplomats obtain maps of Arabia from Persia, and looked at ways Oda could penetrate the Ottoman Empire via the Indian Ocean . It turned out that Oda would not be able to annex lands directly from the Ottomans in Arabia, as they were too distant from her provinces in South East Asia. Oda needed to get closer. And the Shogun identified two provinces in the area that Oda could use as stepping stones: Ash Shariqyah owned by Aden , and Gawdar on the Makran coast, owned by Delhi.

    So Oda began preparations for war to take one or the other province. As part of these preparations, Oda declared war on Ming's remnants in China.

    22 MIng war.png


    The main purpose of the war was to simplify troop travel in China, because Oda's possessions in South China were disconnected from her holdings in Tibet and North China. But also to whittle away potential coalition members should that problem arise again . Oda mostly let her Daimyo swarm handle that war, with some help from small mercenary companies.

    But the main preparatory war before Oda could take on the Ottomans was on Delhi, who was declared on via their ally Chagatai.


    23 DOW DElhi via chagatai.png


    The main aim of the war was to take the province of Gwadar on the Arabian Sea. Once cored, that province would give Oda range to Ottoman possessions around the Red Sea. To make sure no ally took that province for themselves during the war, Oda did NOT call on Persia or Gujarat to help against Delhi, although they were willing. She did call on landlocked Jaunpur however. A secondary aim of the war was to own a province in India and gain access to two more mercenary companies ( as you could have guessed, the constant wars and rebellions have been draining the handful of mercenary companies Oda had access to, and more would be needed in a potential war with the Ottomans).

    The war was fairly easy. Chagatai and Delhi had Kazan on their side, and that enemy was the first to be tackled by Oda.

    24 Kazan out.png

    After annihilating their army , Oda took the city of Kazan itself. That freed up the Grand Company to make a beeline drive to the province of Gwadar, for Oda seriously feared Persia may take advantage of Delhi's trouble and make a play for the province herself. Meanwhile, the armies in India were also making an effort to reach Gwadar quickly, via sieging the fort at Jalalabad.

    25 Jalalabad.png


    Eventually the Grand Company reached the target first and secured it for Oda. Meanwhile, Delhi's armies took Tsaparang fort in the Himalaya mountains but otherwise got bogged down fighting Jaunpur. And Chagatai itself was eventually overrun by the Daimyo swarm. Odas armies then made a push to the capital Delhi itself, and once they secured it, they were able to impose peace terms

    First was Kazan. Although they were Oda's first tributary, now that the relationship was broken, they had a poor opinion of Oda's aggressive expansion. The Shogun feared they would gravitate to their co-religionist the Ottomans, and so he weakened them by forcing them to return land to Muscovy ( Oda did not want to take land herself to minimize aggressive expansion with Ottomans, and to avoid worsening her governing capacity problem).

    26 kazan peace.png


    Next peace was in the other war with Ming

    27 ming.png


    Ming ceded provinces that helped connect Oda's holdings in China to each other. All provinces went to Daimyos.

    Next peace was the important one with Delhi

    28 Delhi.png


    ODa took two very sparsely populated provinces, but with significant strategic value. Ladakh allowed entry into West India , giving availability to the Gorkhalis and Ganges mercenary companies . Gwadar was a stepping stone towards the Middle East. Oda also released Kashmir as a free nation, eventually turning them into another Daimyo .

    Finally Oda made peace with Chagatai, annexing just enough land to straighten out the lines of communications in Central Asia

    29 Chagatia.png

    So in all the peace treaties with the Muslim nations, Oda took care to avoid upsetting the Muslim world at large with aggressive expansion. This was all to prepare for the coming war with the Ottomans. And further preparations were done on the diplomatic front, where Oda concluded an alliance with Venice , who controlled North East Italy and was rival with the Ottomans.

    30 ally Venice.png


    Oda also managed an alliance with Genoa, who was allied to Venice and not rivals with her! And in a good omen that the Gods were blessing Oda's plan to attack the Ottomans, the latter declared yet another war on the Mamluks

    31 Ottos down mamluks.png


    Oda reacted by beginning a hefty monthly subsidy to the Mamluks, taking their income from about 30 ducats to 45 ducats a month. Oda hoped that would help the Mamluks hold on until Oda was ready for her war. And Oda took another step towards readiness by completing the adoption of Aristocratic ideas and activating the policy of Autonomous Estates

    32 finished aristrocratic.png


    That policy increased Oda's force limit from 228 to 264 regiments, surpassing the Ottomans. And as the decade ended, Oda was almost ready to declare war. She was only waiting on Venice's truce with the Ottomans to expire - in just 2 months - so that she would have their help in the war.

    33 not yet DOW.png


    and this is where we leave our narrative. And end with the customary status view of Oda

    34 status.png


    Oda has a superb cadre of generals, with two of them conscripted from her Daimyo vassals [got Cherrypicking achievement from it]. And her army is larger than her future enemy the Ottomans, who were still fighting the Mamluks. Oda is certainly more than prepared to take them on.
     
    • 1Like
    • 1Love
    Reactions:
    Chapter 15: Making Rounds (1590-1600)
  • Chapter 15: Making Rounds (1590-1600)
    In the last Chapter 15: Making Rounds (1590-1600)Chapter, Oda attacked first the Ottomans, then the Commonwealth, trimming down two of the "Big Four" Empires. In this chapter, Oda will continue making her "rounds" on the Empires, and she started with Spain, via their ally the Papacy

    1 dow spain via papacy.png


    To maximize gains from Spain, the latter were included as a co-belligerent , which brought in their ally Austria. The Pope responded by declaring a crusade against Oda

    2 crusade.png

    Oda's counter was a shrug, and the recruitment of a 4-siege general from Daimyo Lebanon.
    3 siege 4.png

    The Odan armies then quickly invaded Austria and took the forts of Unterkarten and Wien in rapid succession, while at the same time relieving the siege of Genoa.
    4 Austrian forts falling.png

    While that went on, 57 year-old Hideyoshi decided to accept a new heir, playing it safe with the succession.. And he also paid attention to changes to the Middle East map, where Aq Qoyunlu got partitioned between Persia and Ottomans, and lost a few provinces to the other Qoyunlu ( Qara). The latter appeared agreeable to join the safety of the Japanese Daimyos and Hideyoshi immediately sent envoys to improve relations.
    5 new heir.png

    6 qoyunlus.png

    Meanwhile , the war with the Papacy and Spain was proceeding quite nicely for Oda. With Austria almost fully occupied, Oda moved on to Spain, sieging their fort at Labourd.

    7 labourd sieged.png


    There was no response from the Spanish armies themselves, and it was assumed that the bulk of them were in the New World. Meanwhile the vassal swarm and Genoa overran the Papal States, ostensibly the leader of the enemy alliance. The first enemy to make peace was tiny Mantua, who was pillaged to improve Kyoto's development

    8 Manrua.png


    Soon after , Landshut and Austria signed peace treaties giving up money. Austria released Bregenz as an independent nation, but because they were in the Empire, there was no hope for Oda to turn them into Daimyo.

    9a austria peace.png
    9b Lanshut peace.png


    That effectively meant that Spain and Portugal were the last enemies remaining, and the invasion of Iberia began in earnest. After the siege of Labourd took over 200 days, the Shogun recruited a new general hoping to get someone with even better skills than the Lebanese guy, and was happily rewarded with general Ikeda {6/6/3/6) whose siege skills were unsurpassed.

    10 perfect general.png


    With Ikeda leading the vanguard siege army, Spanish forts fell one after the other: first Navarre, then Burgos, then Madrid itself. ANd that took place in just 9 months after Labourd was taken, with no resistance from Spanish armies whatsoever.

    11 to madrid.png

    THe lack of resistance was partly due to the Portuguese and Spanish field armies attacking Oda's holdings near Egypt instead of defending Iberia.


    12 fgighting in middle east.png


    The occupation of Middle Eastern provinces did not concern the Shogun, for the Papacy was going to receive the occupations, and therefore that would not affect his negotiating position [warscore] vis-a-vis the Spanish and Portuguese. And by the end of 1593, Oda had occupied all of Iberian Spain, leaving only their colonies and the Balearic Islands and Sardinia in their hands. Feeling that further gains would be difficult to obtain, the Shogun made peace with Spain

    13 peace spain.png


    Spain was forced to release the old kingdom of Asturias and the nations of Navarre and Galicia. Oda took the island of Malta, with its famous Forts, and annexed the province of Labourd, giving her a border with France ( the next Empire stop on "rounds") and proximity to the newly independent North Iberian Kingdoms. Diplomats were immediately sent to improve relations with the small countries. And although Spain was the main target of the war, the Shogun continued fighting a while longer, taking on Portugal for economic and strategic reasons. And thanks to the peace with Spain, Odan troops were able to sneak into NOrth Africa, since the Spanish fleet was the one guarding the straits of Gibraltar. By the time the Portuguese fleet arrived, enough troops had crossed to liberate the Genoese province of Ceuta and begin the siege of Fez.
    14 into north africa.png


    The remainder of 1594 was spent sieging down the Portuguese forts of Fez , Tangiers and Marrakech ( Lisboa was already taken) until the Iberians begged for peace

    15 Peace portugal.png


    The most important clause in the peace for the Shogun was the war reparations which diverted 10% of Portugal's rich monthly income to ODa's coffers. In addition, Oda took one province on the North African coast to give her base of operations there, and to give proximity to Tlemcen who was released in the peace.

    Finally, peace was made with the enemy leader, the Pope.

    16 papacy treaty.png


    Urbino was released as a new nation ( and hopefully future Daimyo) and Rome itself was pillaged to increase the size of Kyoto.

    WIth Oda at peace, the Shogun immediately began working on turning Galicia into a Daimyo. And to help with that , he issued another Sankin Kotai edict, which improved his diplomatic reputation greatly. And that appeared to be just enough to get the Galicians to join the Odan family . Asturias and Navarre soon joined them.

    17 vassalize Galicia and others.png

    18 Galicia vassal.png

    19 asturias vassal decline Gujarat.png

    20 navarre.png


    At the same time, he was working the diplomatic dance with nations released in earlier wars. Zaprozhe and Tlemcen were turned into Daimyos, while Bashkiria , Algiers and Riga were made into tributaries ( each had their reasons to refuse vassal status)

    21 other natiosn.png


    It was while the shogun was negotiating with Qara Qoyunlu that he passed away, leaving the regency in teh hands of Lady Razia of Tabriz ( the Shia Queen).

    22 Lady Razia.png


    She would continue his efforts and successfully add Qara Qoyunlu as a Daimyo, further cementing Odan control of the Middle East.
    During that flurry of diplomatic activity, the military forces of Oda prepared for war with France. First, the manpower pool was allowed to replenish. Second, various armies were moved from North Africa to the areas around Labourd, taking advantage of their exiled status . Third, spies were sent to France to fabricate a claim on Saintonge and facilitate future sieges. And so on July 18, 1586 Oda declared war on the 4th large Empire .

    1738478709917.png


    on France's side were Oda's former allies Genoa and Venice, as well as German minors Liege and Oldenburg , and their old ally Scotland. Oda had Bohemia and the swarm. The strategy for the war was simple. Starting in Labourd, Odan armies would stick together and drive North towards Paris, taking forts on the way, while the vassal swarm was expected to distract the enemy armies . And thanks to general Ikeda and his +6 siege skills, things by and large went according to plan

    24 advance to paris.png

    Averaging about 36 days per siege ( barrage was used every time ) , Japanese forces did a veritable blitzkrieg across the French plain, taking Paris 7 months after war start, and reaching Metz a month later.

    The rapid advance continued in 1598, with France finally counter-attacking with about 30,000 men. Oda quickly defeated that force at Labourd.

    25 Labour battle.png


    After the victory at Labourd, Odan siege armies completed the occupation of France, and by mid 1598 moved on to invade Genoa's Italian possessions

    26 saluzzo falls.png


    While this went on, the effort at turning Japan Christian was finally defeated, with the isolationists winning again ( I did not detail the intervening incident events, but in all cases the Shogun chose the isolationist position).
    27 Christanity defeated.png


    Back in Europe, the city of Genoa fell in September 1598 , leading the Genoese to drop out of the war .

    28 Genoa peace.png


    Saluzzo, Morocco, and Tripoli were released . Each was a one province minor, and all three were willing to become vassals of Oda. ANd Oda took War Reparations from the rich merchant Republic.

    Next was the even wealthier republic of Venice, who was forced to release Perugia and Savoy (in Nice) and pay reparations.
    29 venice.png


    That left France, who still held on to territory in South England ( out of reach for Oda who did not have a significant fleet in the Atlantic), and territory in Naples. As the decade ended , Odan troops are about to cross into Naples . And the Lady Shogun was already considering peace treaties with France.

    30 possible peace.png

    Advisors to the regent have recommended making peace now. Part of the hurry is the need to attack the Ottomans soon. Their truce with Oda had expired and they were attacking the Mamluks again. And Oda needs to fight them before the truce with Commonwealth expires to avoid a coalition appears again.

    WE will finish the customary view of Oda's growing "Empire"


    31 status.png


    And we note that the Aztecs are apparently an Empire, and therefore will also need to be destroyed.


    Some random notes

    1) In Mantua peace, I was promised 1/1/1 improvement in Kyoto for pillaging but only got 1/1/0 . I thins the game recalculates the cost after adding each Dev, and by the time they got manpower , the cost was too high . That was annoying because I really needed manpower the most.


    2) I am glad I got Asturias released before their cores expired. Leon , Aragon and Catalonia may be too big to vassalize. I have similar luck with the French small Appanages that were annexed a bit after 1444, so their cores still exist. That is the benefit of moving fast towards Europe.

    3) My economy is unusual for this time frame of the game. usually in 1600 trade is by far the dominant source of income, and it is not difficult to steer trade to one's home node to spawn Global Trade. But in my case I do not have full control of Malacca node, so I have not made it my home node and will therefore not spawn GLobal Trade myself. But my income is supplemented by war reparations from rich nations as well as the vassal swarm. That should continue to grow. At some point, I should be able to run simultaneous wars against two big Empires. But I will always need periods of peace to vassalize nations and add to the swarm

    4) I have so far - knock on wood - not experienced significant slow down on my PC due to the vassal swarm during war.
     
    • 1Like
    • 1Love
    Reactions:
    Chapter 16: The Second Rounds (1600-1610)
  • Chapter 16: The Second Rounds (1600-1610)

    The last Chapter saw Oda attack Spain and France, after having attacked Ottomans and Poland . The new chapter opened with peace with France, as the Japanese were eager to move on to Ottomans again and start the second round of wars.

    1 peace france.png


    As has become customary for Oda, the enemy was forced to release some small nations ( in this case Armagnac, Foix, Auvergne and Bourbonnais) and cede a strategic province to Oda ( in this case Narbonne). Oda also took war reparations from the French.

    The next 2 years were then spent moving the exiled troops towards the Balkans ( and carefully avoiding Oda's province of Lika and her vassal Bosnia). And cajoling the new French princes into joining the Daimyo family , And some Daimyos took advantage of that lull in between wars to start their own wars. And in each and every case, the Shogun asked the offending Daimyo leader to commit Seppuku

    2 seppukuSolon seppuku.png


    With the ever growing number of vassals, this has become a regular occurrence in peace time, so much that Oda came to depend on the "sacrificed" vassals as an ancillary source of administrative , diplomatic and military power. Meanwhile, the Shogunate's attention was mostly devoted to managing the 6 diplomats who were all constantly busy shuttling between capitals of new nations and Kyoto, sending gifts , influencing nations , establishing royal marriages ( when possible) and turning the small nations into Daimyos . The first two to join in the new decade were tiny Urbino and Tripoli ( a one province minor on the island of Djerba )

    3 cta from persia.png


    The vassalization of Tripoli was almost interrupted by Persia calling Oda to arms against Transoxiana and their allies. The Lady Regent considered this for a while. Persia had been kept as an ally to counter any threat of coalition. But now that Persia has gotten bigger, the court in Kyoto felt that further help to them would be detrimental to the long term project of Empire elimination . Just simply agreeing to the call but not doing anything was not practical, as the vassal swarm was certainly going to help Persia quite a bit even if Oda herself did nothing. And so Oda never replied, effectively declining the call to arms.
    With Oda still at peace, more vassalizations came.

    4 mote vassla.png


    But eventually , those had to be paused to allow war against the Ottomans to proceed .

    5 DOW OTtomans.png

    Oda has assembled her armies near the province of Bessarabia, and from there they moved into two groups, the bulk going on the Western shore of the Black Sea towards Constantinople, and the smaller group on the East shore of the Black Sea towards Anatolia. This was because the Ottoman navy still controlled the Straits of Bosporus and Dardanelles. With the Ottoman forces busy fighting the Mamluks, general Ikeda with the artillery made it to the gates of Constantinople without resistance and took the city in 33 days. He then started the trek around the Black Sea to help with the sieges on the other side of Anatolia. But he was beaten to Asia by his colleague general Ujiie ( also +6 siege) who took Gallipoli in 77 days and then snuck a crossing into Karasi when the Ottoman navy was temporarily away .

    6 constantinople and crossing.png


    With Japanese forces invading Western Anatolia, the Ottomans had basically lost the war. But they had one chance at a victory in the mountains of Trebizond where over 100,000 Turks assembled to push back the Odan siege force. Seeing the odds and the terrain, the Japanese command thought about retreating, but then decided to pour in reinforcements in a gamble to end the war there and then .

    7 trebizond.png


    The gamble paid off. The main Ottoman field army was defeated and after that it was quick progression to conquer the remaining forts. One by one, all the Ottoman forts in Anatolia and Syria fell to the Oda with Damascus surrendering just 9 months after the battle of Trebizond.

    8 damascus falls.png


    By then , the Mamluks had begun to prevail against Ottomans in their war and began to occupy Ottoman provinces . The regent ordered the troops to quickly race to Cairo and take it ahead of the Mamluks to improve Oda's negotiating position at the peace table. And she also concluded peace with the Eyalet-i-Tunis ( formerly Tripoli) to further isolate the Ottomans

    9 Tunis out.png


    And , seeing the main Ottoman army heading West to Djerba, she ordered general Afzal to pursue them .

    10 Djerba.png


    After a victory at Djerba, the enemy sought refuge in the deserts of Lybia and Algeria, only to be mercilessly pursued by the Odan force and eventually annihilated.
    11 desert one.png
    12 desrt two.png


    Once it was confirmed that the entire Ottoman army had been destroyed, the Regent decided it was time for peace. That way there was no hope for the Ottomans to recover and win their war against the Mamluks. The larger the bite the Mamluks took out of Ottomans, the faster the destruction of that Empire would be .

    13 peace ottomans.png


    The Ottomans were forced to release Candar, Trebizond, Ramazan and Theodoro. They also pledged 10% of their income as reparations and paid a hefty sum. But one clause that the Japanese avoided, however, was releasing Byzantium back as independent, and that was because the latter were likely to claim the rank of Emperor and refuse to become a Daimyo as a result. And immediately following the peace, Oda began working on making new vassals of the new nations. Meanwhile, Venice declared war on the Ottomans ( who were already at war with Mamluks).

    14 Venice dows Ottomans.png


    That was music to the Regent's ear as it also sped up the demise of the Turks. More good news followed as multiple nations joined Oda's vassal swarm. Perugia, Savoy, Ramazn, Candar, Trebizond, Herzegovina, Theodora , Imereti and Mzab all became vassals in the year and a half following the Ottoman peace

    15 perguia.png


    Of note is the last two ( Mzab and Imereti) were not nations released by Oda, but simply small countries who agreed of their own free will to join Oda ( after some cajoling with gifts, a royal marriage for Mzab, influence nation and improved relations). With that tranche of vassals secured, it was time for the next stop on "the rounds" : the Commonwealth of Poland and Lithuania

    16 DOW PLC.png


    The Commonwealth had its junior union partner Hungary as well as allies Sweden and England on its side. Bohemia joined Oda ( Switzerland too , who was an ally on the road to vassal status). That declaration of war was the REgent's last official action, as Yoshinobu II took over the reins of the Shogunate.
    And Yoshinobu's reign started inauspiciously with a rare defeat of Odan arms at Smolensk
    17 loss at smolensk.png

    But soon enough , things went back to the usual pattern of Oda's siege armies capturing forts rapidly , leaving the carpet occupation of unfortified provinces to the Daimyos.
    18 Warsaw battle.png

    After losing a string of forts from Podolia to Stettin, including the capital Warsaw, Poland tried to counter. However, in a series of 3 battles near Warsaw , Oda was able to retain control of Central Poland .
    19 battle 1 of 3.png
    20 battle 2 of 3.png
    21 battle 3 of 3.png


    After that Oda began the invasion of Hungary . Pest was the first city to fall

    22 Pest falls genoa out.png


    Then all the other Hungarians forts were taken one by one. And an army was diverted to Sweden to force them out of the war . Finally in June 1609, almost at the end of the decade, Poland was ready for peace .

    23 peace PLC.png


    It was not a complete unconditional peace, because England was still in the fight and Oda's lack of an Atlantic navy kept them safe. But Poland was still forced to give major concessions. Kiev, Moldova and Ducal Prussia were freed ; reparations extracted and indemnity was collected.
    Shogun Yoshinobu hoped that would significantly weaken Poland and maybe lead to Hungary becoming disloyal. But unfortunately, as soon as peace was done, Poland completely integrated Hungary. This meant a few more wars would be needed to completely dismantle the Commonwealth. But that annoying news was tempered by the good news that the Ottomans lost a chunk of land to both Mamluks and Venice.

    24 Ottos less.png

    And among the lands the Ottomans lost was Iraq, who immediately became the target for Oda's vassal whisperers. And those sweet whisperers were able to convince Switzerland ( exiled to Italy and not in HRE anymore), Kiev and Prussia to join the Daimyo family. Moldova, on the other hand, was made a tributary since Oda owned one of their cores ( Bessarabia)

    25 switz prussia kiev.png


    And that brings us to the end of the decade. Oda is readying a war against Spain. But before we get to that and to the status map of Oda, we will note that Oda took Burgher loans to adopt the institution of Globall Trade

    26 estates.png
    27 global trade.png


    And as we can see , the Shogun had curtailed a lot of the Estates privileges in anticipation of imposing a more Absolutist rule soon. We also note that Oda had a new merchant thanks to Global Trade. And when the Shogun was deliberating where to send him, he noticed that the merchant previously placed in Malacca node was no longer there. In fact , sometime in the last decade , Oda silently ceased to collect trade income in Malacca, which was very unfortunate since all the other merchants downstream of Nippon were pushing trade to Malacca. That happened as Europeans started to colonize in Malacca , and the Indonesian Trade Company based there lost its majority control of provincial trade power, and therefore its merchant. Needless to say the new merchant was sent there.
    28 no malacca merchant.png

    29 iberians in malacca.png

    Finally the customary status map of ODa


    30 status.png
     
    • 1Like
    • 1Love
    Reactions:
    Chapter 17: Sailing the Western Ocean( 1610-1620)
  • Chapter 17: Sailing the Western Ocean( 1610-1620)

    We left the last chapter with Oda halfway through a second round of attacking the large 4 empires in the order Ottomans-Poland-Spain-France . It was now Spain's turn . But before that war was begun, the Shogun decided that the days of having naval inferiority in the Mediterranean and the Atlantic needed to end. It was time for the Pacific fleet to sail to the Atlantic. And so maps were requested from Galicia and Savoy ( Asturias, who had an actual colony in Africa, refused due to "being a colonizer" . The gall!).

    1 sharing maps.png


    But although Asturias did not help with the maps, their colony of Gabon was certainly helpful as a pit-stop on the long journey that the Galley fleet ( with 40 transports and the Flagship the Hisanaga) took from India to Europe. And it was during that voyage that war was declared on Spain

    2 DOW spain.png


    Oda troops were pre-stationed near the province of Labourd, and quickly moved to invest and capture the Spanish forts. Like usual , Spanish cities fell in quick succession so that by February 1611 , Odan forces were at the gates of Madrid . That month a new age of Absolutist rule dawned on the world. And truth be told, Oda was somewhat unprepared for it [forgot to build 5 universities]).

    3 spain invaded.png


    But on the military front, Oda was more than prepared. After all of Iberia was occupied, troops began moving into North Africa, thanks to Morocco holding hte African side of the Strait at Ceuta ( and Oda had parked a 30,000 strong Grand Company at Ceuta to make sure the enemy did not control the province).

    4 Ibearia occupied pope out.png


    And soon after the sieges of Tangiers and Kabylia in North Africa were helped by the arrival of the Japanese fleet to the waters around Iberia.
    5 fleet is here.png


    Meanwhile , in internal affairs, the Shogun passed the War Economy government reform, immediately lowering the cost of both regular and mercenary troops by one tenth. Coupled with the rising force limit of Oda due to more and more vassal Daimyos joining her , this effectively increased the size of the army she could field at any time.

    6 gov tier 8.png


    Also in internal affairs, Yoshinobu adopted his Filipino cousin Alon Toyoyomi (3/4/6) as his heir
    7 alon is heir.png

    Meanwhile, the war with Spain continued. Spain's allies Austria and Portugal were forced out of the war . Austria for money only, but Portugal for both money, land and also the termination of their historical friendship alliance with Spain

    8 portugal out.png

    Thanks to a timely reminder about the trade situation in the Malacca zone [ @StrategyGameEnthusiast ] , the Shogun made sure Oda took for herself the new colonies created in the area by Portugal ( and Odan troops had already seized directly one Spanish colony on Sumatra). Portugal also lost the provinces of Tafilalt, who would later become a Daimyo. These territorial terms were imposed in order to prevent Portugal from one day becoming another Empire.

    That left Spain as the last enemy in the war. And this time, to extract maximum concessions, the armies crossed into the Balearic islands and Sardinia , thanks to the presence of the main fleet in the area.

    9 fleet battle.png


    The remnants of the main Spanish fleet were ejected from Cagliari and sunk in the Gulf of Bon. After that it was time for peace

    10 spain peace.png


    The nations of Leon and Catalonia were granted independence . And Oda got reparations from Spain as well as a new province in Central America, one that Oda hoped could be used to get at the Aztec Empire in the future.
    The next Empire on the rounds was France. But first a short period of peace was needed to formalize the vassalizations of Tafilalt, Ferghana, Leon and Catalonia. That lull allowd Oirat to attack Uzbek ( which they eventually annexed). The Oirat ruler paid for his ambition with his life as he was promptly ordered to commit Seppuku.

    11 vassalas and seppuku.png


    After that it was time for the war on France

    12 dow france.png


    France again had similar allies to last time , including Scotland. But this time Oda had two answers to the problem presented by Scotland and French provinces in Britain. First, Oda had the alliance of England . Second , Oda had her Pacific fleet in theatre now. Just like in the last war, the French mainland provinces were quickly overrun . And then two mercenary armies, totaling 60,000 men, were able to set sail from the coast of Normandie and land in Southern England.

    13 to England.png

    These troops quickly helped the English turn the tide of war on their island by defeating the French army at "Domaine Francais" ( formerly London) .
    14 london battle.png


    Seeing how well the military was performing, and with the bottleneck of Odan expansion becoming more and more the peace time negotiations needed to create new Daimyos, the Shogun decided to adopt Espionage Ideas over other ideas, and to adopt them earlier than expected.

    15 new idea group.png


    Soon after that, cousin Alon the Filipino heir died while hunting, and was replaced by a better heir [surprise!] ,with promising diplomatic skills. The heir switcharoo was clearly beneficial seeing how Oda would want to finish the adoption of Espionage ideas soon .

    16 hunting accident.png

    17 better heir.png

    Back in the French war , Liege was forced out for money. Then Scotland was made to break her alliance with France, release three Irish minors , cede Mann to Oda , and pay reparations

    18 peace scotland.png


    Oda made a point in the peace to avoid giving England any land. There was no point in helping a nation that could become an Empire one day .
    A similar peace was made with Genoa, taking reparations and releasing Lucca as a free nation

    19 peace genoa.png


    That left France and Oldenburg as the last holdouts on the enemy side. But before we get to the final peace, we note the passing away of general Ikeda, the "Vauban" of Japan, and the belated start of the Religious League war declared by Bavaria on newly crowned HRE Austria.

    20 league war.png


    Finally France concluded peace with Oda, accepting full terms
    21 France peace.png

    France was made to pay a hefty sum of money, reparations and release the 4 nations of Cornwall, Alencon, Gascony and Provence.

    That completed the second round of wars against the Big Four Empires. The next round was not set to start till 1619, when the truce with the Ottomans ended. So Oda took that time to vassalize the released nations, and to force Seppuku on wayward Daimyos.

    22 seppulu and vassals.png
    23 lost bohemia.png
    24 moer vassals.png
    24b meath and more.png
    24c lucca and iraq.png


    And during that peace lull, troops were also moved to the border of the Ottomans. And the annexation of Smolensk, the largest Daimyo with Orthodox land was begun
    25 annex Smolensk.png


    The annexation of Smolensk was part of a long term plan to eventually convert Japan to Orthodox ( and in that regard, excess power was being spent on developing Muscovite culture lands instead of Japanese lands)

    With those peace time activities completed, it was time to declare war on the Ottomans and begin the third round of Empire bashing.

    26 DOW Ottomans.png


    This war was even easier than the previous two, and we will only detail one event in this chapter, and that was the sack of Damascus .

    27 Damascus sacked.png


    The rich Odan military chose to maintain troop professionalism , as one would expect of such an efficient fighting machine. And that last event brings us to the end of the chapter . Oda is still at war with Ottomans. Her next target would be either Poland or Persia, who has now grown to rival the "Big Four" in size.


    28 next target.png


    29 status.png
     
    • 1Like
    • 1Love
    Reactions:
    Chapter 18: The Tragedy of Syria (1620-1630)
  • Chapter 18: The Tragedy of Syria (1620-1630)

    We left the last chapter starting a third round of Empire bashing, with Ottomans the active target. That war was concluded in June 1620


    1. peace ottomans.png


    As usual, Oda took no land and forced the enemy to release 3 vassals: Hisn Kayfa, Bosnia, and Syria. The first two were one province minors, and after influence nation, economic gifts and alliances, both agreed to become Daimyo vassals of Oda. ( even though Bosnia had cores owned by our vassal Herzegovina, they did not mind as long as it was not Oda who owned them ) . But when it came to Syria, there was a problem

    2 Syria too big.png


    The total development of the new nation was considered just slightly too large to become a vassal. Considering that the release of Syria was the main achievement of the recent war , this was disappointing. But at least , the Ottomans lost a lot of land. The Shogun was still determined to some day make Syria a vassal, so he revoked the guarantee for now, hoping that Mamluks would take a bite of it and then Oda can vassalize the remnant.

    With time to spare before the truce with Poland ( who was the next target on the round of Empire bashing), Oda decided to attack the now-large Empire of Persia

    3 DOW persia.png


    Interestingly, just before the war started , the Persians declared war on the hapless Syrians. That did not change Oda's plans much . The war with Persia was rather straightforward. The armies that had recently defeated the Ottomans simply marched East, taking the mountain forts in Armenia and the Zagros mountains with relative ease. Persian armies meanwhile wasted their time of the Daimyos of Yarkand and Kashmir. There was one notable battle, and that was the fiasco of Ghor, where the general in command of a siege army died as the siege began, inviting a Persian attack. Reinforcements were rushed in, but as sometimes happens, they arrived too late to save the day, but not late enough to avoid their own annihilation

    4 ghor debacle.png


    The Ghor disaster was a temporary setback. Soon more armies were recruited and Persia occupied completely . Peace was signed in 1623

    5 peace persia.png


    Oda took the province of Mosul to connect her vassal Iraq with new nation ( and vassal) Ardalan, as well as Hisn Kayfa. But because Mosul was a core province of Aq Qoyunlu, who was being wooed for vassalization, the province was transferred to Hisn Kayfa after the peace [ again countries considering becoming vassals care a lot if you own their core, but do not mind if your subject does ] . New nations of Ardalan, Ardabil, and Luristan - all located in Western Persia and in contact with the vassals in the Armenian plateau were released and turned in Daiymos . The 4ht released nation ( Sistan) could not be turned into a vassal in time before the war with Poland started ( and would eventually become a subject of Persia again ) .

    A year later, it was time for the next stop on the Empire bashing round

    6 DOW Poland.png


    On Poland's side was our ally England. That did not bother Oda much as she had several Daimyos in the British isles who could occupy England while Oda took care of Poland. And taking care of Poland was done quickly. But before we get to that, we note that the poor Syrians - already at war with a big Persia- got jumped on by the Mamluks

    7 poor syria.png

    And that made them sign a bad peace with Persia, losing much of their land.
    8 persia syria.png

    They should have just accepted Daimyo stats, their size be damned!!!

    Anyways, back in Europe, Poland was quickly occupied with Stettin falling to a combined land and naval blockade in April 1625

    9 Stettin falls.png


    Oda took advantage of the presence of the fleet in the Baltic to ferry several of the armies that just took Stettin to England. These armies then invaded the unfortified coast of East Anglia .

    10 england landing.png


    It was then just a matter of advancing on the English capital and recovering any vassal provinces occupied by them. Peace with England followed

    11 peace england.png


    The new nations of Tyrone, Sligo and Munster were released to later become Daimyos of Oda. And England was made to pay money and reparations to oda. Meanwhile, Syria was fully annexed by Mamluks.

    12 Syria gone.png


    Such a brutal outcome for the poor Syrians, tasting brief independence from Turkish rule, only to be partitioned between neigboring powers [a case of the game imitating reality - or is it the other way around?]. But at least, the portions ruled by Persia were now of an appropriate size to become a Daimyo once the next round of Empire bashing starts.

    And in other international news, the League war concluded between Bavaria and Austria, although by now the Catholic Palatinate was the Emperor ( Austria being rule by Maria Theresia) .

    13 league war ends.png


    Back to the Poland war. Peace was concluded in late 1626 .

    14 Poland peace.png


    Nitra, Transylvania and Wallachia were all released ( and the Shogun made sure none were too large to vassalize) . All three promptly became Daimyos. In addition, the one province minor nations of Teutonic Order and Qasim were also granted independence. These were NOT turned into Daimyos . Initially due to time constraints before the next war. But later the Shogun's advisors recommended they stay independent allies, so that they can be given land from Poland in the next war and only after that they would become Daimyos.

    In addition to making vassals out of the released nations, Oda's diplomats also managed to convince Timbuktu , Aq Qoyunlu and Avignon to join the Daimyo family as well .

    15 Timbuktu.png
    16 Aq Qoynlu.png
    17 avignon.png


    Those deals were made possible by the fact that ODa had no aggressive expansion notoriety in the region, and thus improving relations, influencing nations, giving gifts and creating alliances were usually enough to ink the deals.

    The next stop on our rounds was Spain . Here ODa first claimed the entire Valencia area before declaring war .

    18 DOW SPain.png


    On Spain's side was Portugal again. The Portuguese were peaced out early, and made to return two provinces to Algiers. Conveniently, Algiers was in line to become the next Daimyo , so those provinces were really going to Oda!


    19 portugal our.png


    THe war with Spain is ongoing as the chapter ends. Oda had occupied all Spain's provinces in Europe, but Spain's American Colonies are preventing Spain from outright surrender. And options for the peace are being studied. In particular, the question to address is how to release Aragon and turn it into a Daimyo. Since Aragon is very large- much larger than Syria- the only way to make them a Daimyo is to first reduce their size.
    20 war.png


    21 Aragon cores.png

    22 possible peace.png


    We close with a view of the Odan "Empire"
    24 status.png


    As you can see, Oda is steadily gaining land in Europe . BUt remarkably, she is not regarded as an aggressive expander.
    23 no ar.png
     
    • 2Like
    • 1Love
    Reactions:
    Chapter 19: Art of The Deal ( 1630-1640)
  • Chapter 19: Art of The Deal ( 1630-1640)

    We left the last chapter with Oda at war with Spain ( on round 3 of the Ottoman-Poland-Spain-France cycle). But the first notable event of the new decade was the beginning of the Nanban Trade incident of the Shinto faith. Like usual , the Shogun took the isolationist view.

    1  nanban trade.png


    After that it was time for peace with Spain, as more military gains were becoming harder to get.

    2 peace spain.png


    Spain was forced to release Granada and Sardinia as independent nations . But , in contrast to more recent peace treaties, Oda also took provinces directly . That was because there were no more nations inside Spain to release. And Aragon would have been too large to become a Daimyo. The provinces Oda took were all cores of Aragon, and were distributed between Catalonia and Granada ( once the latter became a Daimyo) . That way, when the next war with Spain comes, Aragon could be released and could be turned into a Daimyo . This land grab of course created some aggressive expansion notoriety for Oda. This could become problematic for Oda as Spain was Catholic like most of Europe ( and Oda still had to dismantle the Catholic Empires of Poland, France and HRE). But for now this did not cause any issues.

    This was soon followed by the vassalization of Algiers, which resulted in the two provinces that Portugal returned recently becoming part of the Odan domain. Considering that Oda gained those from a Catholic nation without incurring any Aggressive Expansion , that was a good deal for the Japanese.

    3 algiers vassal.png


    After that it was France's turn.

    4 DOW France.png


    France was allied to Scotland, who was designated as a co-belligerent since they still had cores of Irish nations that could be released to join the Daimyo family . But before we get to that, we detour to the Balkans where Serb rebels succeeded in breaking free from Poland.

    5 Sebia free.png

    Oda immediately guaranteed Serbia, to protect it from opportunistic jackals like Venice ( or Ottomans). And over time, with improved relations and gifts, Serbia became a Daimyo as well. Now Oda was very wary of Venetian growth because they were getting close to Empire status. Similarly, the SHogun had kept an eye on other growing nations, and had decided that the time had come to bring down Ayutthaya down a peg or two , as they were the largest nation not yet an Empire.

    6 Deve.png


    So war was declared on the Indochinese. That had the added benefit of shoring up Oda's trade situation in the far east as well.
    7 DOW authhyaya.png


    Back in Europe the war with France and Scotland was proceeding smoothly. And it is a testimony to the power of the swarm that I do not feel the need to detail that war, and will just show one screenshot

    8 war with france.png


    And in international news that will be relevant down the line, a war between Mamluks and Persia was completed with a Persian victory

    9 Syria is persian.png


    The unfortunate Syrians found themselves now completely under Persian occupation, with the Egyptians kicked further South. Clearly Persia was becoming one of the more problematic Empires for Oda to deal with, certainly more so than the Ottomans.
    Back in Europe, peace was concluded with Scotland, with the release of future Daimyos Gaeldom, Ormond and Clanricarde.

    10 peace scitkabs.png


    That effectively gave Oda majority control of Ireland and a strong foothold in Britain itself. Brabant soon followed with a monetary peace ( no nations could be released, and no provinces were taken from the HRE member). Then France was to follow next, but first we detour back to Asia where Ayutthaya surrendered.

    11 Ayutthaya.png


    In the peace, Oda took all of Ayutthaya's provinces in Sumatra as well as their Center of Trade in Malacca node. That effectively secured Odan control of the node, and also made sure that Ayutthaya was not at risk of becoming an Empire any time soon.
    Finally it was time for peace with France. Here Oda faced a similar challenge to the ones faced with Spain and with Syria before . France had no more small nations to release. Burgundy was too large . Naples could have been released, but the Shogun secretly hoped that one day rebels there would succeed. That left Brittany who was just too large to vassalize

    12 France.png


    But the Shogun did not repeat the Syria mistake. Having taken a survey of Brittany's size ahead of the peace treaty, he arranged for Cornwall to annex Finistere across the Channel. That put Brittany's development under 100 , allowing vassalization to proceed. And in February of he following year, Brittany joined the Daimyo family ( with the help of some Blackmailing espionage).

    13 brittany vassalized.png


    Now as we saw, Oda also had to take some land directly from France which added to the Aggressive Expansion accumulation with the Catholic nations of Europe. But Luckily for Oda, the next stops on the Empire bashing train were in the East against the Muslims nations of Ottomans and Persia. The Ottomans came up first in July 1635

    14 Ottoimans and Ethiopia.png


    And luckily for Oda, the Ottomans had allied the 6th Empire, that of Ethiopia . This saved Oda from having to work on getting a casus belli on the Ethiopians ( the plan was to get a neighboring province from Mamluks first, but that was not necessary anymore). Since maximal territorial degradation of Ethiopia was desirable, they were designated as co-belligerent, which did not affect the enemy line up at all.

    The war followed the recent pattern of Odan troops leading the way against the enemy fortified cities, and letting the Daimyo swarm handle the rest. While that went on, Oda passed her 9th government reform. And the Shogun chose the Social Contract to improve the religious harmony inside the "Empire".

    15 gov tier 9.png


    [I used same reform in True Tsar to keep a variety of religions in anticipation of flipping via rebels. same strat here]

    By August 1637, Oda was ready for peace ( just two years were enough to conquer Ottomans, Ethiopia and their friends thanks to excellent siege ability and the swarm) . And when it make to the peace treaties, the Shogun wanted to maximize territorial gains while minimizing aggressive expansion reputation. So Odan diplomats had to be creative. In the case of Ottoman allies Kazakh and Transoxiana, they came up with the following

    16 transoxiana and kazakh.png


    First Transoxiana was made to return several cores to Kazakh, while making sure the Kazakh size did not get over 100 development. Then Kazakh was made to pay money to Oda, but did not lose any land ( thanks to the cores returned from Transoxiana they actually paid more). Finally, once Oda was at peace, Kazakh was convinced to become a Daimyo , which was easy as they loved Oda for returning their provinces from Transoxiana. The end result of that deal was that Oda ended up taking a bunch of Transoxianan and Kazakh land with no aggressive expansion whatsoever.

    The next deal was with Ethiopia.

    17 Ethiopia.png


    The customary pattern was followed. One strategic province to Oda, with several minor nations released Unfortunately, only 2 of the 5 released nations became Daimyos ( Harer and Jimma), with the other three citing a far distance from Odan borders to accept [in hindsight, I should have just flat out annexed Ethiopian clay, since they are the only Coptic nation and no one cares about them]

    Finally, it was time for peace with the Ottomans.

    18 peace ottomans.png


    In the peace Oda sought to maximize gains while still limiting aggressive expansion. But unfortunately the same problem we had with Spain and France ( the lack of small nations to release) appeared again. For some reason , Bulgaria could not be released ( likely because there was an active Bulgarian rebel army at the time ) . Crimea would have been too large to make into a Daimyo. So the Shogun had Ottomans release the one province minors of Greece ( in Chios) and Achaea ( in Euboea) as well as Ryazan and Kazan near Muscovy. All could be turned into Daimyos. He then had Oda annex a few province to her and to her vassals. But the largest number of provinces went to Qasim, who was an ally of Oda ( they were released out of Poland in a previous war ) . That way Qasim, not Oda, incurred the aggressive expansion reputation, but were very thankful to Oda and were still small enough to turn into a Daimyo ( their vassalization will be carried out after they are fed more land from Poland to their west) .

    With the Ottomans dealt with in this round, it was time for Persia. But first there was a change in leadership in Oda, as Yoshinobu II ( 4/2/2) abdicated in favor of his younger half-brother Yoshinobu III ( 4/6/4) , the one who became heir after the hunting accident that killed Alon the Filipino. Clearly an ambitious lad who figured out a way to the throne. May he live long and prosper!

    19 new king.png


    War was then declared on Persia on the day the truce expired ( May 1, 1638)

    20 DOW persia.png


    And although it was almost the end of the decade, the war was so swiftly concluded that we get to present the peace deal in this chapter

    21 Persia eace.png


    In the peace, Persia lost almost her entire coastline ( Hormuz is the only coastal province they still own). They were made to release Fars , Sindh and Armenia as free nations ( all three can become Daimyos).They also lost one Syrian province to Lebanon so that when Syria is released in the next war, she could be turned into a proper Daimyo as well. With that peace, the Shogun hoped to fragment the Persian Empire, and maybe rebels would help their westernmost provinces ( like Syria) break free. But he may have under-estimated the Persians, for they soon declared war on the Turks


    22 Persia dows ottomans.png


    As you can see from that last map, Ottomans were getting beaten in war by Poland as well. So there are certain to be changes to the map of the region in the next chapter. If Oda is lucky some of the changes would involve Ottomans losing land to someone who is neither Persia nor Poland, so that ODa would have less work to do .

    We close with a view of ODa's dominion

    23 status.png

    and her aggressive expansion reputation


    24 AE.png
     
    • 1Like
    • 1Love
    Reactions:
    Chapter 20: Deconstruction (1640-1650)
  • Chapter 20: Deconstruction (1640-1650)

    The last chapter saw the end of war with Spain, followed by wars with France, Ottomans, and Persia. So, with the exception of adding Persia to the rotation, we had continued with the order of Ottomans-Poland-Spain-France. So next up would have been Poland. But then things got interrupted by our ally ( and hoprefully future vassal) Qasim .

    1 Qasim CTA.png


    Qasim was calling Oda into a war of conquest against Great Horde. As you may recall, Qasim was released a couple of chapters ago from Poland. And instead of vassalizing them, they were kept as a regular ally and fed Ottoman land. And it was the Shogun's hope to give them more land from Poland in the upcoming war before finally turning them into a vassal. But they apparently had their own goals. Not wanting to lose that alliance and the chance to turn them into a Daimyo, Oda honored the call. And of course the war was trivial for Oda as the swarm simply occupied all the enemy lands ( in fact Qasim did not manage to occupy any provinces themselves) . But to help conclude the war quickly, the Shogun transferred occupation of Horde land to Qasim , which led to this peace treaty

    2 Qasim peace.png


    Qasim annexed two provinces from Great Horde, taking the aggressive expansion hit themselves. But despite this, Qasim was still small enough to accept vassal status with Oda. And that deal had to be done soon because when Oda went to declare war on Poland, she noticed that Qasim had also allied the Poles.

    3 no dow.png


    SO the Shogun decided Qasim had grown enough and turned them into another Daimyo . And it was only then that war was declared on Poland

    4 DOW Poland.png


    The war turned out to be harder than expected because Venice was helping Poland as Defender of the Faith . And England had two large armies in Britain that quickly scattered Oda's vassals there. And one immediate effect of the war was that Poland quickly concluded peace with Ottomans, taking land for herself.

    5 Poland peaces Ottos.png


    unfortunately Poland did not force Ottomans to release any nations or give land to 3rd parties. So the total sum of land Oda had to take away from the large Empires remained constant. but in any case, Oda wuickly occupied Central Poland, and in a replay of hte previous war, sent the fleet with loaded troops from Stettin to England. There Oda forces dealt severe defeats to teh English at Sussex and York, and helped the beleaguered Daimyos of Ireland retake their capitals.

    6 England invasion.png


    And in Italy, ODa had to spent some manpower on battles and sieges before Venice was defeated ( although the capital city of Venezia could not be taken due to the Venetian fleet).

    7 Italy theatre.png


    The first peace treaty was with England, who was made to release Wales

    8 walres released.png


    Wales was not too large and became a Daimyo a few months later. As for Venice, they were made to release Albania, who also became a Daimyo later on .

    9 venice releases albania.png


    That left POland . Here there were still several nations that could be released, the largest being Lithuania.

    10 poland released lithania.png


    A quick census of Lithuanian development showed that they could become a Daimyo after the peace, and indeed they were made so. The other released nations, Silesia and Crimea were kept independent, but still guaranteed by Oda. The plan was to give them territory in future wars before turning them into Daimyos.
    After the Poland war, it would be Spain next. but in the peace interlude the Shogun took care of some housekeeping. Oda finally moved her main trade port to Malacca ( h/t @Nikolai II ) , which led to a slight increase in trade income

    11 move trade.png


    That move would become more beneficial over time as more Europeans colonized the East Indies and Oda gained more provinces there ( by fighting said EUropeans) . And in other international news, Ottomans lost land to Persia. And just like when they lost land to Poland, the land moved from one Empire to another, so Oda did not really care about this .

    12 Otto lose to Persia.png


    The war with Spain came next.

    13 DOW Spain.png


    Again Oda found herself fighting a strong Venice ( who was defender of the Faith ) . And of the enemy nations that Oda had to conquer in this war, Venice was the toughest. Determined to crush them once and for all, the Shogun ordered the navy to challenge them for supremacy in the Mediterranean. And the initial battle did not go well for the Odan fleet, which had to withdraw at the Battle of Taranto.

    14 first engagement.png


    But the Shogun persisted. And after Treviso fell, the fleet was moved there just opposite Venice. Then when the main Venetian fleet was spotted transporting troops in the Adriatic , far away from Venezia itself, the fleet was sallied out and a unit moved rapidly from Treviso into Venezia before the Venetian fleet could return.

    15 venice invaded.png


    After that event, the war was effectively over as Venice city was eventually captured and the venetians made to free the Italian city states of Bologna, Pisa and Ferrara.

    16 peace venice.png

    All three italian minors would become Daimyos after the war. The defeat of Venice left Spain as the only contender on the enemy side. And here Oda had to wait a bit longer for peace because Spain's Aragonese provinces were occupied by Holland in a separate war .

    17 holland occupied huesac.png

    And that meant Aragon could not be released as a nation out of Spain. So Oda spent the next few months preparing for the next war against France. But luckily , Holland and Spain made peace and ODa was able to release Aragon from Spain at the peace table.

    18 Spain peace.png


    By releasing Aragon from Spain, Oda was effectively "deconstructing" Spain . For if one thinks of Spain as having been created by the union of Castile and Aragon, then splitting Aragon off is very important step, at least symbolically, towards the elimination of the Spanish Empire. Similarly, this decade saw Lithuania being split off the Commonwealth, essentially deconstructing the latter into Poland and Lithuania again. And hopefully the next decade will see France part away with Burgundy, another early rival whose absorption was a step on France's road to Empire, and whose loss will be a step on her road to oblivion.


    19 manufacturies.png


    Finally before we close the decade, we will update our list of Empires, noting that Sicily , who is geographically outside of the Holy Roman Empire is actually the Holy Roman Emperor. And that Bulgaria, who is a potential vassal of Oda, claims Empire rank

    20 empires.png


    21 status.png
     
    • 2Like
    • 1Love
    Reactions:
    Chapter 21: The Ones That Got Away (1650-1660)
  • Chapter 21: The Ones That Got Away (1650-1660)

    We left the last chapter with Oda ready to pounce on France. And as soon as Aragon became a Daimyo, war was declared

    1 dow france.png


    The war was easy for Oda. So easy in fact, that Oda's ally Vijayanagar asked Oda to join them in attacking Bengal

    2 decline Vijay.png


    Seeing that Vijayanagar had become too big , Oda declined to help them. And thus ended the last of the Indian subcontinent alliances that Oda started over a hundred years ago to contain the Bahmanis.

    Back in Europe, after two years of sieges , France capitulated.

    3 France peace.png


    Oda took no land for herself, but forced France to release Burgundy and Naples, two very large nations. France lost more than 1 tenth of her development as a result of this.
    Immediately after the war, the Shogun worked on wooing Burgundy to his side . But the Burgundians had other ideas, and applied to join the Holy Roman Empire instead

    4 burgundy enters HRE.png


    The Shogun ordered his diplomats to hurry up with improving relations with Burgundy, sending gifts and upgrading the diplomatic reputation of Oda (via Sankin Kotai edict) . He knew that the HRE was going to deliberate about Burgundy for a year, and that gave Oda time. And after some wooing, Burgundy appeared agreeable to vassalization.

    5 BUrgundy vassalizable.png


    It was then just a matter on waiting for Diplomats to improve relations with Burgundy before the deal was sealed. But then the Shogun got distracted by the expiration of the truce with the Ottomans .

    6 Ottoman truce out.png


    Oda had her armies positioned north of the Black Sea , ready for an attack. But the Shogun decided against it . He had been watching with interest the large Bulgarian and Crimean separatist rebellions that the Ottomans seemed unable to put down. (the Ottomans were in the midst of a Janissary disaster it seemed ) And some of the provinces had been rebel-controlled since 1649 . So if Oda waited just long enough, the rebels would take care of downsizing the Ottomans quite a bit. And since Oda had managed to make Crimea and Bulgaria into Daimyos, she would gain provinces "for free". So the war was put on hold, and preparations were instead made for war on Persia ( and of course, we forgot about Burgundy :( ) .

    But Oda's plans for the region were thrown off when Daimyo Wallachia declared Sengoku on BUlgaria.

    7 Sengoku wallachia.png


    Now Sengoku wars were fairly common among the Daimyos, and the Shogun welcomed them as opportunities to enforce Seppuku . But this time it was different, because Wallachia threatened to completely swallow Bulgaria. So the Shogun not only demanded Seppuku from the Wallachians, he also recruited their best general to weaken them . But beyond that, there was not much Oda could do directly to help Bulgaria [in hindsight , I should have gifted them money ] .
    Meanwhile, in more "Empire" related news, the Aztecs seemed to be faring poorly against New Spain.

    8  Aztec trimmed.png


    For Oda , this was a welcome development. The smaller the land held by Empires the better.

    Back in Europe, Wallachia ended up swallowing Bulgaria completely .

    9 bye bye BUlgaria.png


    The chance for BUlgarian rebels to grow Oda's domain had disappeared. Oh well, though the Shogun. ANd he proceeded with his plans to attack Persia

    10 dow persia.png


    But then not even one month into the war, rebels enforced their demands on the Ottomans, and Bulgaria became independent again, albeit with different borders

    11 Bulgaria free again.png


    At the same time, Crimean rebels managed to transfer several Ottoman provinces to Crimea, who was an Oda Daimyo. So in that regard, waiting on the war with Ottomans paid off, as Oda grew without incurring any expense. However, Wallachia's bad actions ended up costing us the BUlgarian provinces.
    Now seeing how useful Ottoman rebels were, the Shogun decided to use the spy network inside Ottomans to support Tripolitanian rebels. Whether that would lead to a successful result remains to be seen

    12 tripoli rebels.png


    Now back to the war with Persia, where Japanese troops advanced methodically, taking fort after fort until they reached the Eastern borders of Persia and crossed into Bahamanis and took their capital Bidar


    13 vijay bengal.png

    The fall of the Bahmani capital coincided with a peace treaty between Vijayanagar and Bengal ( the war we declined a CTA for at the start of the chapter) . Vijayanagar annexed a large swath of Bengali land, getting them close to Empire size.

    Concerned about Vijayanagar's growth , the Shogun decided to end the war with Persia and Bahmanis. First the Bahmanis

    14 peace Bahmanis.png


    The Bahmanis released Gujarat and Junagarh . Both will be turned in Daimyos later. And ceded one province to Oda to allow fabrication of claims on Vijayanagar

    Then the Persians signed peace

    15 Persia peace.png


    The Persians were forced to grant independence to Syria ( again) , Afghanistan, Baluchistan, Khiva and Mewar. Effectively their entire Eastern border now consisted of Oda vassals-to-be, blocking that avenue of expansion . And all of the released nations soon became Daimyos, while Oda prepared for war against Vijayanagar

    16 mewar and firends.png


    It was then time to declare a preventative war on Vijayanager

    17 Dow VIjay allied to Jaunpur.png

    the purpose of the war was to prevent Vijayanagar from getting large enough to become an Empire. This was the case of the old adage "an ounce of prevention is better than a pound of cure" . The war was straightforward, with Oda leading sieges and letting the swarm occupy the rest.

    18 peace vijat.png


    The nations of Jumla, Bundelkhand, Venad, Mysore, Orissa and Golkonda were all released and all of them are agreeable to becoming Daimyos [some with a margin under 15, so needed the Espionage Blackmailing idea]

    And that peace treaty bring us to the end of the chapter. Oda had continued to grow with vassals, but let two prizes slip through this decade: Bulgaria and Burgundy

    19 bulgari and burgundy.png


    20 status.png


    ----

    1) war score for release nation depends on Oda's admin effieicency and warscore modifier. When I completed Malta forts to level 3 ( I did not show screenshot but that was done this chapter) , the cost of releasing nations dropped. This is NOT the same with allies, where feeding them provinces depends on their warscore modifiers. My next idea group will for sure be Diplmatic for the 20% war score cost reduction. At that point, I should be able to take off 300 Dev per war from each enemy ( currently I amd doing about 215 or so )


    2) I am thinking of dismantling HRE in next chapter. That way I can start to Daimyo some nations in there which would make later wars easier. And get Burgundy.

    3) I had annexed Kiev in teh last chapter. I am working on increasing Orthodox provinces in Oda so that I can convert via rebels as soon as I get the Sakoku law achievement .

    21 orthodox.png


    And I have beend developing Orthodox provinces with excess points, rather than Japanese or Korean provinces. For Skoku achievemet, I hve 5 of 6 needed incidents

    4) speaking of achievements, I accidently got viva la revolucion when I supported Crimean rebels just before they enforced their demands on Ottomans in this chapter

    22 vival larevolucion.png
     
    • 1Like
    • 1Love
    Reactions: