• We have updated our Community Code of Conduct. Please read through the new rules for the forum that are an integral part of Paradox Interactive’s User Agreement.
Sending the Bahama and Guyana Colonial Forces to Africa? That'll certainly confuse the enemy. Possibly your own troops as well, but that's the price you sometimes have to pay for a cunning plan.

Well, it's not like they'll see much use over there. They are also some of the more loyal colonies to the Empire, so it's easier to trust local police forces to maintain order.


Things are slowly heating up. Deploying the colonials to Africa makes a lot of sense - they're not particularly needed elsewhere and this enables Britain to utilise a force of people who, while not local, are used to the subtropic heat. Those listening posts are doing excellent work already, I should imagine that will become very useful once the war heats up. As I usually play minors, I often forget what an edge good radar and decryption can give you!

Natty squadron in Singapore, but I can see her meeting a bad fate if the IJN decides to focus on Malaysia over the US Islands. Hopefully China can hold out and keep the Japanese attention divided between three potential fronts.

Enjoyable update as usual!

Exactly! I foresee those colonial troops doing a lot of good in Africa and other areas. The listening posts are one of my favorite things about Britain, knowing where the enemy is, especially how many are in other places is such a nice thing to have. I'm planning on reinforcing the squadron in Singapore soon, but there are seven heavy cruisers already there. BB's and a few CV's would help a lot, but the Kreigsmarine and RM are of course more important in the overall sense.

Aaaaand subscribed. Sucks you couldn't stop the annexation of the Sudetenland, but would it be feasible for you to stand up for the rest of Czechoslovakia? Still understandable if Britain just isn't ready yet.

Unfortunately the AI in the game isn't exactly what I'd call smart, so if I do stop them from annexing the rest of Czechoslovakia the game gets wonky. I've done it a few times before and unless WWII runs pretty much as normal until Poland, the German AI usually ends up sitting in front of the Maginot line for a good chunk of the game until it or the USSR decides to declare war on one another.

Also while it would probably be somewhat feasible for me to stop them, I doubt I could stop them well and it'd end up in a stalemate which I'd likely eventually lose because France can't support me well enough as an ally and Germany is programmed to win.


As a note, I had to reload an earlier save do to some game/AI wonkiness but my next update should be tomorrow sometime.
 
Sorry for the delay, my weekend was much busier than I thought and a few things from school required my attention. I'll try to have an update today or in the next couple.

Subbed! And which mod are you using?

Historical Probability Project. It adjusts techs and doctrines along with some more events and various other things I forget.


It looks like things are falling into place for you. Nice.

They are!
 
So, after a long wait the next update is finally here! I feel like a real AAR now with all the delays and such. :p Any and all comments as to the content and format of my posts are very welcome. Onto the update!


Part 6: Stormfront

As the year of 1939 began, all of Europe seemed to be hunkering down in preparation for the seemingly inevitable war. The actors seemed to be the same as the Great War, though Austria had been swallowed by the Greater German Reich and Italy had thrown in with the Bosch after all. But Britain and France still stood and were preparing themselves for the imminent storm.

hoi3_tfh%202015-09-13%2019-04-02-29_zpstph1aw1y.png

British production, first quarter of 39.

Though the French had long been trying to dig their heads in the sand as to the fact that Germany would not be appeased, they had finally come around and were starting their own buildup, though slowly. The British buildup continued apace, with Duke of York ready to complete final commissioning in only a month and a half, with HMS Victorious ready to be commissioned in the middle of the year. Each of them would add much needed capability to the RN, as they were made with the latest shipbuilding techniques and would add a shot of life to the aging fleet.

Two more armor divisions were also being trained and fitted out for the army, which would bring their total complement up to ten. Though these divisions constituted only a portion of the total forces that Britain could bring to bear, they represented a great deal of her hard hitting power and planners were doing their best to make full use of their abilities while at the same time preserving much of their strength as Britain could hardly afford to waste such valuable assets. Three specialty divisions were also in early workups, with the Royal Marines training two divisions of troops along with the Empires call up of the famed Gurkha's in division force. Such troops would likely be needed on all fronts, though currently plans for them were speculative at best.


The first few months of the year were relatively quiet in the grand sense, though factories and shipyards around the world continued their noisy buildups of equipment. February found HMS Duke of York completed and delivered to the navy, where it was immediately assigned to the new Fast Battleship force. Comprised of the newly completed Duke of York and the modernized Warspite, Valiant and Queen Elizabeth along with appropriate escorts, none of the ships in the fleet made less than thirty knots. While the other older battleships would be kept back in Home Fleet for close in protection, it was planned that this force along with the soon to be larger British Carrier forces would be the new main striking arm of the fleet.

hoi3_tfh%202015-09-16%2021-09-58-24_zpsbkmidooa.png

Though still in the middle of working up, the crew of the newest fleet Battleship had a good ship and were more than prepared for a fight.

Along with the deteriorating situation in Europe, Japan continued its rampage through the Far East, where British power was much weaker. It was decided that with the completion of the Duke, that the fleet could finally cut free some real ships of the line for duty in the east. HMS Revenge and Revolution were cut free from duty guarding the Channel and ordered to proceed to Singapore to take up protection duties. Though they would still be outnumbered by the Japanese forces, the two battleships along with the mass of cruisers gathered their would provide much needed force projection in the area.


March broke the quiet of the political front and finally shattered all hopes of peace in Europe. Though Germany had seemed satisfied with the largely ethnically German portions of Czechoslovakia, on the 25th it was shown that they would never be satisfied. Acting quickly they issued an ultimatum to the Czech government dividing up their lands between Germany and her allies. The rump state of Slovakia was all that remained and her terrified government was a pawn of the Reich in every way.

hoi3_tfh%202015-09-16%2021-28-13-23_zpsx7fn0g70.png

Despite international outcry the partitioning of Czech lands went forwards without fighting.

Troubling but further from the minds of most people, Italy on the same day announced their takeover of the small Albanian state, a move that was more bluster and pose than anything as the Albanian's had little way of effectively fighting back against the Italian army and had nothing of value besides inflating Mussolini's ego.

hoi3_tfh%202015-09-16%2021-28-47-59_zpsekmqubfp.png

This of course was of little comfort to the Albanians as they fell under Italian control.


Though His Majesties government wanted to declare war over the blatant land grabs, their allies in France could not be swayed. Claiming difficulties rearming and issues on their homefront, the larger land partner of the alliance wouldn't declare war. Frustrated but unable to effectively fight Germany on the ground by herself, the government managed to get a promise from the French that further German aggression would be met by force. Since the only way for Germany to advance without coming into contact with British and French forces was east, that meant guaranteeing the recently reformed state of Poland.


hoi3_tfh%202015-09-16%2021-31-32-49_zpsvt89zcuu.png

It was as much as the Government could get from the French and they would take it as far as they could.

The end of the month brought a spate of sudden innovation in the aerospace industry, previously worked upon ideas being thrust forwards as the promise of war grew ever closer. Combining advances in engines, armament and fuel storage the RAF found itself scrambling to update their planes in record time, British industry straining to compensate for new developments while at the same time continuing their buildup. This all culminated in the new Westland Whirlwind, Britain's newest long range fighter and one that quickly replaced older air frame's to become the number one single seat fighter in the RAF's inventory.

hoi3_tfh%202015-09-16%2021-29-39-85_zpsdx47ilqi.png

05b7d2b2-dbb1-4800-918a-81a219cdaffd_zpspyx12h3o.png

Britain had come under attack by German Zeppelins during the Great War, the RAF would not allow Germany the luxury of controlling Britain's skies again.

Not to be outdone, the army announced another major breakthrough in equipment and doctrine of its own as the month ended. The jungles of Africa and Asia had long been the bane of all European troops that had operated in them, with casualties from disease and the environment oftentimes outnumbering those from enemy action. After many months of developing new equipment and listening to those in the armed forces from those places, the army had introduced gear which promised to reduce such things to the minimum unavoidable amount.

hoi3_tfh%202015-09-16%2021-31-53-61_zpsurdaysli.png

Though resistance against colonial involvement remained in certain places, it was quietly circulated to the right people that local help had been invaluable in developing the armies new techniques.

April and May were busy months for the Empire, with the focused upgrading of the RAF and the rush to complete the Armies new divisions. As June rolled around both of the previously training armor divisions were completed and integrated into the second Armor Corps, which was quietly sent to North Africa where Italian border posturing had grown worse as the months rolled on. The Gurkha's and Marines finished training during that same month, with all three divisions being formed of incredibly well trained and tough men by the standards of any army.
As there was no current need for the divisions in Britain, once formed they were also quickly sent to Africa, this time to the deserts on the border of Italy's newly conquered Abyssinian territories.


46cd7beb-4663-4ed5-b2df-0d13b62bbcea_zpsio5qggne.png

Up and coming, forward thinking Generals such as "Steve" Irwin were assigned to the new formations

hoi3_tfh%202015-09-17%2013-42-04-65_zpseodglsb0.png

As soon as British forces completed training and construction, more were ordered. The Duke of York made way for the Prince of Wales and new armored divisions continued to be trained and equipped.

July brought the completion of HMS Victorious, adding another full sized fleet carrier to the Royal Navies arsenal. With three now stationed at Scapa Flow, the unsinkable island nation now had the ability to project major airpower wherever it felt like using its much more mobile floating airfields. Though she was the most modern aircraft carrier in the world for the moment Victorious was soon promised to be eclipsed by HMS Formidable, which had begun construction before she had even been commissioned. Along with a growing number of escorts and aircraft, Britain's ability to project sea power had arguably never been greater.


hoi3_tfh%202015-09-28%2009-37-16-91_zpsvmwnzj4z.png

Though she was smaller than all the other likely participants, Britain was prepared to swing well above her weight.

July and August also brought along a number of important developments for the Army, with new combat radio's being developed that promised longer range and much cleared signals. Along with this came a better understanding of tank tactics, Britain's crews being on the front edge of ability in the still new field of war. With the co-ordination promised by communications and training, along with Britain's ability to intercept and decode enemy signals even faster than they could, it promised to be a frustrating war for any adversary.


However nothing would deter Hitler and the Nazi's from their drive for power. Late in the month British intercepts provided an indication that some deal had been made between the Nazi's and their avowed enemies in the Soviet Union. The extent of this deal was not known until a few days later as radio announcements from both Poland and Germany indicating sudden but fierce fighting along the Polish border.


105e0f8f-ef5a-4fe9-8bf9-40800f235819_zpsnauzfhfy.png

hoi3_tfh%202015-09-28%2009-45-57-89_zpsv1xjmesm.png


Though it took a few hours to become clear as to what exactly had happened, in the end their was only one conclusion to be made.​


The Empire was at war.


Our finest hour is now at hand. Let's give 'em Hell, boys!
 
Our finest hour is now at hand. Let's give 'em Hell, boys!

Jerry sure as hell won't know what hit him this time!

are you planing on sending any troops or planes to Poland?what about Norway?

Poland, no. Unfortunately the same constraints as real life prevent effective deployment of the British army to Poland in HOI. I need to reinforce (My fault, probably should've done it a bit before), supply through the Baltic would be horrible and a bit gamey, and Germany simply has a bigger army than me.

Norway, that I might try depending on if Germany invades or not, seeing as how the AI is a bit inconsistent in invading them.
 
are you planing on sending troops to France or first knock Italy out of the war if they joined.have you reinforced your pacific forces the Japanese are likely to declare war on you anytime unless they somehow decide to go after the Russians??
 
are you planing on sending troops to France or first knock Italy out of the war if they joined.have you reinforced your pacific forces the Japanese are likely to declare war on you anytime unless they somehow decide to go after the Russians??

I'll do my best to answer these questions in the next major update, spoiling what's coming isn't very good storytelling.
 
Oh dear, that Hitler chap has gone too far this time. Who would've thought he'd go this far over the Germans in Danzig? No matter, he'll likely come to see reason and come to the negotiation table soon. By Christmas this will have all blown over, mark my words!

Great update as usual. I mostly play minor powers and so I'm always a little bit surprised by just how much you can build as a Great Power. You've done a really good job of keeping the strategic picture clear without overloading us with too many details. It's just a shame there's not a quick and easy way to show overall tech progress due to the nature of the game's setup.
 
it was rhetorical question if it was neutral would you invite it in the allies camp or not since sometimes italy can be very hepful and sometimes it can be overrun in a few months by Germany
I think I've seen Italy go allies once. So, don't know.

Just posting to say that I'm subbing to this AAR. Nice written style and it looks to be interesting -- I don't normally use mods, but this makes me want to download one now.
Glad to have another reader! As for mods, I really like HPP because it streamlines the techs and doctrines while giving out a few neat bonuses and such at proper times. I'd suggest it.

Oh dear, that Hitler chap has gone too far this time. Who would've thought he'd go this far over the Germans in Danzig? No matter, he'll likely come to see reason and come to the negotiation table soon. By Christmas this will have all blown over, mark my words!

Great update as usual. I mostly play minor powers and so I'm always a little bit surprised by just how much you can build as a Great Power. You've done a really good job of keeping the strategic picture clear without overloading us with too many details. It's just a shame there's not a quick and easy way to show overall tech progress due to the nature of the game's setup.

That Hitler fellow sure has gone too far this time, but I'm not sure it'll be over by Christmas! (That'd be boring.)

As for my production, I'm really pushing the limits now since wartime divisional production eats up a lot of IC. I currently have an additional armored corps in production and they each cost a tad bit over 25 IC a piece :eek:, so I'm a bit stretched.

As for techs, I'll try to get them in the next update but suffice it to say that I'm basically on top of all the major ones, with IC, AG and Supply production getting one year advances, everything else like INF, ARM, Fighter and ships techs being researched as the year comes around. I'm mostly keeping up with doctrines too, though we'll see how that goes now that the war starts. I will have 1943 level Mech and Electrical computers in 1940 though. Hopefully that'll let me stay ahead on techs. :D
 
As for my production, I'm really pushing the limits now since wartime divisional production eats up a lot of IC. I currently have an additional armored corps in production and they each cost a tad bit over 25 IC a piece :eek:, so I'm a bit stretched.

Small tip for the future, though it won't help for the already built - brigades often have very different build times and for expensive units like armour you might be able to save a lot of IC days if you build the brigades individually rather than as a whole division, as some brigades will finish earlier than others. This lets you squeeze a bit extra out of your IC.
 
Small tip for the future, though it won't help for the already built - brigades often have very different build times and for expensive units like armour you might be able to save a lot of IC days if you build the brigades individually rather than as a whole division, as some brigades will finish earlier than others. This lets you squeeze a bit extra out of your IC.

Well, I could've used that earlier! Never thought of it before and honestly I'm a bit obsessed with divisional formations, but I'll keep it in mind for later.
 
Chapter 2: The Empire at war.

Part 1: The Happy times.

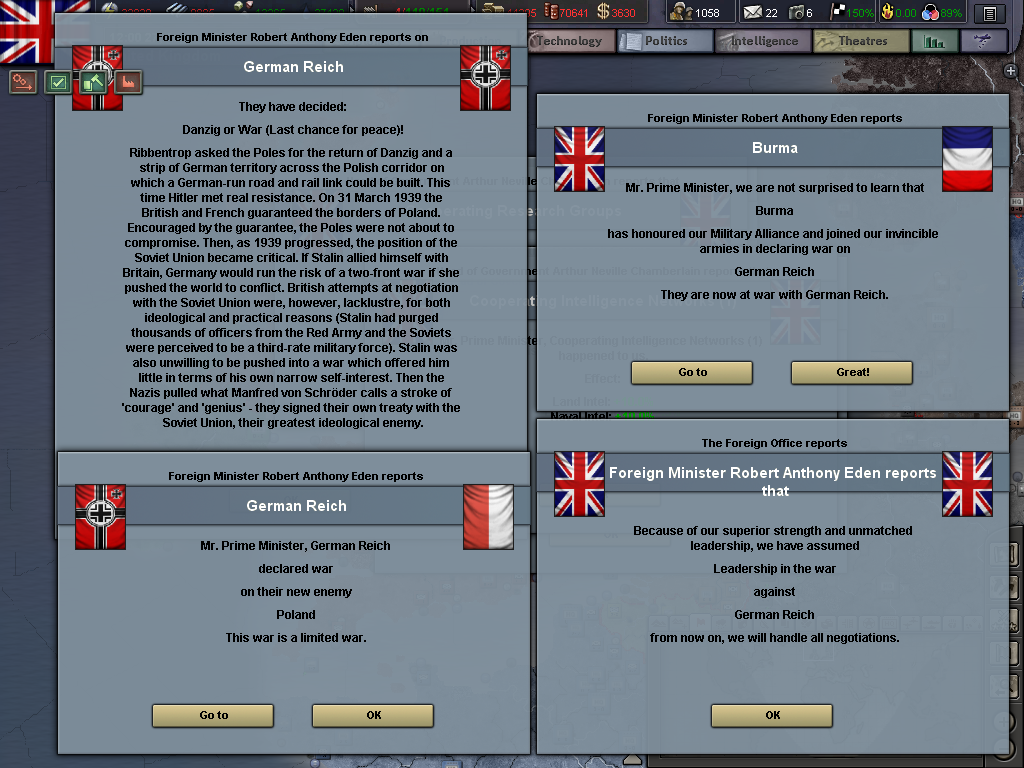
Late on August 27th 1939 the German Reich declared war on Poland, with waves of troops immediately launching themselves over the border. Polish troops had noticed the massing and positioned themselves in preparation of the assault, but there was ultimately little they could do against the much larger and mostly better equipped German army. Though they bled their enemy, they were generally overwhelmed.

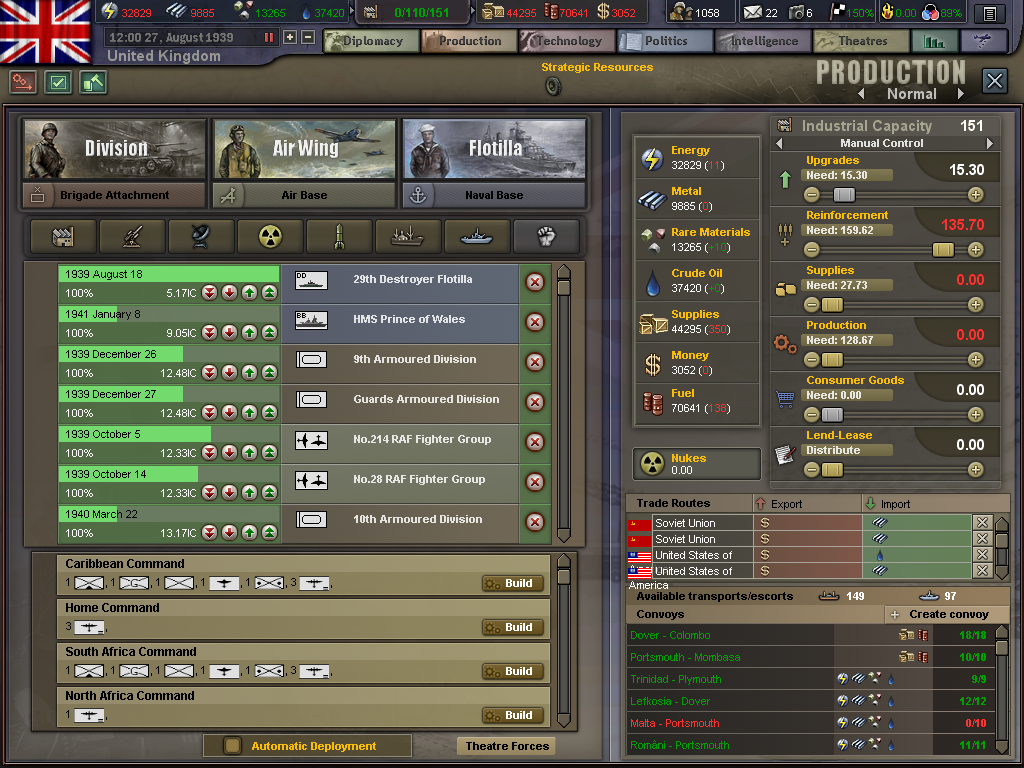
It wasn't until August 28th that a formal declaration of war was announced between the British Empire and Germany, but immediate alerts went out to the Royal Navy and Airforce to recall all personnel and the army received orders to recall all reserve troops on short notice, which were put into effect on noon of the 28th. This meant that Britain was ready for immediate defensive and offensive naval action, with available air cover from both the RAF and the RN's carriers ready to do whatever was needed. The army was prepared in the large sense, but needed to bring all of its formations up to strength, which was the main focus of the government in the coming weeks as they were unsure if the Germans would try to blitz France at the same time as Poland.

hoi3_tfh%202015-09-28%2009-47-45-53_zpsoloydxjp.png

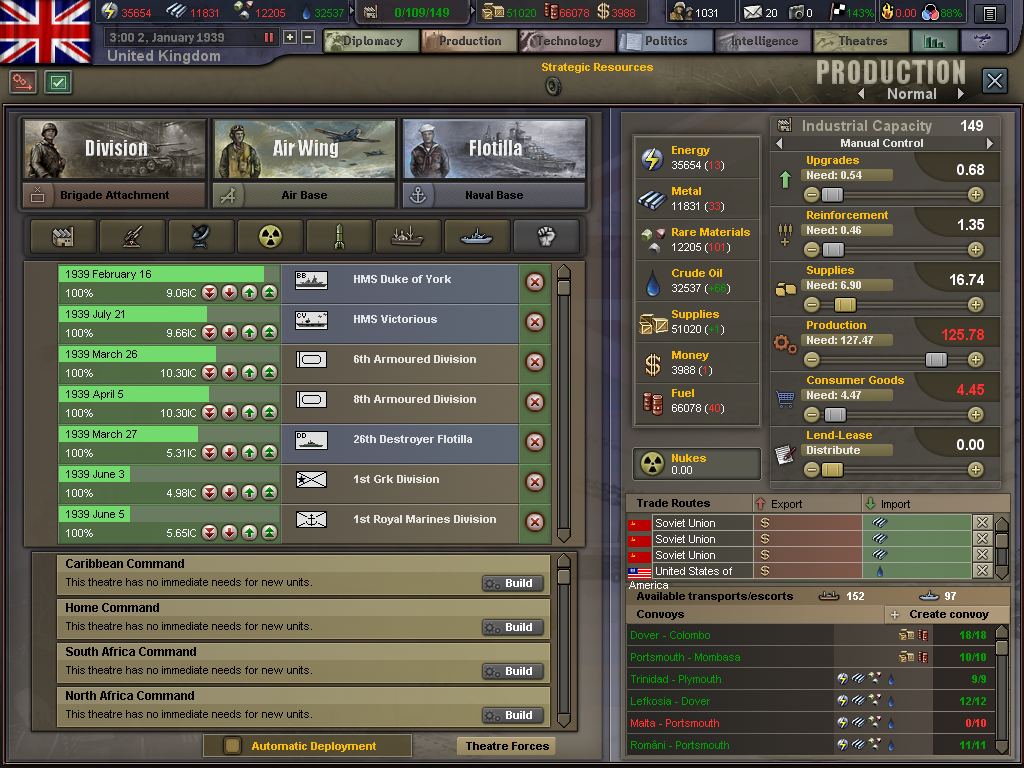
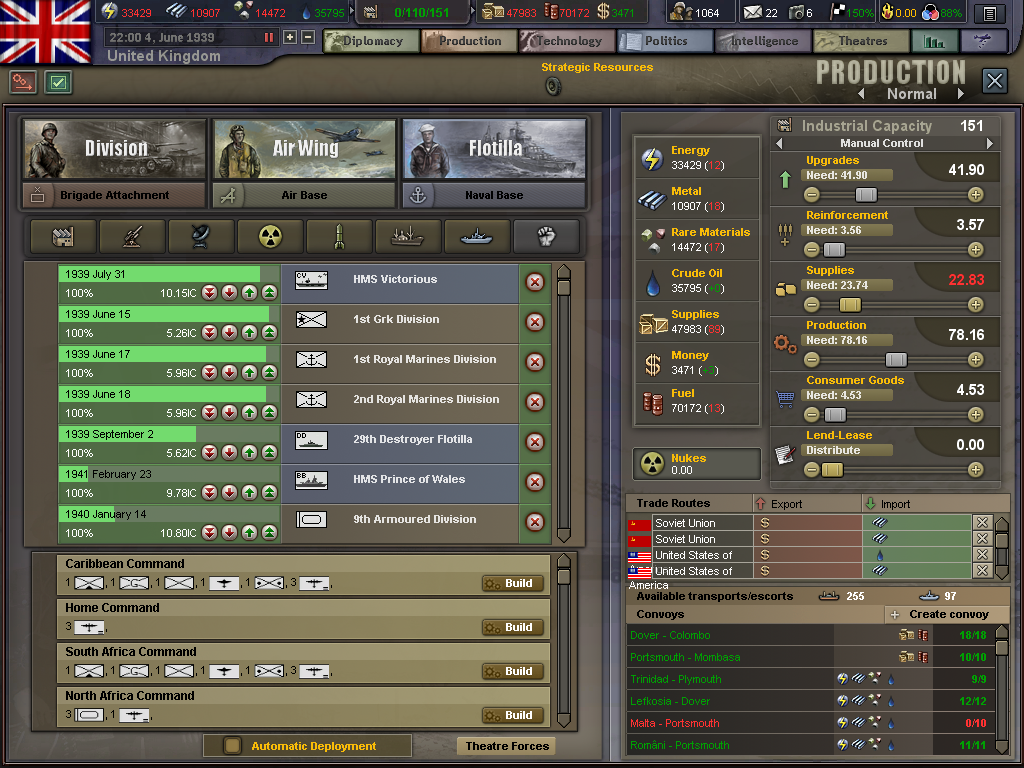
Production on new forces was temporarily disrupted as men from all walks of life were called up to their army.

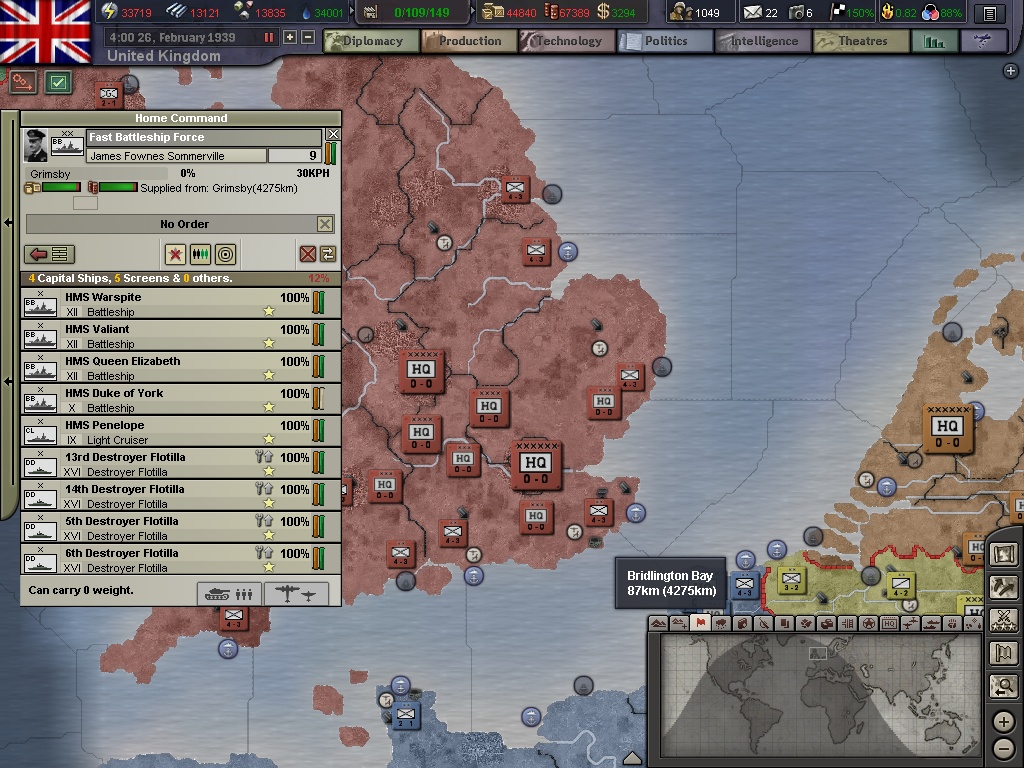
The first clash of battle between British and German forces happened later in the day on August 28th, barely after a formal declaration of war between the two countries cleared the cables between them. British radio intercept technicians, who had long since cracked German naval codes, intercepted orders for a German task-force containing a number of large surface ships to move down the Dutch coast and past Amsterdam, presumably as a warning to the government to stay out of the developing conflict. Taking advantage of the Royal Navies already staffed and ready ships the admiralty ordered and immediate sortie of of both the Fast Battleship task-force and the Battlecruiser task-force to intercept the German ships.

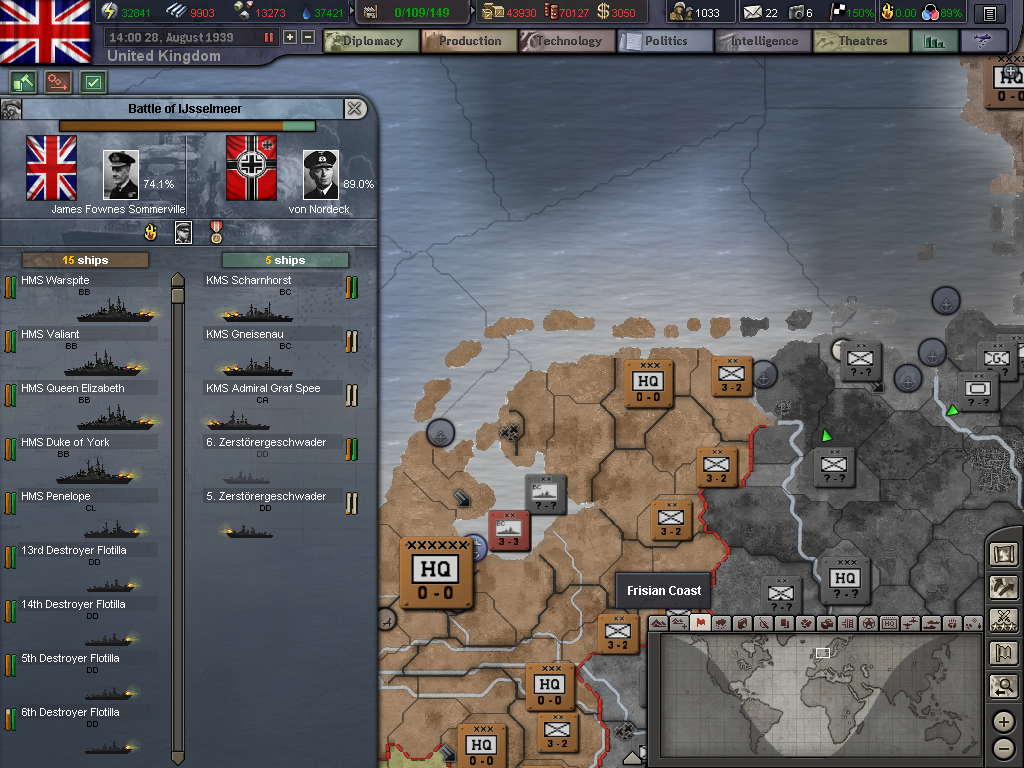
Shortly after 2:15 PM on the 28th, the Fast Battleship task-force under Admiral Sir James Sommerville was at the entrance the Ijsselmeer in pursuit of what had been determined to be the German Battlecruisers Scharnhorst and Gneisenau, the heavy cruiser Graf Spee and about ten destroyers. Having already passed by then Dutch coast and on their way out, the German task-force was taken under long range fire by all four Battleships. Completely outgunned Admiral von Nordeck the commander of the German ships ordered them to flank speed in an attempt to flee. While the correct decision, von Nordeck had underestimated the speed of the British ships. Though his ships were faster than the British, it wasn't enough to get them out of range quickly as Admiral Sommerville had placed his ships in the perfect position.

hoi3_tfh%202015-09-28%2011-48-10-47_zpsbsy02xtu.png

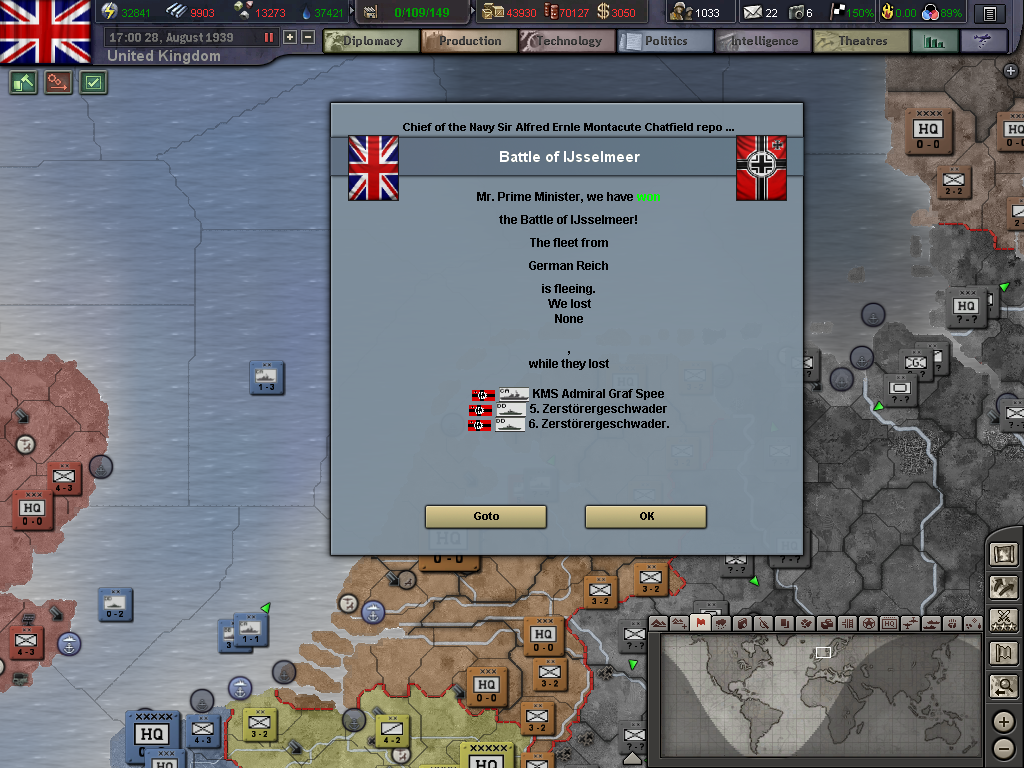
For over an hour von Nordeck's ships had to endure fire from the British ships. The German ships became strung out after a few minutes as von Nordeck had ordered max speed to all vessels, which all had different top speeds. As the battle ran on, each of the German ships was taken under fire in turn. All ten destroyers were destroyed one by one, most never even able to return fire. Graf Spee attempted to screen some of the smaller ships, but fire from two of the British battleships quickly bracketed her and smashed her to pieces though a few shots fired managed to damage HMS Penelope, the only cruiser in the task-force. Scharnhorst and Gneisenau both traded shots with the larger British vessels, Gneisenau taking several hard hits but not losing speed. Eventually both of the pocket Battleships managed to make it out of the range of the British ships, but the rest of the ships were all either burning or sunk along the Dutch coast.


hoi3_tfh%202015-09-28%2011-53-49-30_zpsqzge84kd.png

Though the British lost no ships, she lost several dozen sailors from hits landed by the Germans. The first men lost by the Empire in this war, they would not be the last.

Having just one a victory and wary of German planes attacking his ships in constricted waters, Sommerville withdrew after it became clear that the German ships could not be caught. Sailing back into port Sommerville's task-force was met by cheering crowds, Union Jacks waving in the wind. Though a small victory, it was one that seemed to prove that the British Empire was more than ready for the coming war.


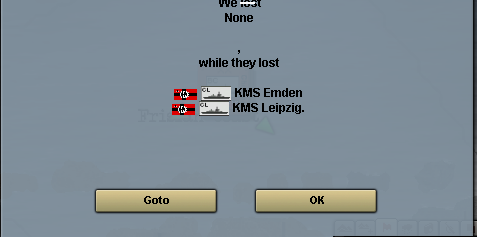
Further victories later the next day as Hood, Renown and Repulse along with their light cruiser escorts met three German light cruisers and their destroyer escorts, sinking two with little damage to themselves, only further increased the British morale. When combined with the quick Canadian declaration of war on the 4th of September and a massive wave of Indian volunteers as the news reached the Dominion, British opinion of the war was riding high.

60ca2b27-8a30-4f3a-83fa-3aec5c65c9a0_zpsry2vq3ob.png


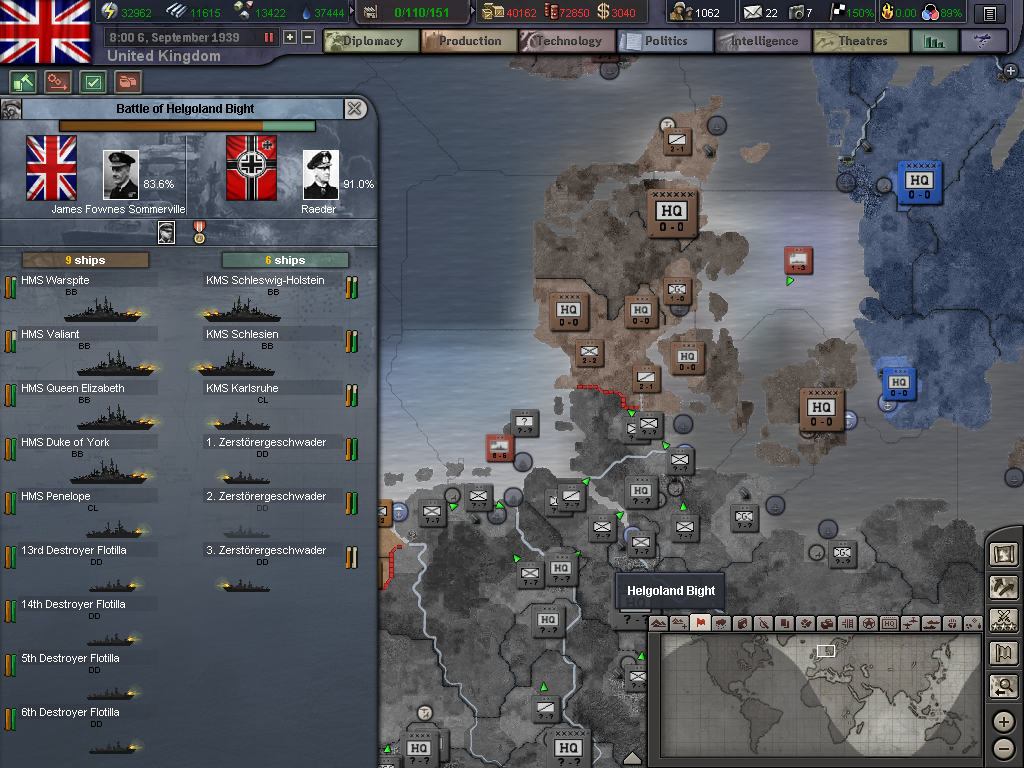
The greatest and most daring victory for the Royal Navy came a week and a half later, as Admiral Sommerville once again received information from British intercepts, this time accompanied by reports from British submarines, of further German naval movements. A large task-force was moving from German Baltic bases to Wilhelmshaven in an attempt to gather their forces and threaten British shipping. Sailing out in the early morning hours his taskforce managed to intercept the German one, though it was dangerously close to the German coast. Containing the two aging Deutschland class battleships leftover from the Great War as well as a cruiser and over a dozen destroyers, the task-force is completely surprised by the British ships.


hoi3_tfh%202015-09-28%2012-14-21-47_zpsavqqtw1n.png

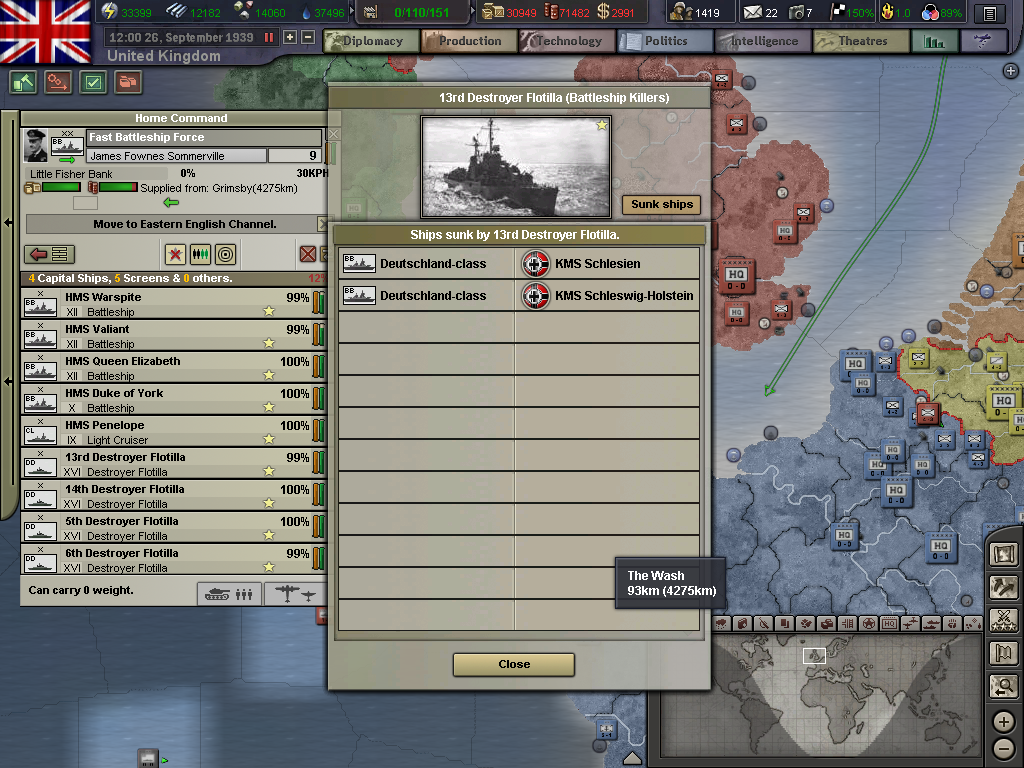
Admiral Raeder as the commander of the German ships immediately ordered the smaller German ships to flee, while he took the two aging and slow ships around in an attempt to slow the British fleet. Unfortunately for Raeder several of his ships refused to abandon him. Charging the British ships the Germans fired repeatedly, but managed no hits due to their older guns and rangefinders. British fire bracketed the Germans and several hits were landed, but they refused to go down. In a simultaneously daring and dangerous move, the Commander of the British 13th Destroyer flotilla, Captain Charles Saumarez Daniel ordered his ships to close to torpedo range. Dodging German fire, the four destroyers launched a tight spread of torpedo's at relatively close range. Unable to maneuver quickly enough to dodge, both of the German battleships took several torpedo hits and began to sink. As German sailors began to abandon ship, Admiral Raeder found himself put in a lifeboat and forced towards one of the German destroyers by his crew, saving him from British captivity. In the end, the Germans had lost two Battleships, another light cruiser and five destroyers.

hoi3_tfh%202015-09-28%2012-14-40-50_zps6d35f5rp.png

hoi3_tfh%202015-09-28%2012-43-26-50_zpstu3slwvu.png

The 13th Destroyer flotilla unofficially became known as the "Battleship Killers" after the battle.
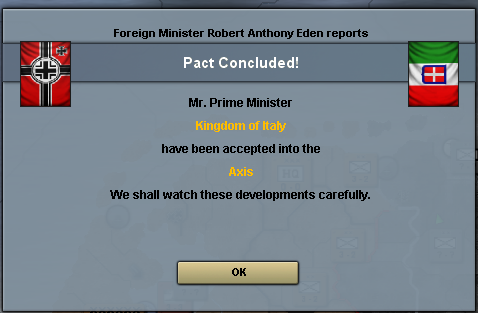
Following the battle, the British once again retired back to base triumphant, secure in the knowledge that much of the German fleet was already at the bottom of the North Sea. This triumph was dulled somewhat as news came shortly after that Italy and her relatively strong and modern Regia Marina had joined with Germany. Though there was no declaration of war between the two nations, it seemed inevitable that they would soon clash.

85c33c76-849d-4a90-a05d-2bc1fa4a64b0_zpsap8ao1ud.png

Despite the news morale remained high, as the Royal Navy had again proved its dominance of the sea.

Though the rest of the month was relatively quiet, though there were several attacks on British merchant shipping by German submarines. In return, the Germans paid heavily for their victories as British ASW groups and escorts pounced with their advanced detection gear and anti-submarine weapons. Over a dozen German submarines were confirmed sunk in that time, some with help from the French navy.

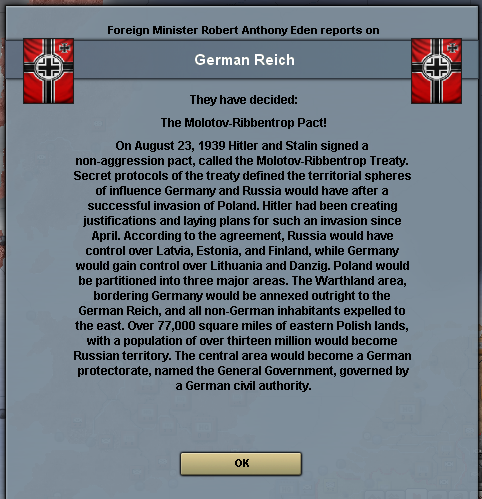
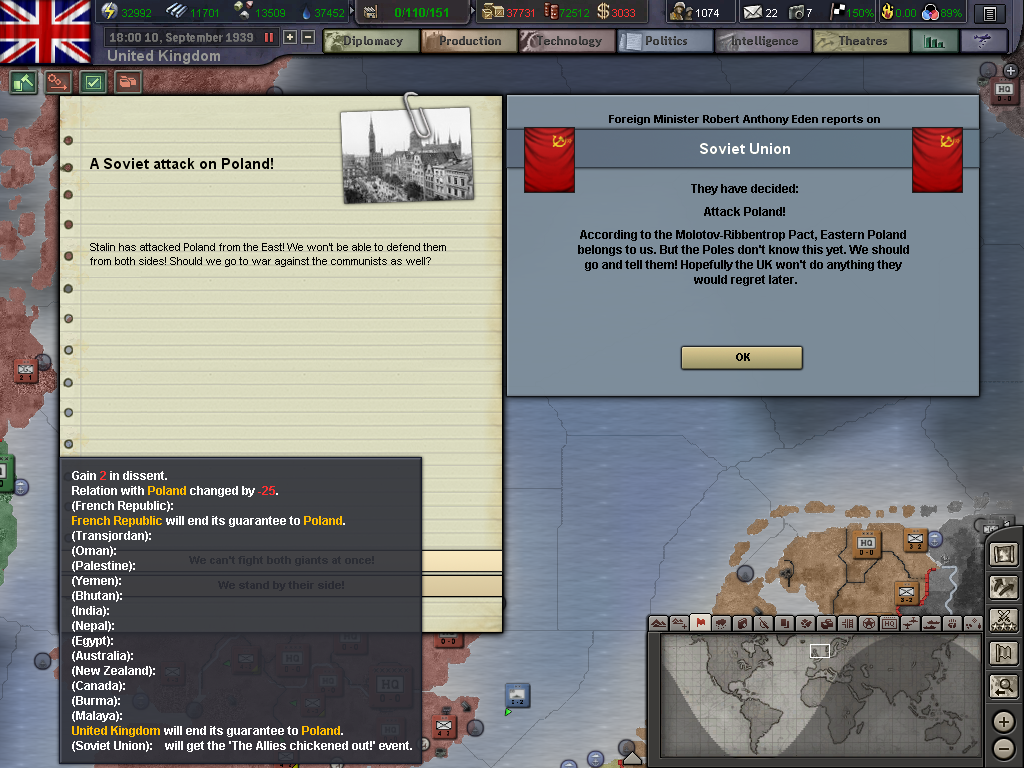
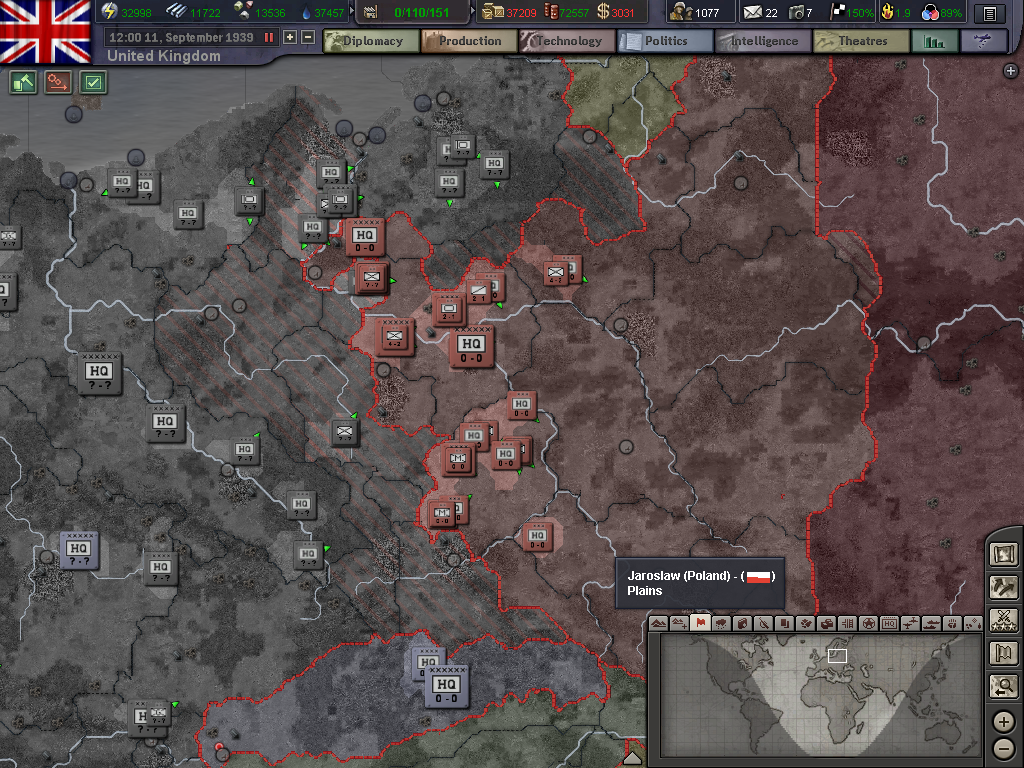
Even as that good news spread, there was bad news coming from Poland. Even as the British called up forces and retrained reservist members, the Polish Army was being pushed back by the Germans. Even with French support, there was little that could be done to stop them as much as some planners in the British General staff wanted to send the ready units of the army to try and aid the Polish. With Danzig falling withing only a few days, there was nowhere for the British to land without fighting and she didn't have enough ready divisions to force a landing. Following the Soviet declaration of war on Poland following shortly after, there was nothing that could be done and the government fell to Realpolitik and gave up all hope of saving the Poles.

hoi3_tfh%202015-09-28%2012-22-51-52_zpsi4ovl4ko.png


hoi3_tfh%202015-09-28%2012-23-47-54_zps2s7ewrf0.png

Though brave Polish forces were outnumbered and outgunned by the aggressive German army.
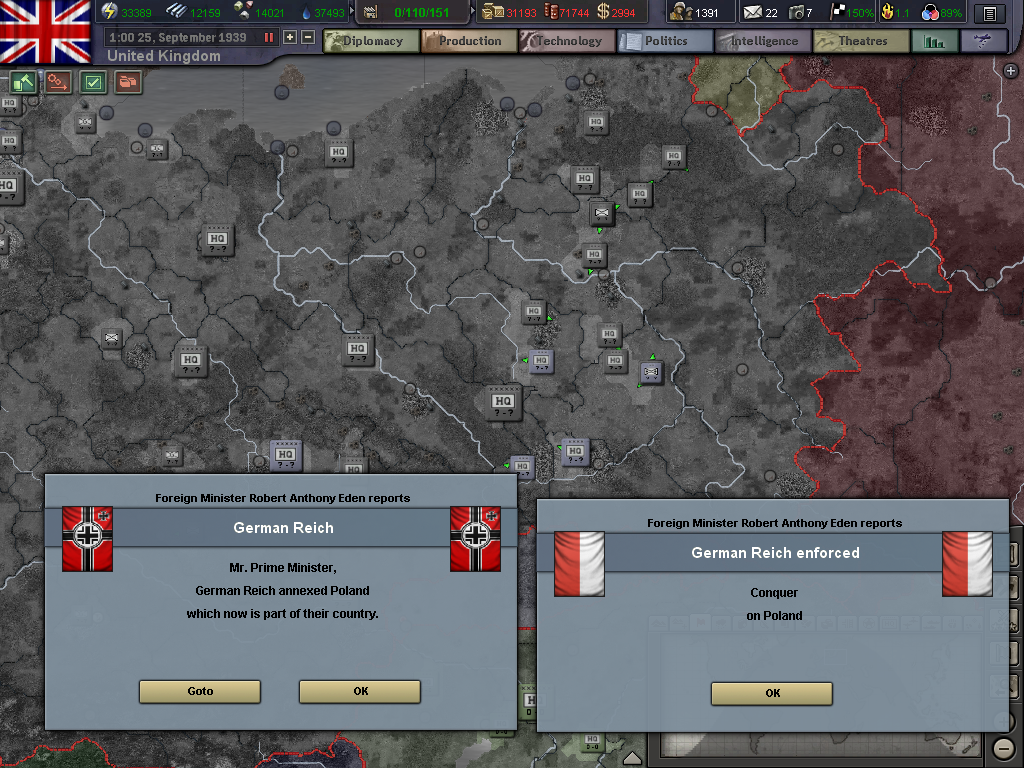
Though the RAF landed several air attacks on German facilities in the western part of the country, in the east there was nothing they could do even as the Polish armed forces collapsed. Like a building falling, there was nothing that could be done to stop it and on the 25th of September Poland capitulated to Germany.

hoi3_tfh%202015-09-28%2012-39-16-18_zpsjobhclpu.png

Though some Poles escaped to the Isles, most were understandably bitter about the lack of help their country received.

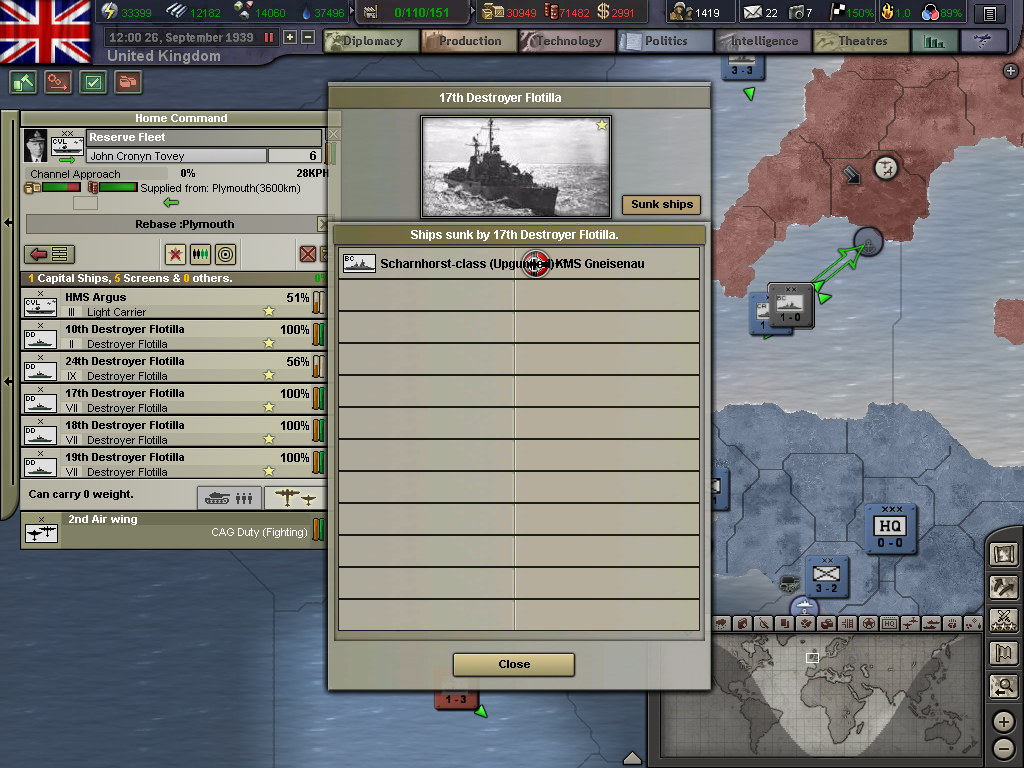
Later the next day mixed news came in from the fleet. HMS Argus and its destroyer escorts had been patrolling southwest of England on ASW duty when a task-force again containing Scharnhorst and Gneisenau along with several escorts tried to sneak through the channel. Encountering them in a spread out dispersion, Argus and her escorts came under fire from the larger German ships. Though several hits were taken by the British, Argus managed to launch torpedo bombers which managed to damage the German ships and several destroyers closed in on Gneisenau, which hadn't been fully repaired from her earlier fight with Sommerville's Battleships and was slower than the others. Taking several torpedo hits she foundered and was left behind by her sister ships as they continued to dash through the Channel. British destroyers picked up the survivors, taking them back to base as the destroyers escorted the Argus in for repairs.

hoi3_tfh%202015-09-28%2012-42-48-76_zpshcybiiou.png

Despite heavy damage, Argus managed to make Portsmouth under her own power.


Several days later, the General staff, in response to government demands of reassurance of Britain's readiness for the war, introduced the new specialist training program, which called for much higher standards on British officers and men in return for increased training time. Britain couldn't match the Germans for quantity on the ground, even with help from her dominions, so she would have to fight with quality.


252de6e7-809a-42f5-ac80-aaab19051579_zpsahbyeuyr.png

British men would be the best trained in the world, they couldn't afford anything else.

October found Germany declaring war and occupying Denmark in only a few days, the government quickly capitulating in face of overwhelming German military power. Britain had no time to do anything for her people, much less stop the Germans. A few Danish ships sought refuge in British ports, but other than that most Danes seemed to accept their position as a veritable German province.


As the month of October passed with little fighting aside from occasional air sorties back and forth, the British people began to realize that this would be another long and hard war, just like the previous Great War. German and French troops stared each other down from their border fortifications, neither side moving an inch. The General staff had sent the 1st Infantry corps in order to hold the British and French mutual support, but for the moment everything else seemed quiet as debate raged on what else to do with the British army and her tanks, which many felt would be wasted behind fortifications.


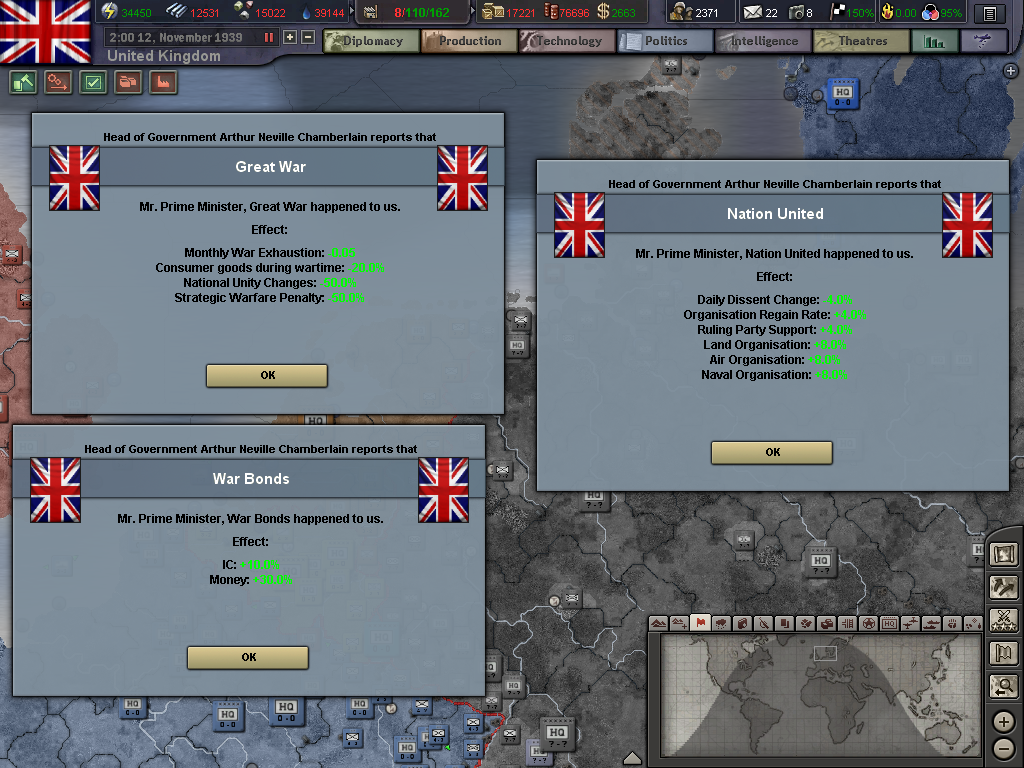
Early November found the British people buckling down and preparing for the long run. Factories ran 24 hours a day, every shift filled with newly trained workers. People bought war bonds, every cent promised for a tank, plane, ship or bullet. Even more than that, people simply pulled together, supporting their neighbors as sons and fathers went off to war, making sure that nothing strange happened to locked up buildings and that the Government had everything it needed to get the war won as fast as humanly possible.


hoi3_tfh%202015-09-28%2013-11-56-56_zpsux8wtwo6.png

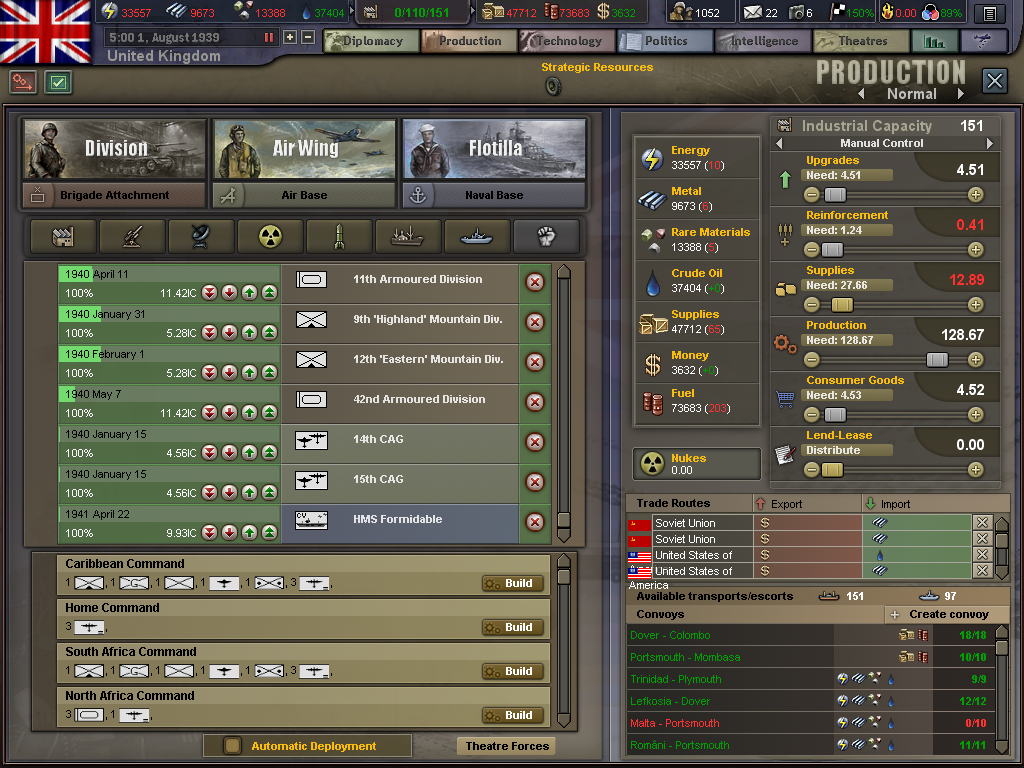
Industrial production during this time shot up massively as every sinew of the Empire was stretched towards victory.

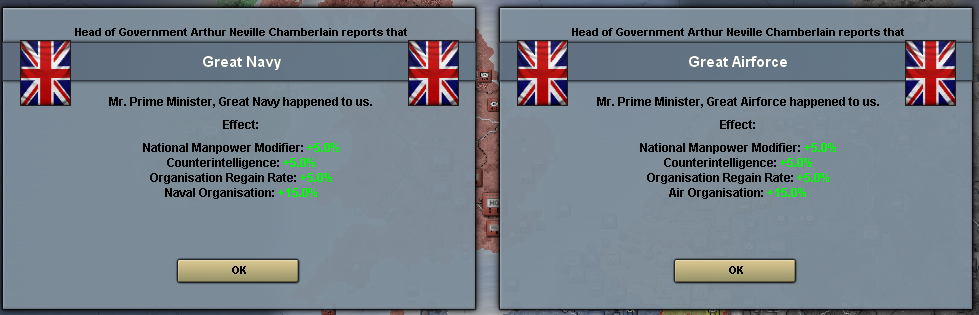
Recruitment for the Navy and Airforce increased massively, as both services were well respected and known by the public to be the Elite of the Empire. The army lagged behind in this area, as her forces weren't as well publicized or glamorous to the average citizen, though they still benefited from the general feeling of patriotism coming from the public.


d8c7742d-92b9-4d10-8e41-0183c6b5155d_zps74dd4maw.png

Britain was prepared to defend herself against all comers, the question was could she take the fight to the enemy.
The rest of November passed by relatively peacefully, aside from the debate that raged between the British and French general staff's on how to prosecute the war. The French expected the war to be one similar to the previous Great War, with long static lines and an eventual breakdown of German morale from starvation. They were prepared to sit behind the Maginot line as long as necessary and reinforce the Belgian forts and defensive river lines if the Germans decided to violate their neutrality once again.

The British argued against this, knowing that this Germany was unlikely to fold. There was no war with Russia, no quagmire in the East. Her population was united behind not only a powerful leader, but the desire to avenge their loss in the last war. This war would take initiative and daring to win and they couldn't afford to wait behind defenses for the Germans to fall apart on their own. Bomber command had ideas to bomb the Germans into submission, but even that would take years and with no guarantee without army support to back it up.

But the French would not budge and Prime Minister Chamberlain felt that he wasn't strong enough to deal with the war. After offering the position to Lord Halifax, who turned it down, the position was offered to the Conservative Firebrand Winston Churchill, who had been one of the first to join on King George's rearmament campaign. Offered the position late in the day on December 2nd, Churchill formally accepted the position in an early morning meeting on December 3rd. Younger and much more eager than Chamberlain about the war, he promised to be a good leader for the British people, immediately preparing to assume his position.


hoi3_tfh%202015-09-28%2015-02-31-30_zps8fmziieo.png

Though he had been brought back into the government earlier in the year, this was Churchill's first true power position since he had left after WWI.

The next months flew by in a strange dichotomy. There was officially a war declared between three of the worlds great powers, but there was little fighting going on. The Kreigsmarine had attempted to press German strength in the North Sea, but the Royal Navy had quickly dashed all of those hopes, sinking a large portion of the German surface fleet and sinking submarines at an amazing rate thanks to advanced ASW techniques and equipment. Thoroughly chastised, the Kreigsmarine now sat in port under heavy air cover, only her submarines even attempting action against the British.

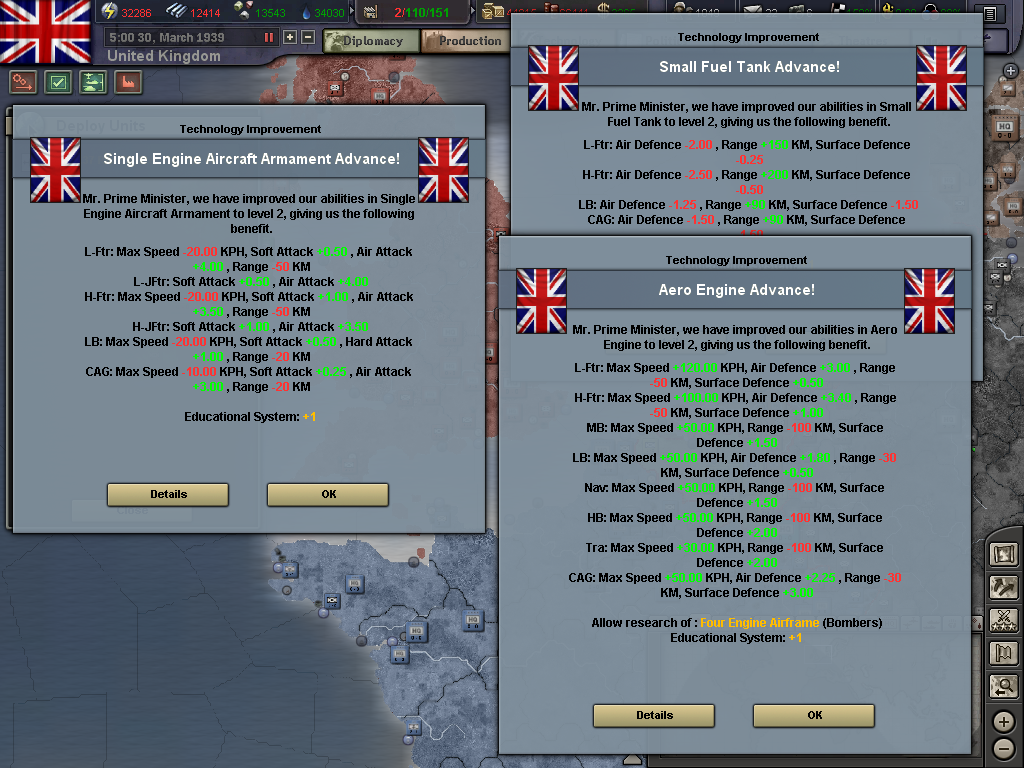
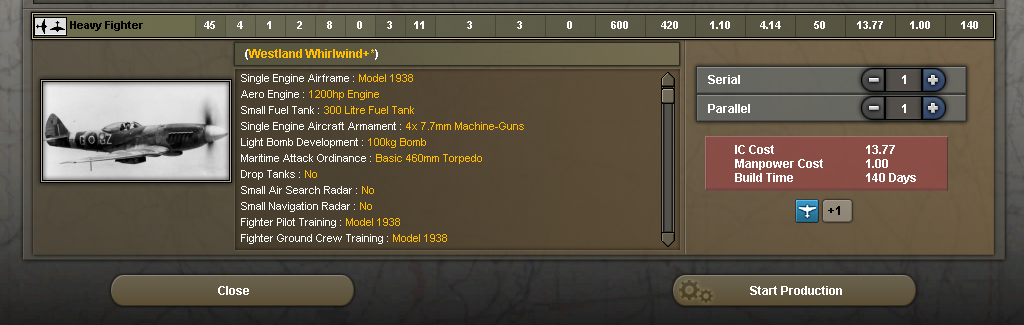
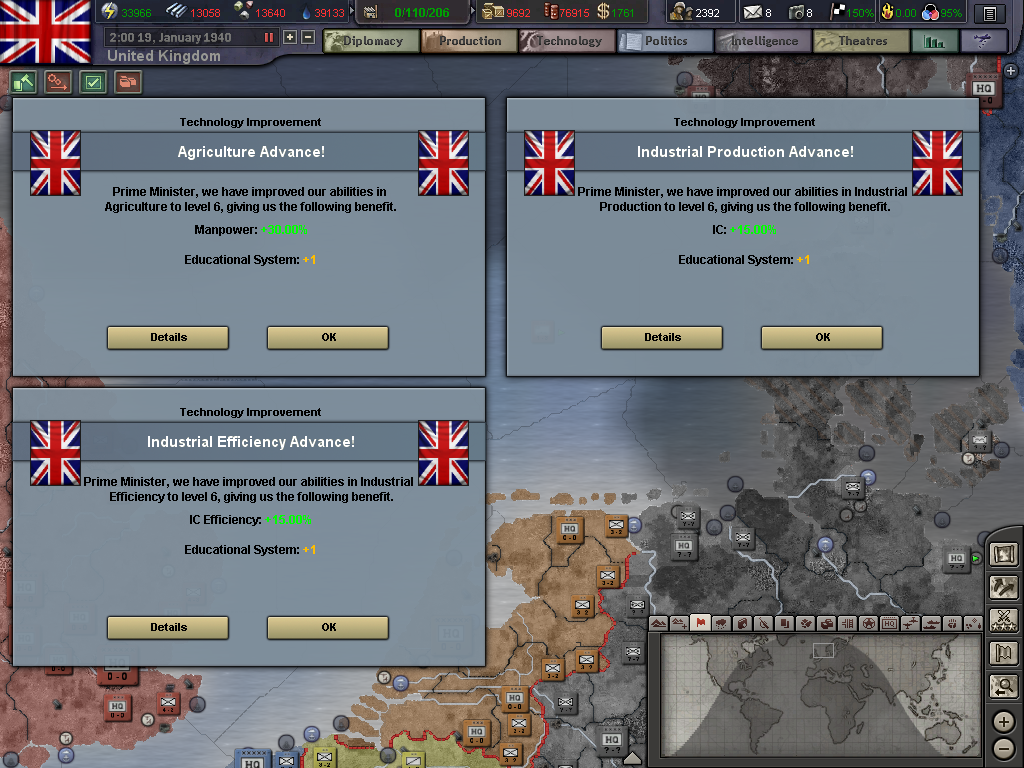
There had been no combat beyond that between the major powers, only occasional air skirmishes. Their were no developments from the front, no battles to be lost or won. It seemed like the world was at piece, but both sides knew that new fighting could break out any second. The only news came from the British homefront, where major updates in training occured for the RN and British designers pushed aeronautical theory and ground vehicle technology even further. Industrial capability and agricultural development also followed an increasing upwards trend, with production increasing amongst all fields.


hoi3_tfh%202015-09-28%2015-33-51-71_zps48rjskv3.png

British industrial power had never been higher.

Months passed by like this, with no moves by either side. Britain could do nothing without French backing directly against Germany aside from bombing. Italy hadn't formally declared war against either France or Britain and neither government wanted to increase the number of opponents they would be facing.


hoi3_tfh%202015-09-29%2013-13-07-66_zpspd8wwaly.png

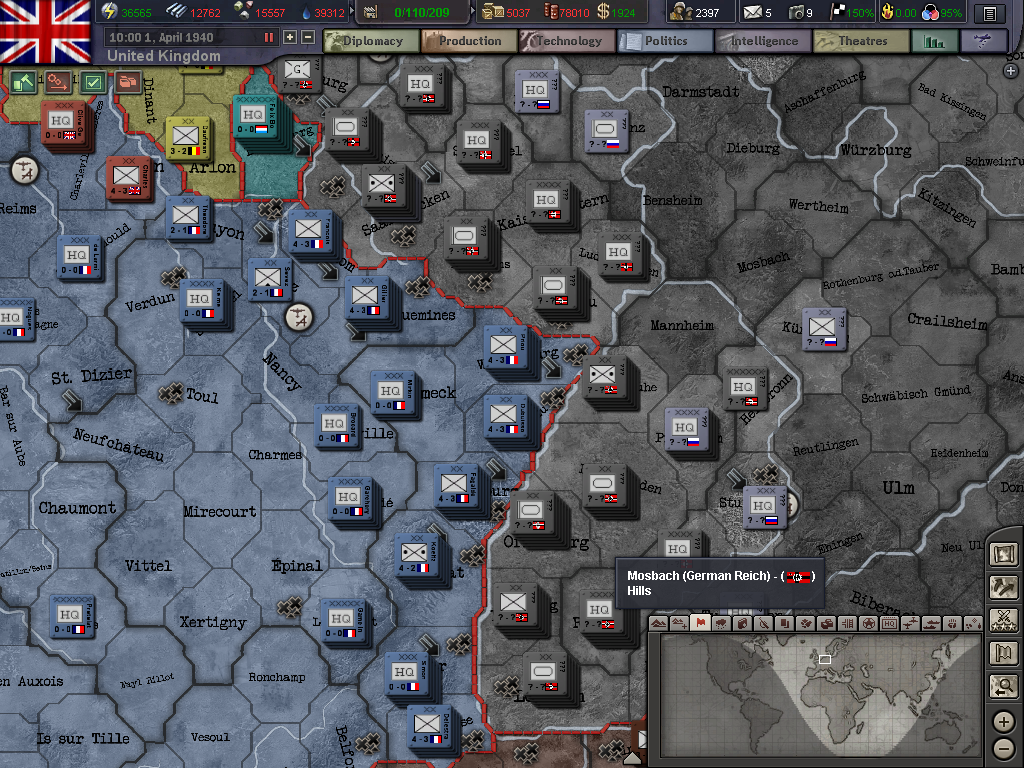
April found most of both armies sitting on their respective borders.

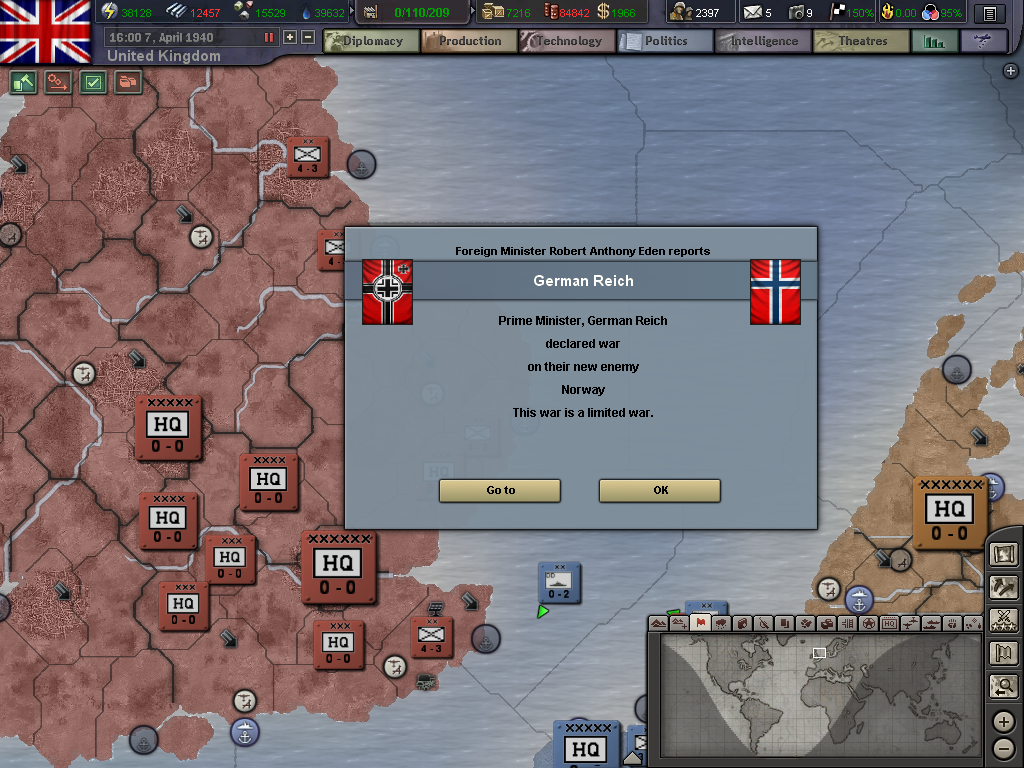
As the British General staff were despairing on ever being able to halt or even manage to hurt the German ability to wage war, the Germans suddenly opened up a new front that promised the British a place to act, even in a limited capability.

Norway.


hoi3_tfh%202015-09-29%2013-15-37-22_zpsckk4gfbr.png


Last edited:
Here's hoping you can save the Norwegians.
 
  • 1
Reactions: