• We have updated our Community Code of Conduct. Please read through the new rules for the forum that are an integral part of Paradox Interactive’s User Agreement.
CHAPTER THIRTY-NINE: Schmoozing Ireland, Stackwiping Scotland (November 1559-August 1562)
  • CHAPTER THIRTY-NINE: Schmoozing Ireland, Stackwiping Scotland
    |-|
    (November 1559-August 1562)

    Using 600 ducats I pay off 3 of our Bourgeoisie loans, leaving us with 2 leftover. I also trade some favors for manpower from Spain. Our diplomats are busy in Sligo and Tyrone, building favors and improving relations.


    Picture1.jpg

    Because both nations were released in a peacedeal, Spain has guaranteed them for the duration of their truce with England (though they can always cancel those early).

    Owning Ireland directly, not through vassals, would be better for us. But we’d have to wait for Spain to end their guarantees. There’s always the chance that Spain keeps the guarantees right up until the truce expires, letting England right back in.

    Vassalizing Ireland, while slower, is safer. And with everything that’s happened to Brittany these past decades, I think safe, guaranteed bets are needed for us to succeed. If we want to beat France, if we want to beat England, we’ll need a solid base.

    Ireland will be that base.

    On King Henri’s death, we lost a Stability. I don’t have enough admin points to boost it back to 0 right now, but it’ll be a priority. The cost is increased because of the Religious Turmoil Disaster. A consequence of the negative Stability and our high War Exhaustion, a plethora of revolts are hitting on our nation everywhere.

    Some have already risen in Africa, now some appear in Bengkulu. And more are growing and firing all the time. Our manpower is stretched thin, and it will only grow thinner. We also only have one transport fleet, so can only deal with these far-flung colonial revolts one at a time.

    There’s also the Satapo native war which began in the last part. We can win this, but it’s preventing our War Exhaustion from decaying naturally. And now we’re pulled into another conflict.

    Scotland alone has declared on Tyrone (Spain did indeed revoke their guarantee). If we break our alliance, cutting our losses and getting a 5 year truce, Scotland will annex Tyrone. That, in turn, could let England creep back in whenever they attack the Stuarts again.


    Picture2.jpg

    (We could break our guarantee of Tyrone and dec our own war, but we'd have a 5 year truce because of our previous treaty. A trucebreak isn't appealing right now.)

    If we want to keep our rivals out, we must fight, even if our nation begs for peace.

    No. There will be no peace. Not until it’s forced upon our enemies.

    There is some good news about this war though. England won’t give Scotland access, so they have to use their 5 transports.

    3 more infantry regiments are recruited in Ireland. That, plus Tyrone’s own 3k, means we’ll outnumber Scotland slightly against whatever they send. Our other armies are busy with Satapo and the revolts.

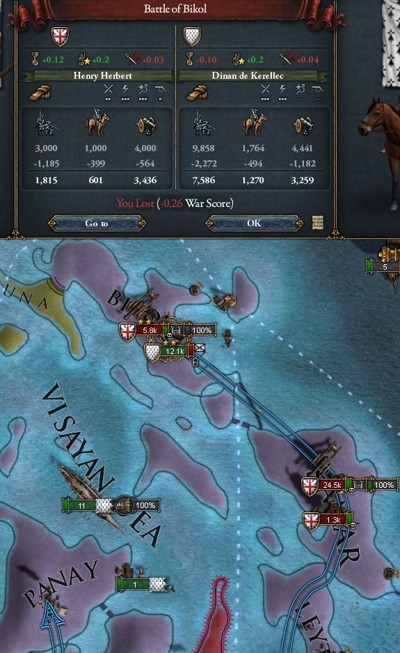
    The Scots attempt a landing in Leinster. Aided by the -2 landing penalty and Tyrone’s reinforcements, we win.


    Picture3.jpg

    (The Scots can only come at us 5 regiments at a time.)

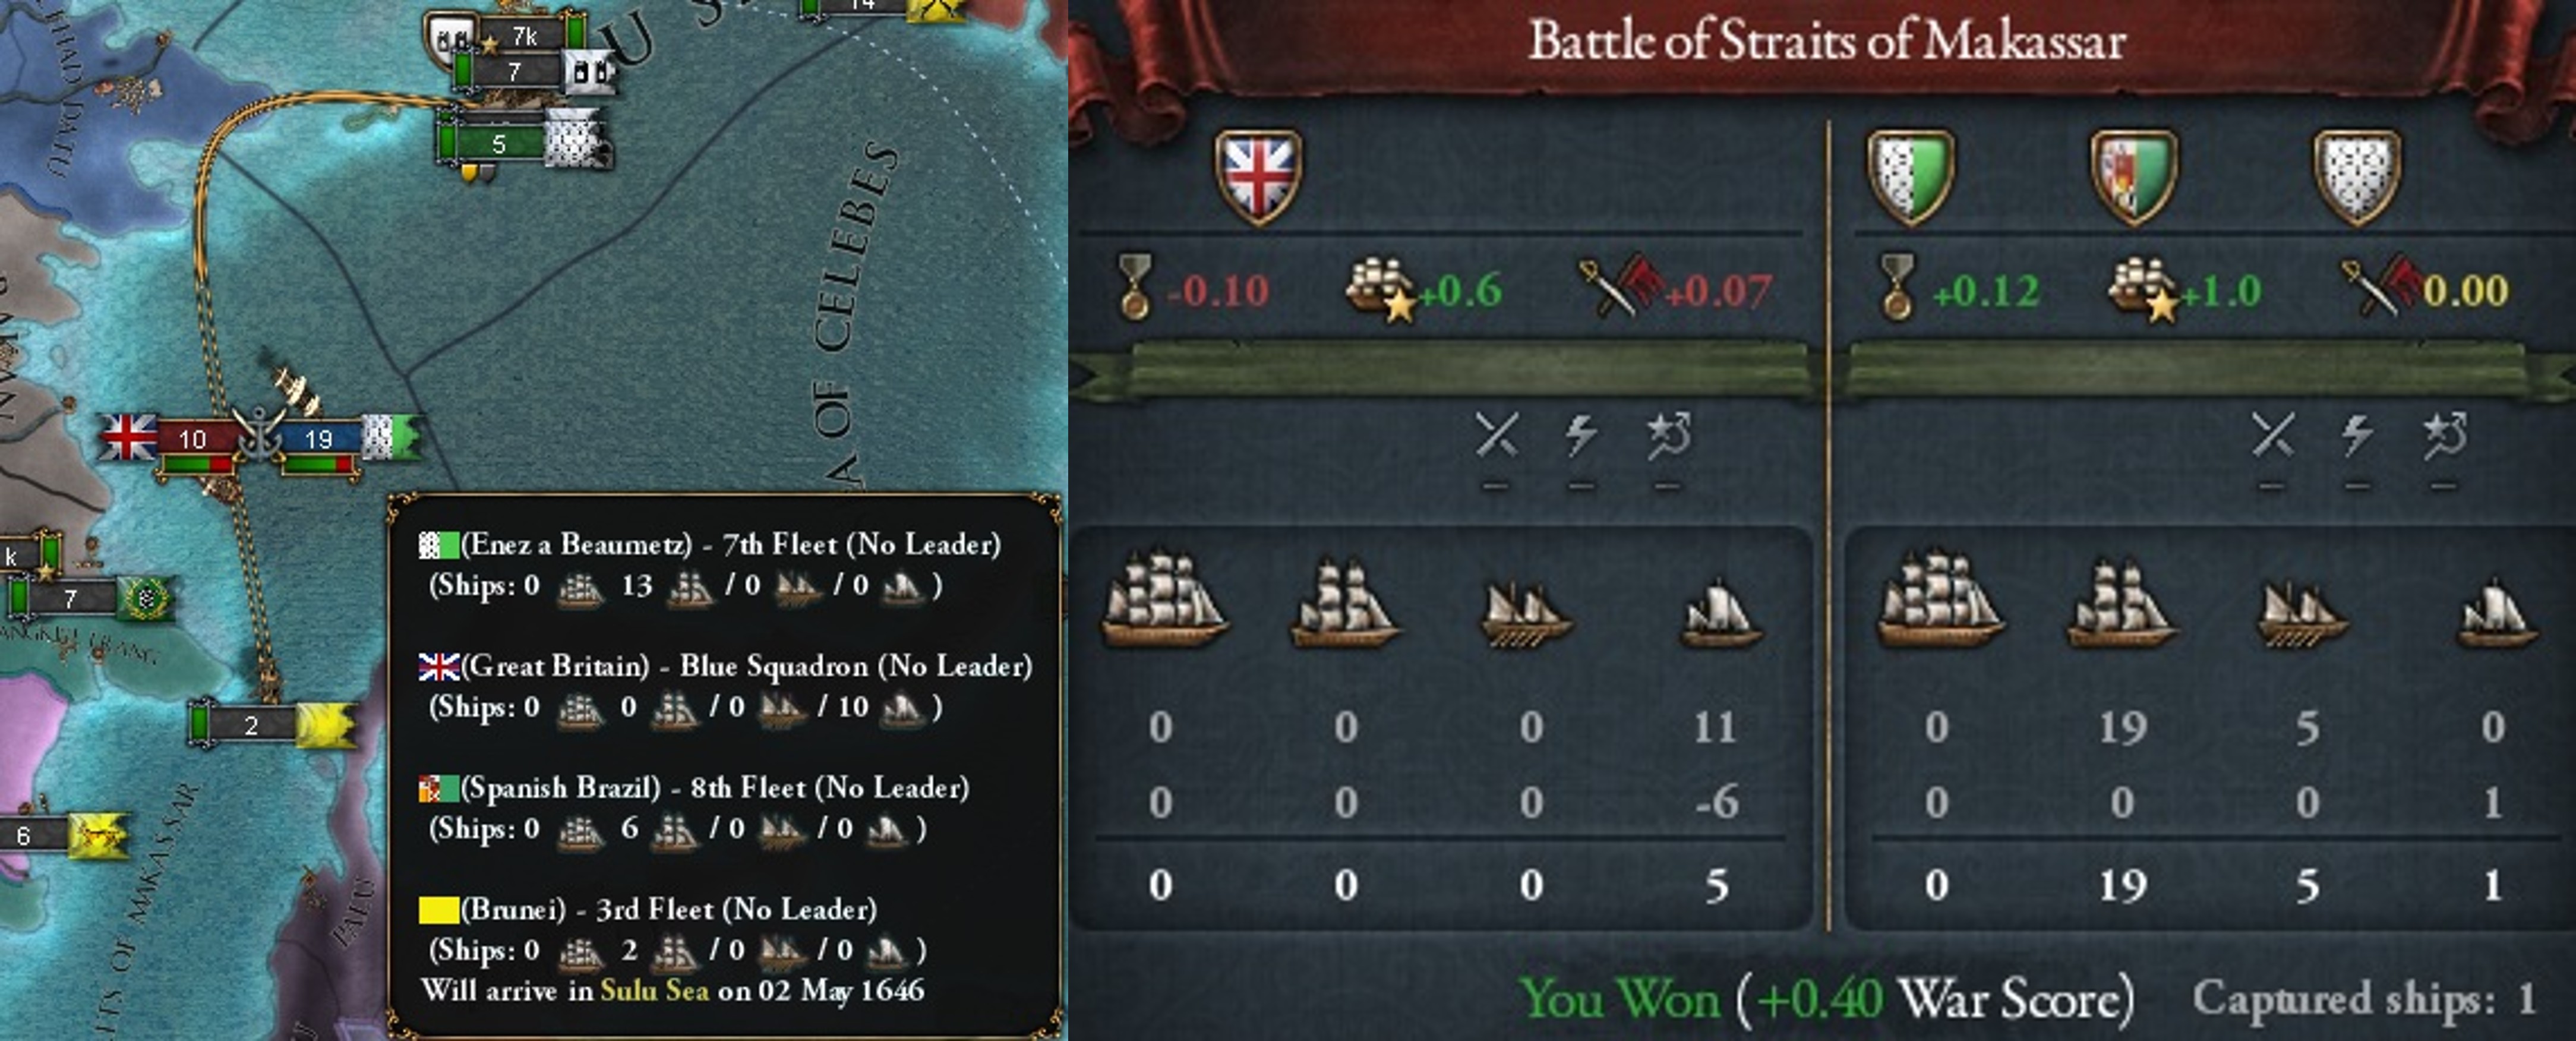
    They try to retreat to their transports, but I use our light ships to force their fleet into battle. This halts Scotland’s evacuation, causing a stackwipe.

    Picture5.jpg

    A few months later, the Scottish try again with a landing on Tyrone directly. We win again. Our navy forces a stackwipe again, but this time we lose 2 ships.

    Later, again, another battle in Leinster. Another navy-forced wipe.

    In continental affairs, France is attacking the HRE for Utrecht. It’s obvious who’s going to win. All we can hope is that Austria, the Pope, the Danes, and the Dutch take as many French with them as possible before the end.


    Picture7.jpg

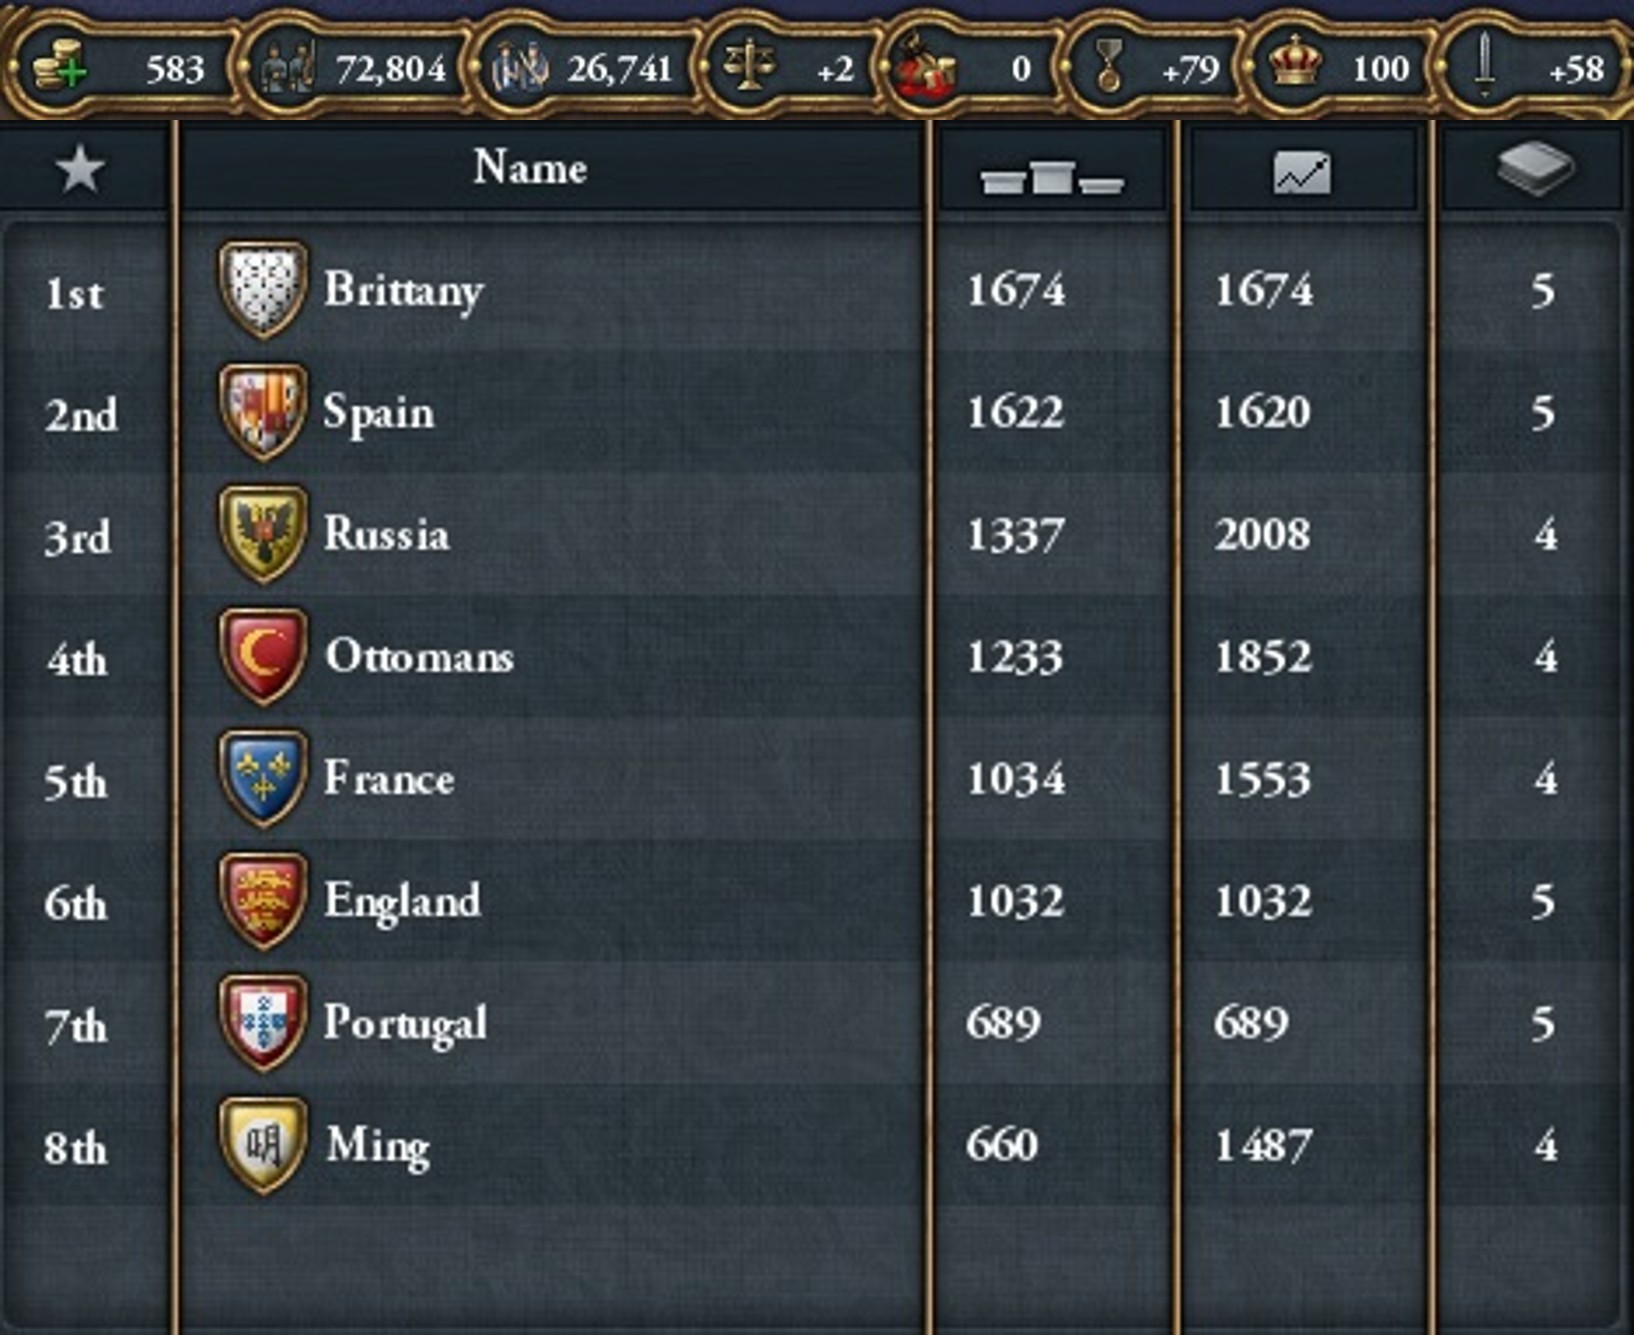
    (The 3 numbers left to right: France's number of armies, ships, and manpower. A scary behemoth!)

    It is then, on the 4th of June, 1561 that our new King is crowned. His reign will see great change. But for good or ill, who can say.

    The first victory of King Richard’s reign happens against Satopo’s ally, Fox. We annex them into d’Elbene.

    Unfortunately, Richard took this as a sign to become Cruel, further increasing unrest in our provinces. Great. Just great.


    Picture8.jpg

    Spain arrives at that moment with an offer. They want to provide us with an heir.

    I know previously I said I wanted to see if the Dreux could go all the way. But here are my thoughts:

    Narratively, King Richard is young, inexperienced. He has other things to worry about besides procuring an heir. Gamewise, this was a new session, I had time to think things over. I believed, at this point, that we would grow large enough to surpass Spain, large enough to get a union over them when the time came.

    But I also still want to see if House Dreux can make it, so if our Spanish heir lives, fine. If he dies, fine. We’ll let fate decide.


    Picture9.jpg

    I accept Spain’s offer. Prince Felipe’s stats are great, 4/3/6.

    Another victory in North America. Satapo cedes 1 province in Georgia to d’Elbene.


    Picture10.jpg

    Another battle against Scotland in Tyrone. We stackwipe their army but lose 3 ships.

    With one war ended, one more begins. It’s Ojibwe again.

    Henrika is still very weak. To help them out, and to start cutting off Danish Canada from the interior, I colonize Mosoni and Attawapiskat on the Hudson Bay. Sampit finishes soon after. That colonist is sent to Kesagami also in Canada.


    Picture11.jpg

    (The 3 yellow-orange provinces are currently being colonized by us. The red province is a future target. I'd hoped Henrika would do this themselves to be able to core their interior land. But we'll have to do it instead.)
    Our army in Ireland has had so many battles that we’re forced to let the Scottish land. We’re also out of manpower. I hire 10k mercs to deal with the Scottish force. Even with enemy reinforcements, we win and stackwipe both armies over a few battles.

    Picture12.jpg

    Scotland tries a different approach. They land unopposed onto Mann and occupy it. But if they think that will force us to the table they’re mistaken.

    We’re in the midst of 2 wars, hemorrhaging money, and out of manpower. Nevertheless, we fight on.

    Still, it’s tiring. I cut my play-session short.
     
    • 6Like
    • 1
    Reactions:
    CHAPTER FORTY: Renames & Expand Infrastructure (August 1562-March 1571)
  • Author's Note: Another long, detailed chapter right here. Perhaps I could've split it into two parts. But then, I don't think either shorter update would've been "worth the wait" with the once-per-week schedule I'm posting at. With the rate-of-posting in mind, do you all generally prefer longer updates such as this one, or would you want shorter episodes?


    CHAPTER FORTY: Renames & Expand Infrastructure
    |-|
    (August 1562-March 1571)

    We pick up again with our 2 wars, countless revolts, and War Exhaustion issue. Over the break between sessions, I remember something. We can’t lose War Exhaustion while at war, and it doesn’t look like either war will end anytime soon. But we can decrease it manually by 2 by spending 75 diplo points. We’re 7 years ahead on tech, so I do just that.

    Picture1.jpg

    (Rebels loading, firing, constantly. So tiring...)

    Points: 398 -> 38

    War Exhaustion: 19.61 -> 9.61

    That should take the heat off a bit.

    But, of course, the game sees we might be succeeding and can’t have that.

    Here’s Austria with a Call-to-Arms. It’s the League War!


    Picture2.jpg

    Sorry…Austria…you’re breaking up…going through a tunnel…

    *Click!*

    Here’s another idea I’ve had between breaks. Our economy is only functional right now thanks to the gold from Mexico. I’m serious. We get like 300 gold per fleet every few years, the equivalent of an extra 25 gold income a month!

    What if those fleets were…larger? Yes, we can do that. Yes, we could’ve benefited from it this whole time. All it takes is 100 gold up front, some admin power, and the click of a button.


    Picture3.jpg

    Here’s something you may not expect. A third war! Started by…us?

    I suspect Huron will attack us again. They’ve done it a couple times before. This time, I want to get the jump on them. Plus, this war brings in Iroquois, another very aggressive thorn.

    I’m done intervening in all these native wars. That ends now.


    Picture4.jpg

    In the France-Utrecht war, Naples is separate peaced for 2 provinces. This won’t help Austria, Utrecht, and the Pope win against France (especially now the League War is happening) but it weakens France’s long-term Neapolitan friend.

    Picture5.jpg

    Another thing also helping our economy is Spain. Whenever we can I’m remembering to ask for money or manpower. We will come out the other side this time of troubles, I promise you, but we must be diligent.

    The first of our new and improved gold fleets arrives. This one brings in 367.92, but 38.94 was lost along the way.

    Helpfully around this time, we receive a gold rush in Africa for another influx of cash. I build churches in Cork, Limerick, and Ulster (0.13 a month, 0.10, and 0.10) to celebrate. Most of our loans are paid off, leaving us with 1 leftover. We must invest in our future.


    Picture6.jpg

    Another war comes, but we don’t get called in. This is a benefit of being embroiled in so many other conflicts. If you’re already at war, your AI allies are less likely to call you into things. Spain attacks England, using the pretense of dynastic restoration (their mission tree tries to simulate the Spanish Armada, giving them a free union CB).

    Picture7.jpg

    Some of our forces, battered and weary, barely arrive in Bengkulu in time. If we were 1 month later, we would’ve lost the province fully to rebels. Phew!

    Picture8.jpg
    Picture9.jpg

    Iroquois is annexed. Kaskasia is annexed. Chalaghwatha is annexed.

    Richard receives news that Brittany is falling to ruin. We spend money to try and stop it.

    Scotland offers white peace. We refuse. That would just leave Tyrone open.


    Picture10.jpg

    (National Fragmentation? You don't say...)

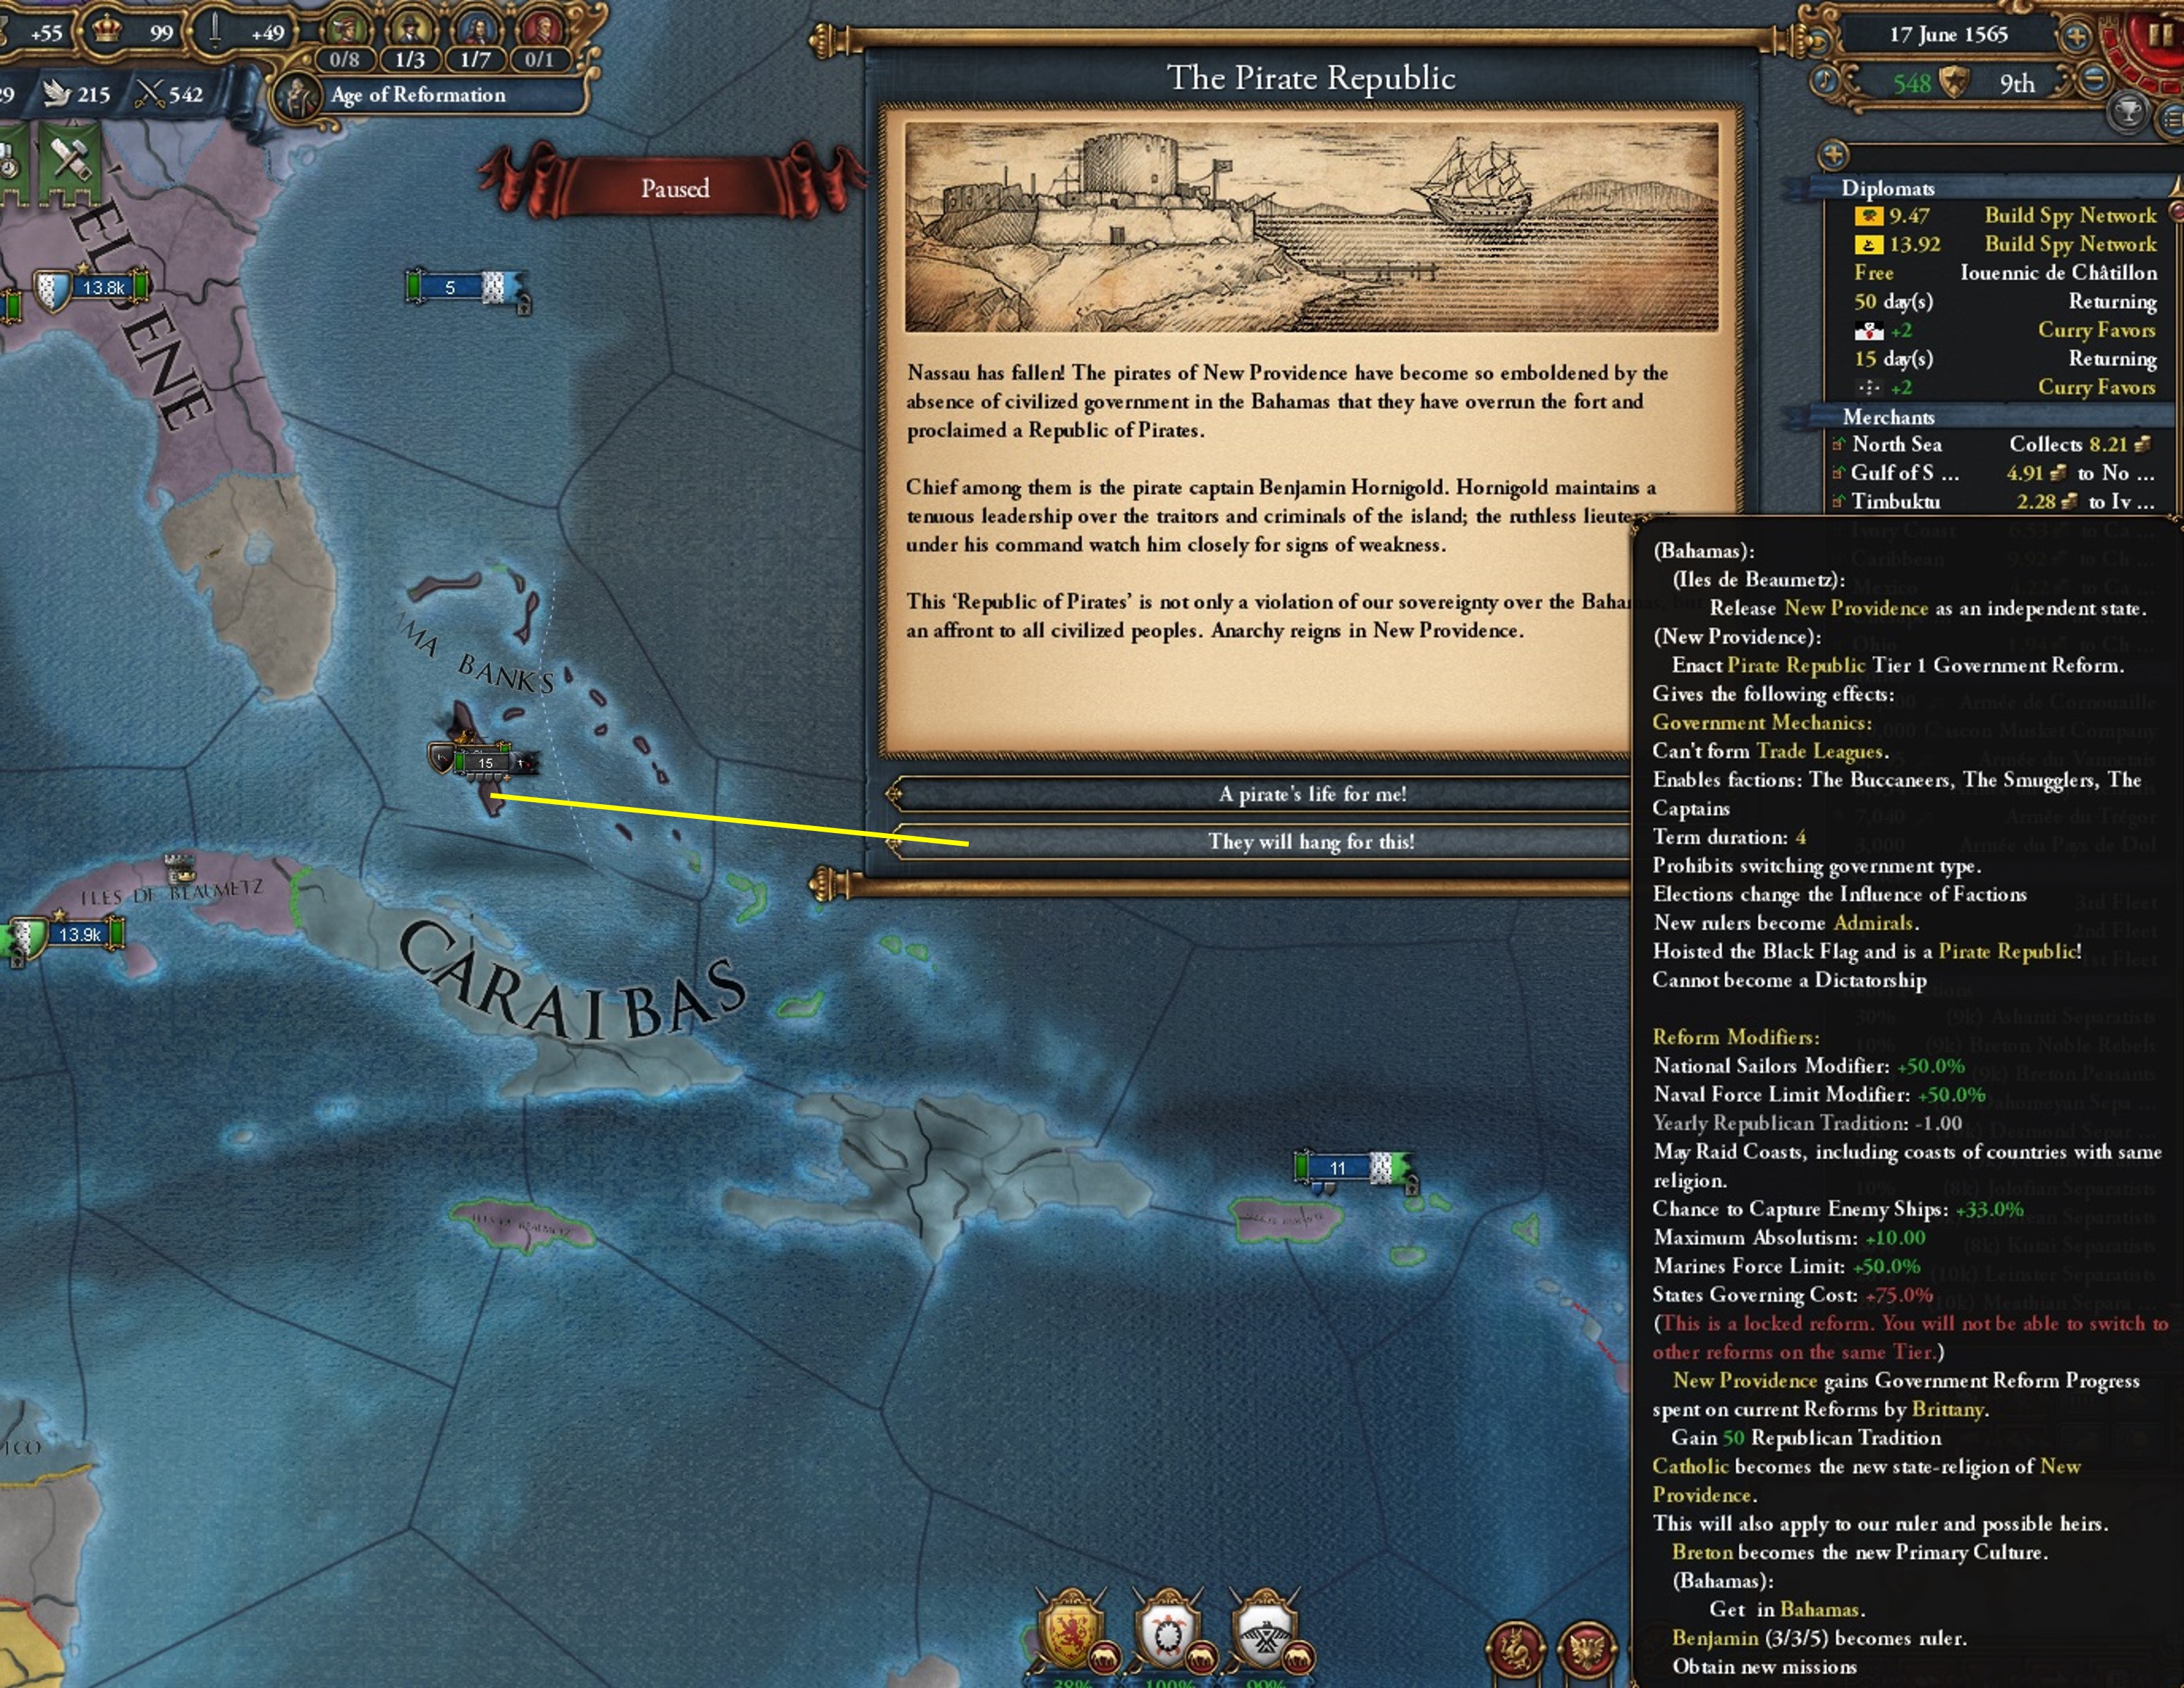
    The Bahamas breaks free from Iles de Beaumetz, declaring a pirate republic. We had the option of playing New Providence here. But that’s not the goal this game.

    Picture11.jpg

    (That very large tooltip is simply saying that New Providence has spawned as a Pirate-TAG)

    Chisca is annexed.

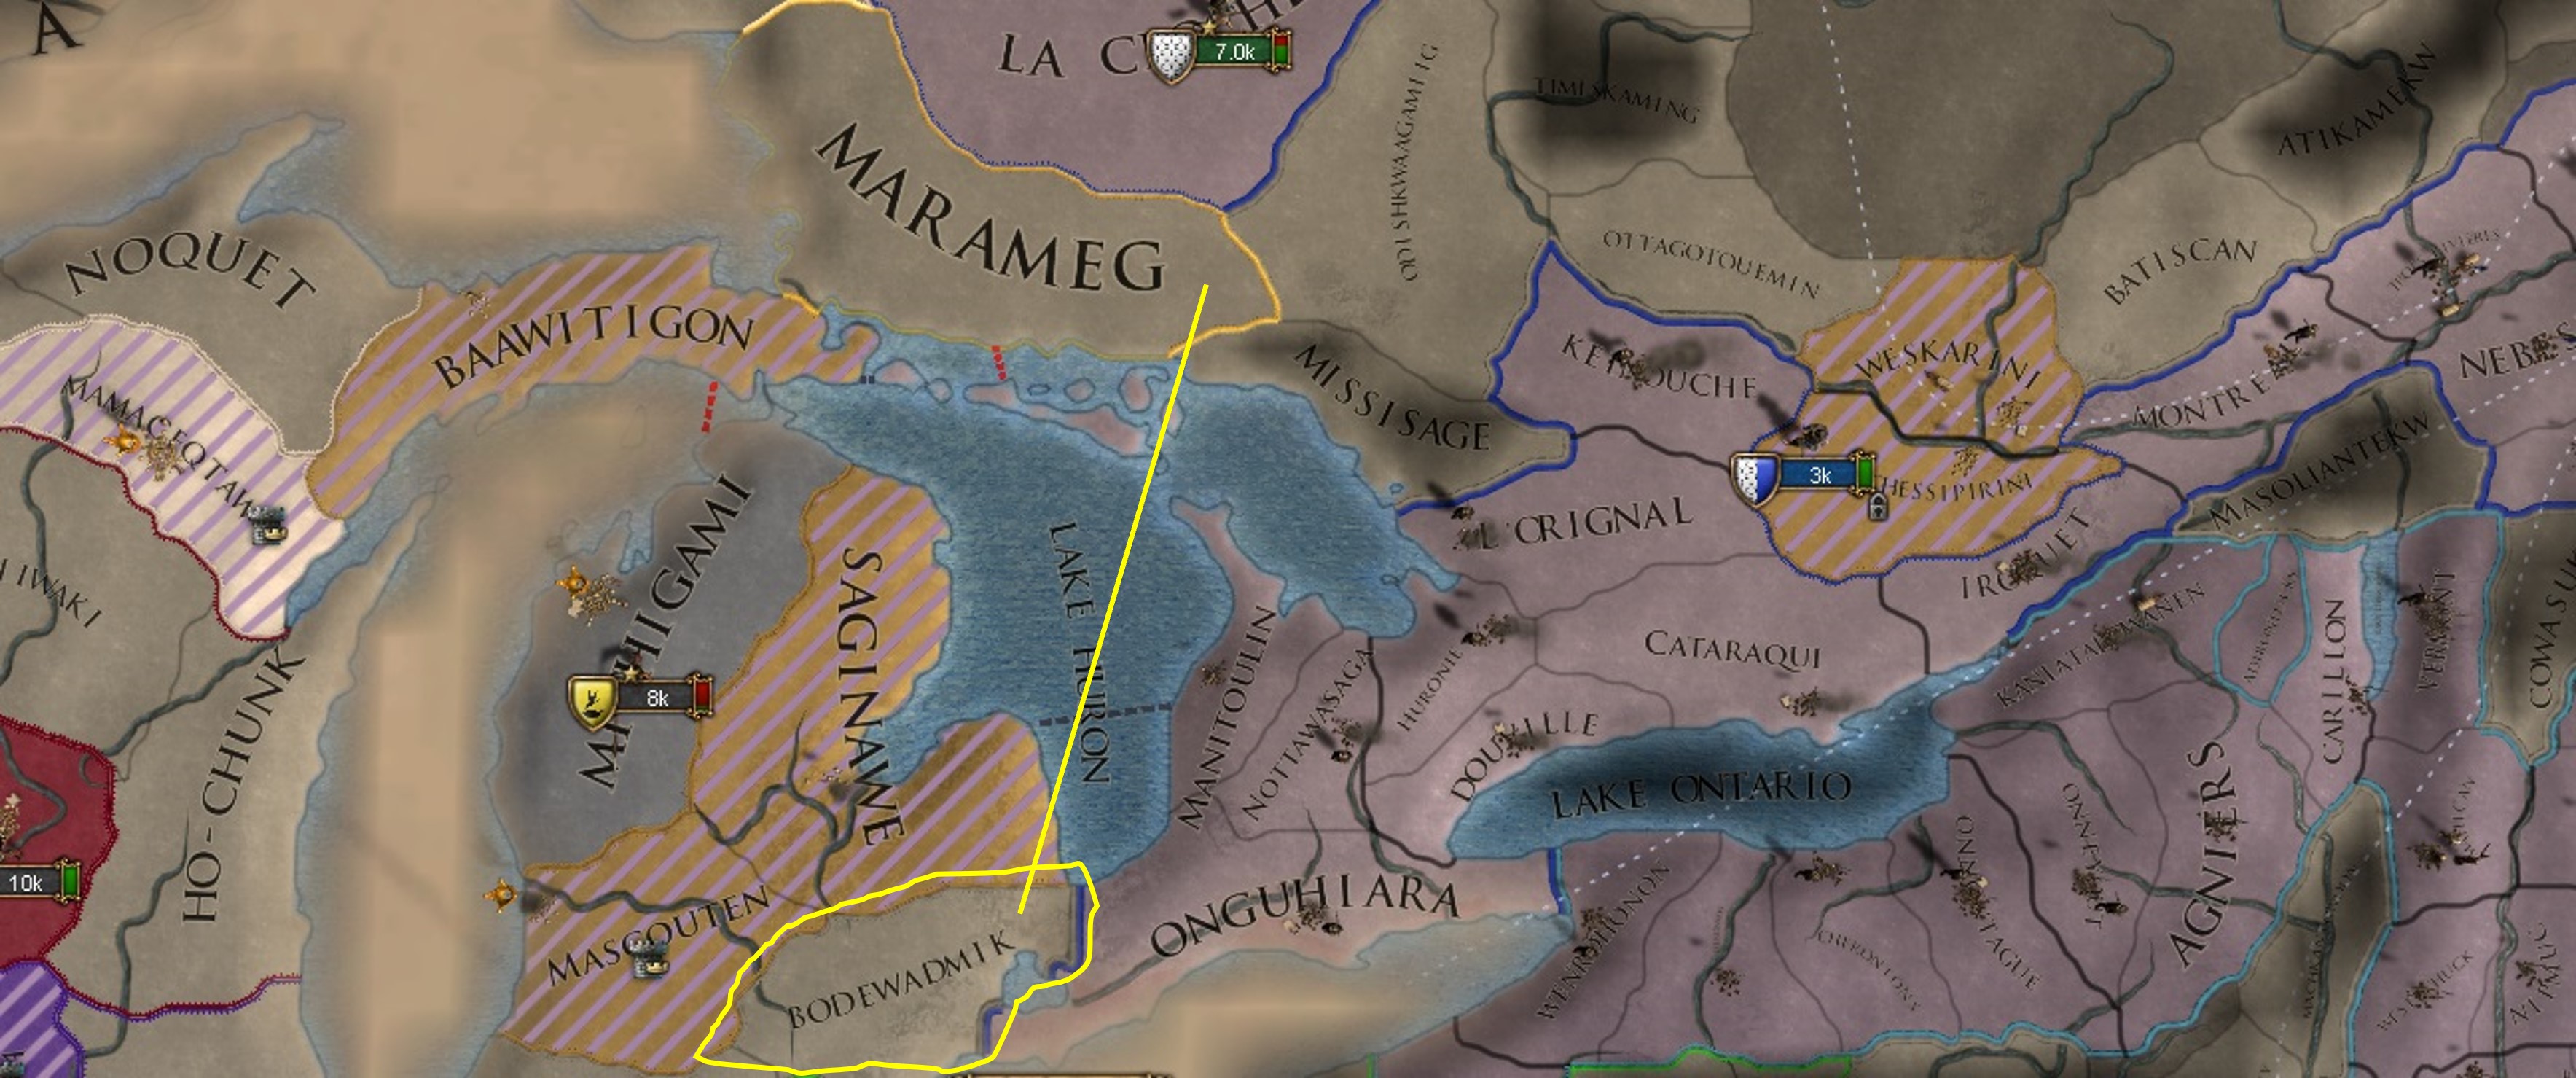
    Marameg, on the border between peninsular Michigan and Canada, and Bodewadmik (Detroit) are colonized to give us a border with Huron and subsequently Ojibwe.


    Picture12.jpg

    Huron is annexed, finally. Ojibwe is annexed, finally.

    We also finally boost our Stability back to 0.

    Our armies in North America have nothing better to do, so we declare on Miami.


    Picture13.jpg

    (Miami, the last native standing in Michigan)

    Since our War Exhaustion can’t go down because of the war with Scotland, we might as well be in multiple, manageable wars. Being in 1 or being in 10 makes no difference in that regard. The last of our loans are repaid with all the spoils we’ve gotten.

    The France-Austria war ends predictably. Utrecht loses their capital but persists elsewhere. Austria loses 2 provinces, including their gold mine, to France’s ally, Bregenz.

    And good things don’t last apparently. Or maybe you were rooting for the Dreux? Prince Felipe dies in a hunting accident.

    We get a new Dreux heir immediately. I disinherit him. His stats are terrible.


    Picture14.jpg

    Tyrone peaces out Scotland for money and takes the Inner Hebrides. Once we end our war with Miami, we’ll finally be at peace.

    The end of the Scotland war also lets us finally vassalize Tyrone. With them subjugated, Sligo sees the writing on the wall and accepts as well (they were rivaled to Tyrone, preventing us from getting the 190 opinion necessary). Welcome aboard, friends!


    Picture15.jpg

    Hathawekala is annexed. We declare on New Providence to quickly reconquer them.

    And, at long last, who’s ready for some renames!

    I know this is probably not the most exciting thing. But I promised it, so here it is. It’s also good for roleplay.

    • d'Elbene:
      • Baye Blanche, capital of d’Elbene -> Bae Gwenn
      • Nouveau Arvor -> Nevez Arvor
      • Penakuk -> Nevez Bretagne
      • Sklaer’s Ennemi -> Sklaer’s Enebour
      • Sainte Anne -> Sant Anne
      • Baye Notre Dame -> Baye Hon Itron
    • Henrika:
      • les fort des trois rivers -> Al Kastell a Teir Ster (name is now small enough to allow capitalization)
      • Trois Rivieres -> Teir Ster
    • Greenland:
      • Vittresville -> Vittreker
    • L’Espoir d’Anne -> Al Esperans a Anne
    One other thing. I’m sure it’s nothing.

    There’s a French colony in Maine.


    Picture16.jpg

    (I'm keeping the default names the game gives in most cases. But our original North American provinces needed a makeover)
    Continuing. Oneota is annexed.

    One admin click of Development is spent in Dublin to bring it up to 20 and to get rid of the leftover Devastation there from Scotland’s blockade.

    Some more admin is spent in Desmond and Leinster on Expand Infrastructure. What is EI, you ask?

    EI is a small button in the province building window. For 50 admin power, the province gets some nice bonuses and is more expensive to govern. You can click EI an infinite number of times but have to reach a threshold beforehand (15 Dev, 30, 45, etc).


    Picture17.jpg

    (Desmond is at 13 Dev in this image, but I did bring it up to 15 as you'll read below)

    The key bonus here is +1 number of Manufactories. Normally a province can only hold one kind (i.e. a money one OR a manpower one OR a governing one). But EI allows you to have one of each type, assuming you’ve clicked the button enough times.

    Richard’s prerogative is to build Ireland into a mighty land. An Eden. From which the world will tremble, will despair, and will beg Brittany for mercy. Look out France! Despair, oh England! We are coming.

    I also bring Leinster up to 20 Dev from 18, and Desmond up to 15 from 13.

    The League War ends, surprisingly enough, in Austrian victory. Bohemia, the leader on the Protestant side, was surrounded by Austria and her allies, leading to this result.

    Incidentally, we get some bonuses as a fellow Catholic nation for the Catholic side winning.


    Picture18.jpg

    Erie is annexed. Kispoko is annexed. Cahokia is annexed.

    We core 2 of Huron’s provinces in the Louisiana CN region. We’ll soon have a new subject in the Americas.

    23k Reformed zealots revolt in Dublin. With Irish help, we put them down.

    2 colonists are sent to Brazil. It has gold and no other Catholic has a CN yet (England lost their Papal sanction upon becoming Anglican), so why not.


    Picture20.jpg

    Desmond is brought to 30 Dev (4/4/7-> 7/9/14) and we press the EI button again. Then I do a few more clicks, making it 37 Dev (7/11/19). This Devving lets the current Institution, the Printing Press, appear in the province. Soon it will spread to the rest of our lands.

    Picture21.jpg

    (It's already a great province with all that Development, now it just needs some buildings)

    IDB annexes New Providence. I build 7 new transports to help with all these revolts

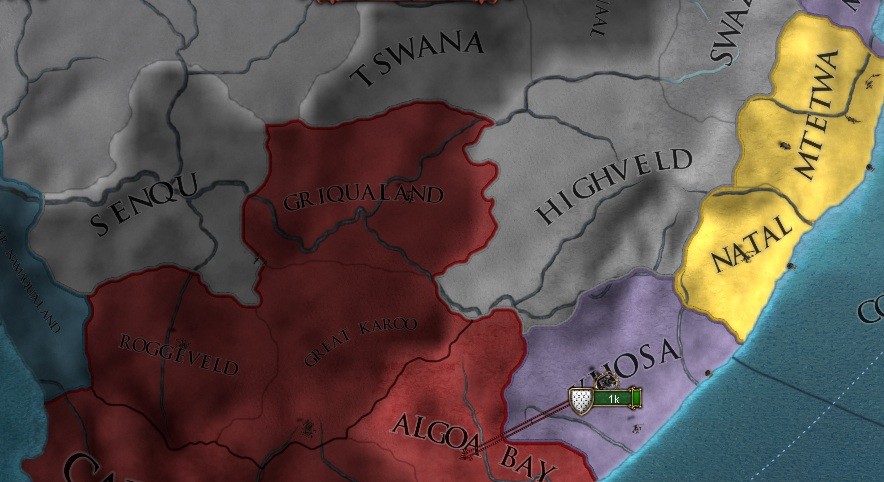
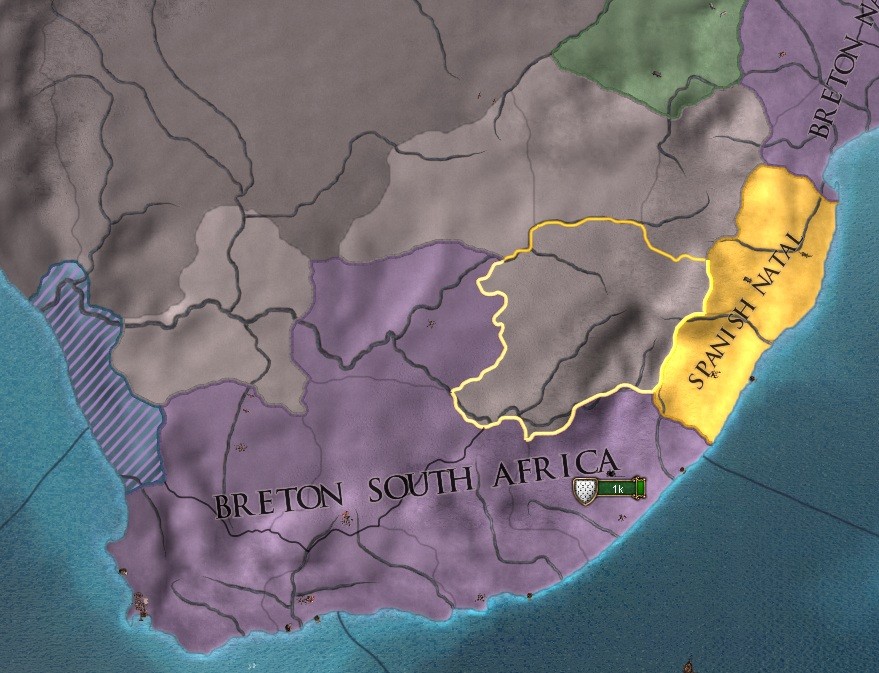
    We colonize Xhosa in South Africa. For the next Age Ability, I take the one for Institution Spread. I also turn on the appropriate Edict (Chapter 7) in Ireland.


    Picture22.jpg

    King Richard, while cruel, is at least Well-Connected. All our Advisors are cheaper for the rest of his reign.

    I end up having to abandon our 2 Brazilian colonies. Why? Spain, our trusty ally, cuts us off from the interior. I don’t want to own Brazil directly. I want a CN. We move instead to Ambon and Kendari in the East Indies.


    Picture23.jpg

    (I didn't realize Muturu in Brazil was coastal. That province is a chokepoint to the interior. We've been outplayed)

    The England-Spain war ends in a loss for Spain. The wargoal required them to occupy London. No way that was happening. They lose Minorca in the Balearics, Sassari in Sardina, and a few provinces in Chile.

    Picture24.jpg

    10 more transports are ordered.

    I declare war on Chiaha in the Appalachians. We also attack Creek. Miami is annexed.

    Some mercs are hired to help with the revolts.

    We end the update with a lot of money, not a lot of men, and plenty of rebels.
     
    • 4Like
    • 1Love
    • 1
    Reactions:
    CHAPTER FORTY-ONE: Trade Company Investments, a New CN (March 1571-June 1578)
  • CHAPTER FORTY-ONE: Trade Company Investments, a New CN
    |-|
    (March 1571-June 1578)

    We start off with a look at North America. I’ve found something interesting.

    Danish Canada, as they’ve done for a while now, continues expanding throughout Canada. Norway is here too but doesn’t have a CN yet. And now France has started a second colony. Their provinces are split however by Colonial Regions, 1 is in Canada and the other is in East Coast.


    Picture1.jpg

    (The blue outline is the Eastern America CN region. France has one colony in Eastern America and one in Canada).

    I’m hopeful they’ll be able to finish 4 more and get their own CN, that way d’Elbene can just take it out in a 1v1. But remember France’s colonies grow slower because they are still Catholic and violating our Papal claim to this area. The Scandinavians, as Protestants, don’t suffer any consequences. Henrika and d’Elbene, being Papally recognized subjects, are also free from penalties. It’s a race between them all to see who’ll fill the area first.

    I start another minor war against the last independent Mexican native, Otomi. Al Esparans a Anne has enough troops on their own to deal with it.

    After that, we finish coring our recently annexed lands from Huron. These cores, combined with our Natchitoches land, make 5 cores in the Louisiana Colonial Region. I rename our new CN to Nevez Breizh, New Brittany, and turn it into a Crown Colony.


    Picture2.jpg

    Our CN also has enough provinces to give us a merchant.

    I try transferring from Mississippi River to Ohio, bumping up our income by about a ducat.

    I also move our Ohio merchant (transferring to Chesapeake Bay) to Rio Grande (transferring to Mississippi) since all the Ohioan trade is already moving east thanks to our subjects.


    Picture3.jpg

    And I move our merchant from Chesapeake Bay (transferring to GSL) to Amazonas (transferring to Caribbean).


    Picture4.jpg

    Once all the changes are sorted out, our trade income is 11.39. Before it was 10.31. It will continue to grow as rebellious provinces are unoccupied, North America is conquered, and our subjects grow.

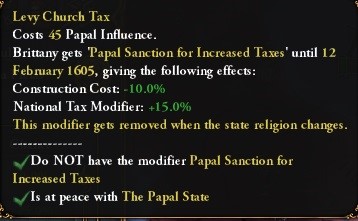
    A sign of our increasing power is that Desmond is assigned a Cardinal. This is the first one we’ve had since we lost the mainland. The Papal Controller right now is our ally, Spain. It’s good to have friends in high places.

    We actually have enough Papal Influence right now to pick 2 bonuses. I go for manpower recovery and less inflation. As mentioned previously, we’re completely out of manpower. Our inflation also isn’t looking healthy at 13.91%, a combination of gold fleets from Mexico, the mine in Matsolo, and the loans we repaid in the last part.


    Picture5.jpg

    We end our war with Creek. They’re cut off from the coast and more of inland Georgia is taken. All the land goes to d’Elbene. Chickasaw, a separate participant in our war against Chiaha, is peaced out for all their land east of the Mississippi river.


    Picture6.jpg

    (A look at North America post-war).

    Back in Europe, a scripted peacedeal let’s the Ottomans vassalize the rest of the Mamluks for free.


    Picture7.jpg

    Another native ally cedes 1 province to Nevez Breizh. Chiaha gives most of their land to d’Elbene. We’ll be back for the rest eventually, it’s just annoying having to chase down armies for a complete victory.

    Whenever you annex a nation that still has armies, those armies automatically become rebels to you. This changes the AI behavior for those armies, causing them to stop running away and instead siege their cores. However, rebels also receive your tech levels automatically. With our manpower issues, I’d much rather not fight anyone on an equal footing right now, even if it’s just rebels.

    We have enough rebels to deal with in the rest of our empire anyway.

    I ask Spain for some manpower and money which they happily provide. Otomi cedes all their land to Al Esperans a Anne.

    We pay around 500 ducats to embrace the Printing Press Institution. The institution itself doesn’t give a large bonus, just less Stability cost. But all our techs are now cheaper because of our modern ideals.

    Admin and diplo tech 14 are picked up right away. We don’t have quite enough points for the mil one at first, but grab it a year later. Now we need to decide what our next Idea Group is going to be. I’ll think on it.


    Picture8.jpg
    Picture9.jpg

    (Various buildings unlocked and a better cavalry unit).

    King Richard sires a son during this time. The game wants another Francois, I go with Jean instead for variety.


    Picture10.jpg

    Our colony at Xhosa is done. It’s time to look for a new region and CN. I hear Australia is nice. Wadjuk on the southwestern coast, a Trade Center, is chosen.

    After I send our colonist away, I notice a European presence, finally, in the East Indies. It’s not Spain though, but England.


    Picture11.jpg

    Kendari finishes, I send that colonist to Eora on Australia’s east coast. Our Wadjuk colonist returns empty-handed after a native tribe migrates into the province. We send him instead to Tharawal just south of Eora. But another native migrates into Eora, however Wadjuk is free again. Maybe this time it’ll work.

    Er…No. I guess not. How about Badtjala? Off we go! No…

    Fine, Gorontalo on Sulawesi. There. All good.

    Ambon finishes. We head to Poso also on Sulawesi. Simple. Easy. No migrations to cancel our colonists.


    Picture12.jpg
    Picture13.jpg

    (Tharawal is the only colony established in Australia at this time. All the rest were cancelled because of native migrations).

    Here’s how our income currently sits. We’re at 37.42 gross with most of that coming from trade (now at 12.82). With our armies turned off, we’re making a healthy profit. But our armies can’t rest forever. We need to grow.


    Picture14.jpg

    (Highlighted in red is our War Exhaustion. It's slowly being bought down, along with our inflation).

    Aside from growing through wars of conquest, how else can we achieve this? Through buildings and TC Investments.

    In preparation, I take a Mission giving 3 Dev in our capital and cheaper construction costs in the whole State. And I complete another one giving that same bonus across our whole nation. Then I complete the one below that for an extra 10 ducats a year for the next 25 years.


    Picture15.jpg

    The Bourgeoisie loans are taken. I also bring Ormond up to 20 Dev (3/7/10).

    Who’s ready to go on construction spree?

    Starting off, we build 4 Workshops, one of which is in Cork, and a Manufactory in Ormond. The buildings will give us more income directly, but I take care not to neglect the Trade Centers, upgrading the ones in Gabu and Cape Coast. Improving these strengthens our control of the Ivory Coast, letting us push more money out of that node and towards the Caribbean. A good chunk of that money will eventually end up in our home node, the North Sea.

    Using 412 of our remaining 538 gold, I build a Trade Company Investment (TCI).

    Back in Chapter 25, I mentioned that TCs get access to special, expensive buildings. What we’ve just built here is one of those, a Broker’s Office. TCIs are built and completed instantly.


    Picture16.jpg

    There are 2 broad categories of TCIs, Area Based and Region Based.

    AB ones can be built in every Area with a TC present. They provide bonuses to the provinces and TCs within their specific Area. You can have every type of this investment in an Area, no need to pick and choose between bonuses. They have 2 tiers, costing 200 ducats each (or the full 400 if you decide to go straight to the second tier).

    RB ones can only be built once per region. You must pick one type of bonus. They cost 1,000 ducats and give benefits to the region and your entire nation.

    All TCIs are also generally grouped by what bonuses they provide: defense, trade, production, tax, or manpower.

    Here’s that explanation put into a nice table. If you want to know the specific bonuses each one provides, you can check the wiki:


    TCI Table.jpg

    (This table was actually too large for the forum's own table feature, so here's a screenshot from Word).

    So, in the Area of Kongolese Coast we have at least one province in a TC, letting us construct TCIs.

    The Broker’s Exchange (a tier 2 upgrade) gives extra production income from all our TCs in the Area and extra Goods Produced from every province in that Area, even those not assigned to a TC.

    Our income is 41.19 already. How much more might it grow before the century is out?


    Picture17.jpg
    Picture18.jpg

    (A look at our economy and merchants after the TCI was purchased and the month ticked over. The increased Goods Produced from the TCI meant more money overall in Ivory Coast, leading to more money in places further along the chain like Caribbean and GSL. And of course this means more money eventually in the North Sea).

    Finally, I take out a few loans and get started on a Manufactory in Dublin. I figure it’s best to get started on those early, but I also don’t want to take out too much debt. A few extra loans won’t hurt though as long as our income continues to grow.
     
    • 3Like
    • 2
    Reactions:
    CHAPTER FORTY-TWO: Annexations, Espionage, Claims. Ireland, at Last! (June 1578-May 1587)
  • CHAPTER FORTY-TWO: Annexations, Espionage, Claims. Ireland, at Last!
    |-|
    (June 1578-May 1587)

    To reinforce this idea of peaceful growth, I check a box when interacting with Spain. This button prevents them from calling us into their offensive wars, but we also won’t gain any favors passively. They also might end our alliance. But we’ll get a warning if they think about doing that, so can just uncheck the box before that occurs.


    Picture1.jpg

    (This screenshot was taken after the declaration. That's why Spain is already at war. I saw the truce between England and Spain was up, so figured another was forthcoming).

    And it turns out to be a good thing I did. A few days later, they attack England. That’s not our problem though.

    After the Workshops finish, our income is at 44.19.

    We’ve started annexing both of our minor Mexican vassals to free up the relation-slots, but they won’t finish the same month.

    Why is this an issue?

    Because annexing one will lower our Diplomatic Reputation for a period, either preventing or slowing the other annexation (our Diplo Rep must be positive for it to progress).

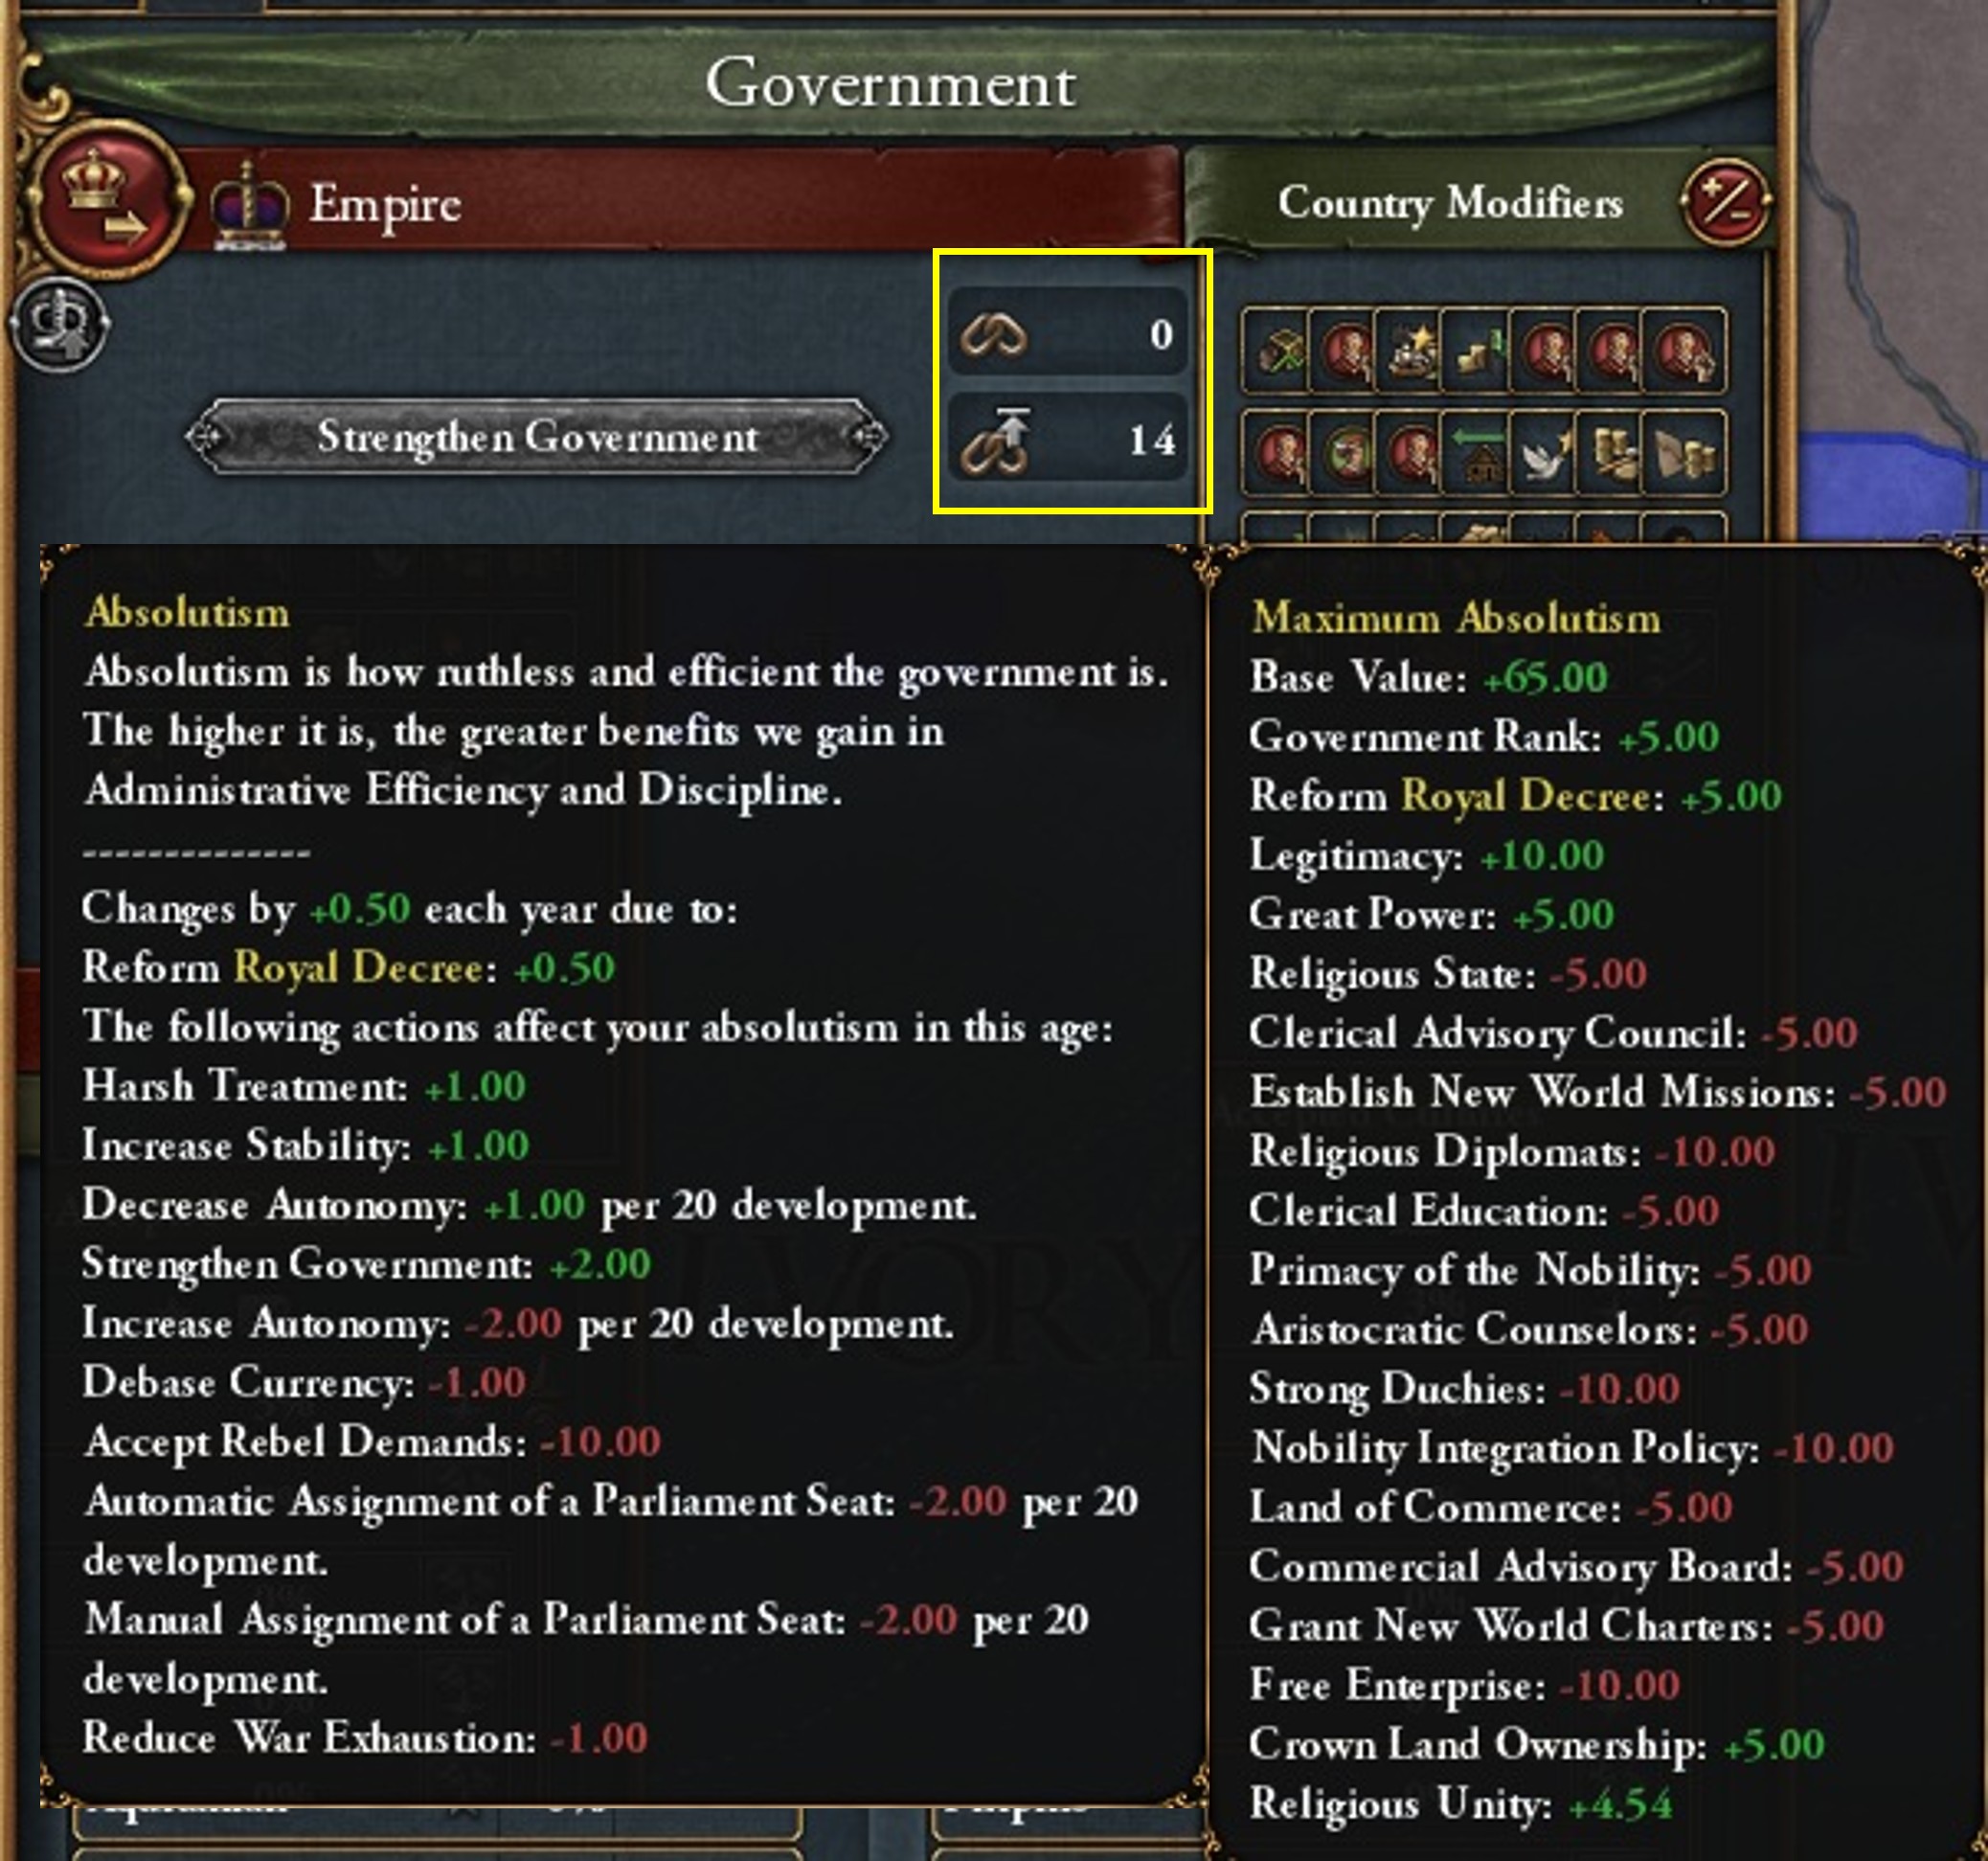
    We could take a privilege from the Nobility to prevent this, but I also want to start preparing for the next Age, the Age of Absolutism. Each privilege we’ve handed out is lowering our Maximum Absolutism. We want to start revoking superfluous privileges. We already revoked one from the Bourgeoisie at the end of Chapter 38.

    What can we do instead to help with our annexations?

    We can try and sync our annexations so they finish in the same month. It won’t prevent the loss of Diplo Rep, but it will mean both integrations will be finished on time without any slowdowns.

    First off, I use Concentrate Development (Chapter 28) on the slower of the two progresses to speed it up. Both vassals are nearly annexed (90.7%), but there’s one more thing we can do to guarantee they both finish the same month.


    Picture2.jpg

    Integrations don’t progress while the subject is disloyal. Usually this is a downside, but here it works to our advantage.

    Scutage, an option we last used with Kildare back in Chapter 14, can be turned on and off at will, however cancelling it causes an increase in Liberty Desire.


    Picture4.jpg
    • Step 1: wait until one of the integrations is a month away from completion.
    • Step 2: toggle Scutage to get that subject disloyal.
    • Step 3: wait for the other annexation to be a month away.
    • Step 4: get the first subject loyal again, either through spending Prestige, paying off debt, or disabling the Divert Trade/Embargo Rivals toggles.
      • Developing in a subject also decreases Liberty Desire but could potentially mess up the integration timer. Use caution.
    • Step 5: both annexations should now finish on the next month tick.
    After the integrations finish, we get a free Stability from an event. Before accepting it, I boost Stab manually to +1, bringing us to +2.

    Picture5.jpg

    Even though our vassals' land is automatically transferred to Al Esperans a Anne, we do receive our vassals’ armies, a measly 3k (2/1/0 composition).

    Using some spare cash, another Workshop is queued, along with 7 Barracks.

    Once those finish, our max manpower shoots from 56,778 to 60,612. And the increased cap also increases our rate of recovery, 658 to 703 per month.


    Picture6.jpg

    23k Reformed zealots revolt in our capital. Our manpower situation has recovered, so I build an army to deal with them. Our Disaster ends a few months later.

    Religious Turmoil is unique among most Disasters in that it ends either when the end-conditions are met, or when enough time has passed. Even though our Religious Unity and rebel situation still isn’t great, we’ve weathered the storm. We get a free Stab for doing so, bringing us to +3.


    Picture7.jpg

    Could this time of troubles, of rebellion, of war, of strife be over? Do we dare tempt fate?

    How’s the King looking?

    Picture8.jpg

    Good. Great! Then maybe…maybe there is hope.

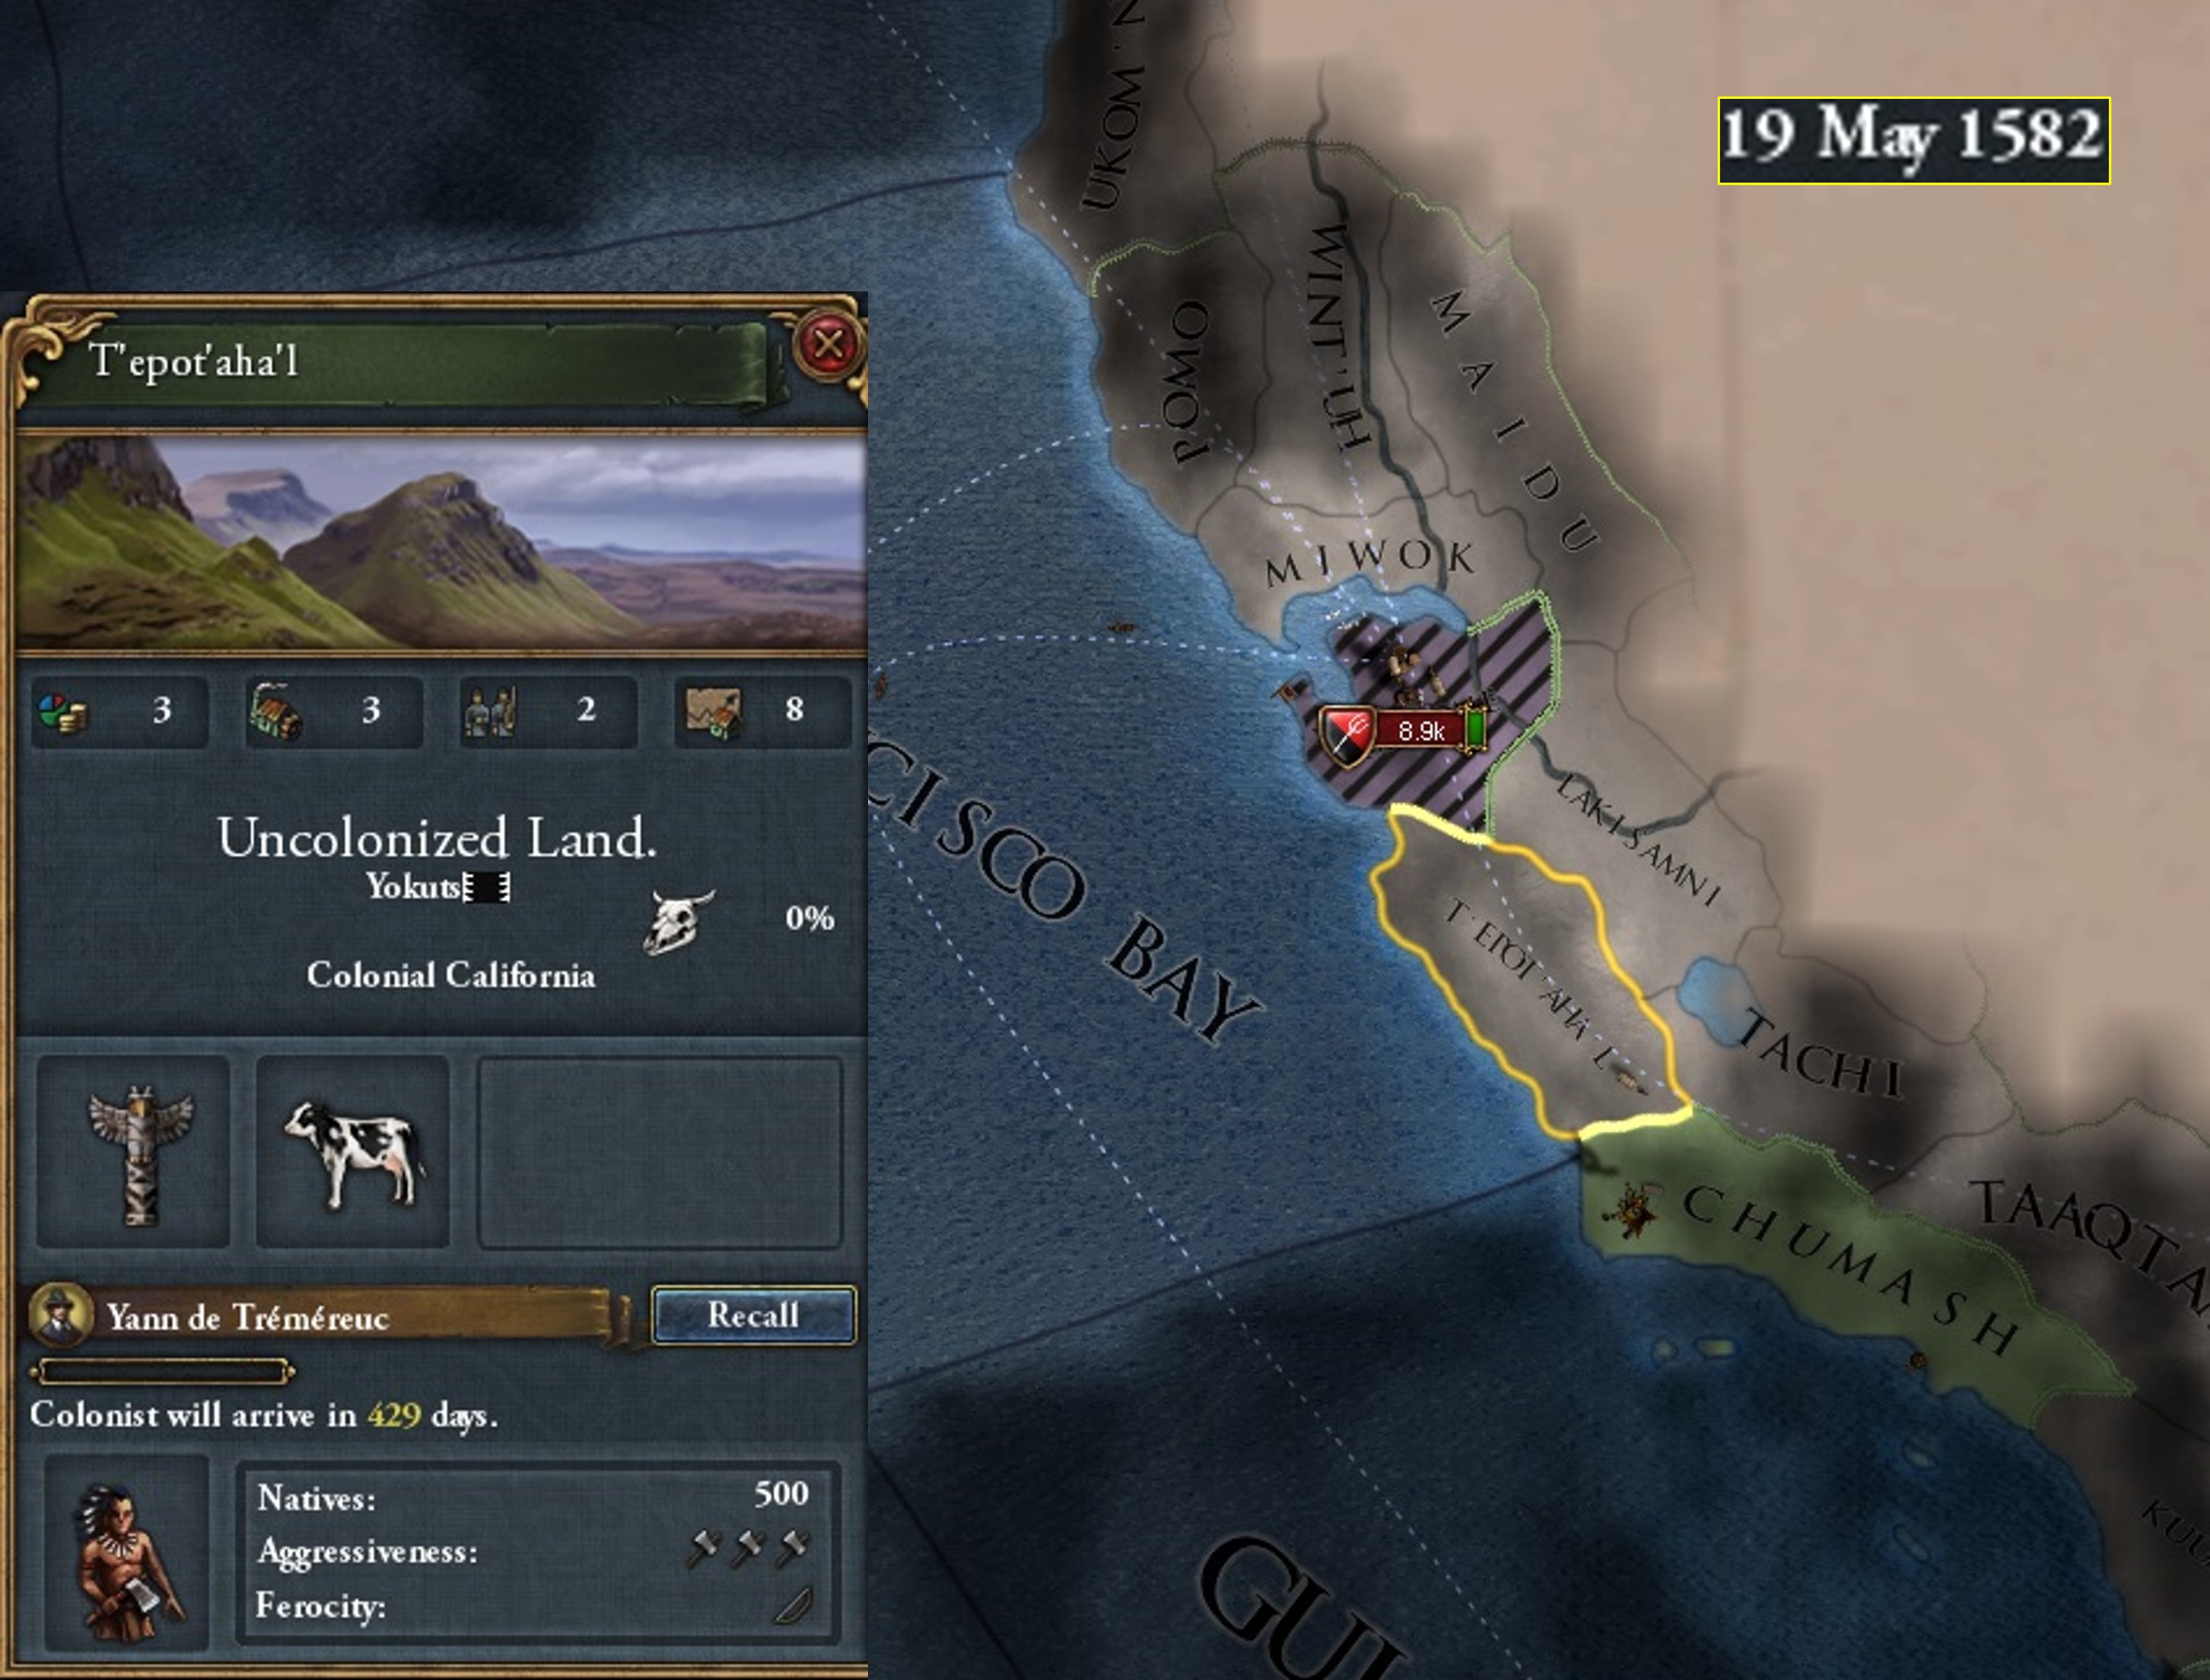
    Tharawal off the coast of Australia finishes, next we head to T’epot’aha’l in California. Ignore those peasants, they’ve been there for a while. Unlike Separatists, they aren’t an urgent threat to deal with. One thing at a time.


    Picture9.jpg

    After 2 costly battles, the first a defeat, the Irish rebellion is put down. We now have a decent standing home army (14/2/1) in case England tries anything.


    Picture10.jpg

    (I don't remember why I didn't have a general in the first battle. Maybe they were all busy with revolts).

    We don’t quite have enough for the next admin and mil techs, but the next diplo tech is taken on schedule. It gives faster colony growth and new upgrades to our transports and galleys.

    When we do take the next mil tech about a year later, it gives extra Tactics and Morale, plus an upgrade for our infantry. The next admin one, meanwhile, gives a crucial Manufactory (Soldier’s Households) and a toggle for our armies (Forced March).

    Both of those things will be discussed another time.


    Picture11.jpg
    Picture12.jpg

    Gorontalo finishes. I move to the last free province in Sulawesi, Mamuju. I don’t notice any other European outposts. Once Poso completes, that colonist moves to Miwok in California.

    T’epot’aha’l has been occupied by the Californian peasants. Our colony will still grow, but the colonist gets kicked out. He’s sent to Eora. The Miwok colonist is also kicked out by the rebels. After a failed play in Australia for the province of Woolna, we eventually succeed at colonizing Wurundjeri in the southeast.


    Picture13.jpg

    An easy looking North American war is started against Etowah and their allies.


    Picture15.jpg

    (The Danes have also reached Florida, as you can see).

    With our excess of diplo points, I’ve finally decided on our next Idea Group. We take Espionage. Espionage used to be a joke, but now it’s one of the best picks in the game. Highlights include an extra diplomat, less AE, extra Spy Network construction speed (meaning faster sieges and cheaper tech), and +15 reasons for vassalizing an AI nation.

    Spain’s war with England ends in victory. They retake Sassari, Minorca, and a large amount of land in South America.

    They also release the last 2 Irish minors, Clanricarde and Tyrconnell. Our army in Ireland is put on high alert.

    As that happens, we take the first slot in Espionage, letting us cheaply take others’ subjects in peacedeals and making it so whenever we fabricate a claim, we can claim the whole State instead.

    You still have to pay the full cost for each of the provinces in the State (though Espionage does make the cost cheaper). But fabricating on the whole State means you can get claims on stuff you don’t border.


    Picture16.jpg

    Espionage is a great group if you want to have claims everywhere, all the time. Later it will be less useful, though still great, as we’ll get a free CB on everyone in the entire world.

    Claims themselves also have some effects. Claimed provinces cost less to core. They also have a very niche effect on warscore costs. Claimed provinces aren’t cheaper to demand, but when choosing your wargoal, whichever province you pick costs less to take.

    I usually like to claim the highest developed provinces and States first, then work my way down. Of course there are other considerations too, like how easy the wargoal is to occupy, whether you actually plan on taking the province to take advantage of the decreased costs, and so on.

    Using some of our saved up Papal Influence, I further decrease construction costs to help with our building spree.


    Picture17.jpg

    I also see that Spain has broken their guarantee of Clanricarde. We quickly annex the province and feed it to Sligo. The same happens to Tyrconnell whose province is given to Tyrone.

    Ireland is finally, wholly, ours!

    I declare another war in North America. This conflict sees us face Zuni, Navajo, and Yokuts. The enemy decides to siege California, dealing with the peasants there, instead of facing us in battle.


    Picture18.jpg

    (The beginnings of a new Breton CN).

    I pick up another Age bonus giving us extra Prestige every time a missionary converts something.

    We enact the next Government Reform. The main factors here were the +1 admin point per month and the lessened Estate influence. The Corruption increase means we’ll be paying more to buy it down, though right now our passive decrease is negating it.


    Picture19.jpg

    (All of these are good in their own ways. But I want to start curtailing our Estates, and we need the admin power).

    The reduction in influence lets us revoke a privilege from the Nobility. Revoking unimportant privileges is something we’ll slowly be working on.

    Picture20.jpg

    The Privilege gave us a decision for a free general which we've used occasionally like at the end of Chapter 2. But now we have enough mil to not need it).

    Using some cash, I queue up more buildings and 6 light ships. Peoria is annexed into Nevez Breizh. Etowah is annexed into d’Elbene.

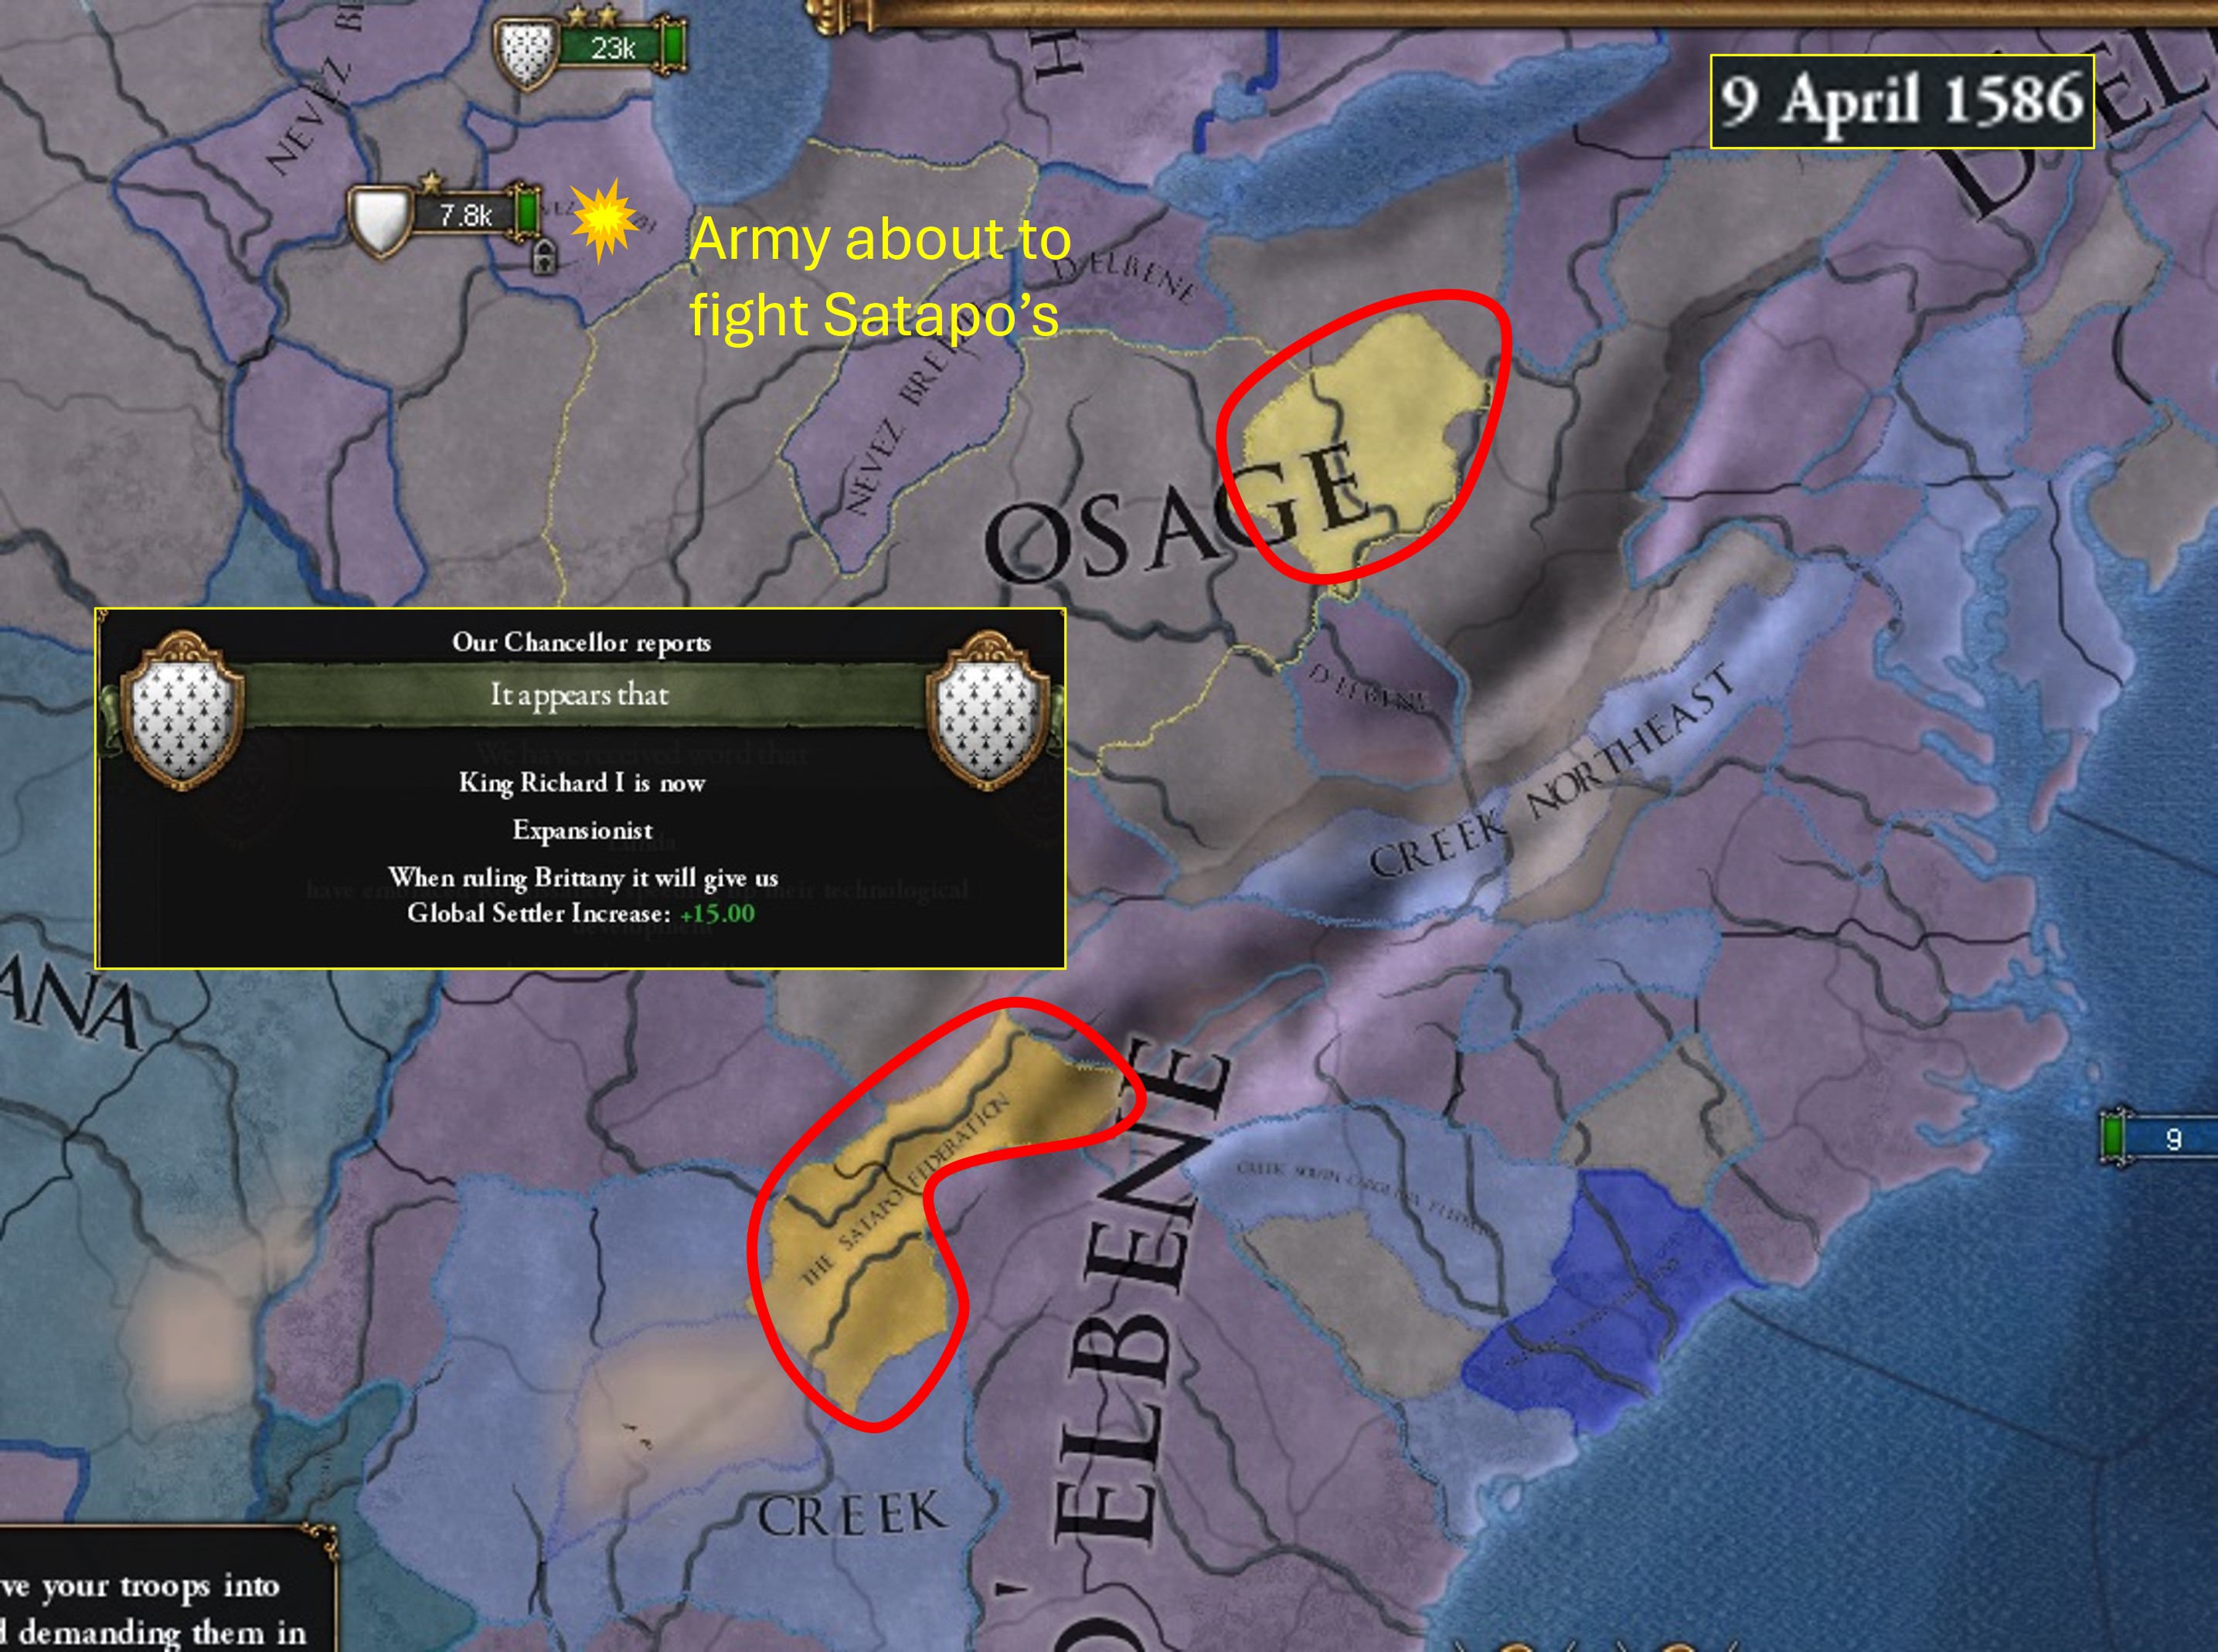
    There are 2 French colonies in South Carolina. I declare on Satapo and Osage.


    Picture21.jpg

    (Three natives left east of the Mississippi. Then It's just as and our European rivals. France has started a second colony in South Carolina).

    King Richard is hailed as an Expansionist. He’s also Cruel too, remember. A Cruel, Expansionist for a King…

    Quite the character.

    But Richard, though villainous, is the ruler Brittany needs. Someone who isn’t afraid to get their hands dirty, to take risks, and to bring Brittany glory and greatness.

    Spain breaks their alliance with Portugal. We annex Osage and Satapo.
     

    Attachments

    • Picture19.jpg
      Picture19.jpg
      1,9 MB · Views: 0
    • 6Like
    • 1
    Reactions:
    CHAPTER FORTY-THREE: Growing Ever Larger, Ever Stronger, Ever Faster! (May 1587-December 1593)
  • CHAPTER FORTY-THREE: Growing Ever Larger, Ever Stronger, Ever Faster!
    |-|
    (May 1587-December 1593)

    Starting off, we have enough points to pick up the second slot in Espionage. This one gives us -20% AE.


    Picture1.jpg

    And the Pope has affirmed Portugal’s right to Colonial Cascadia.


    Picture2.jpg

    Mamuju completes. With no more peasants in California, we send our colonist to the existing settlement in Miwok to help it grow faster.

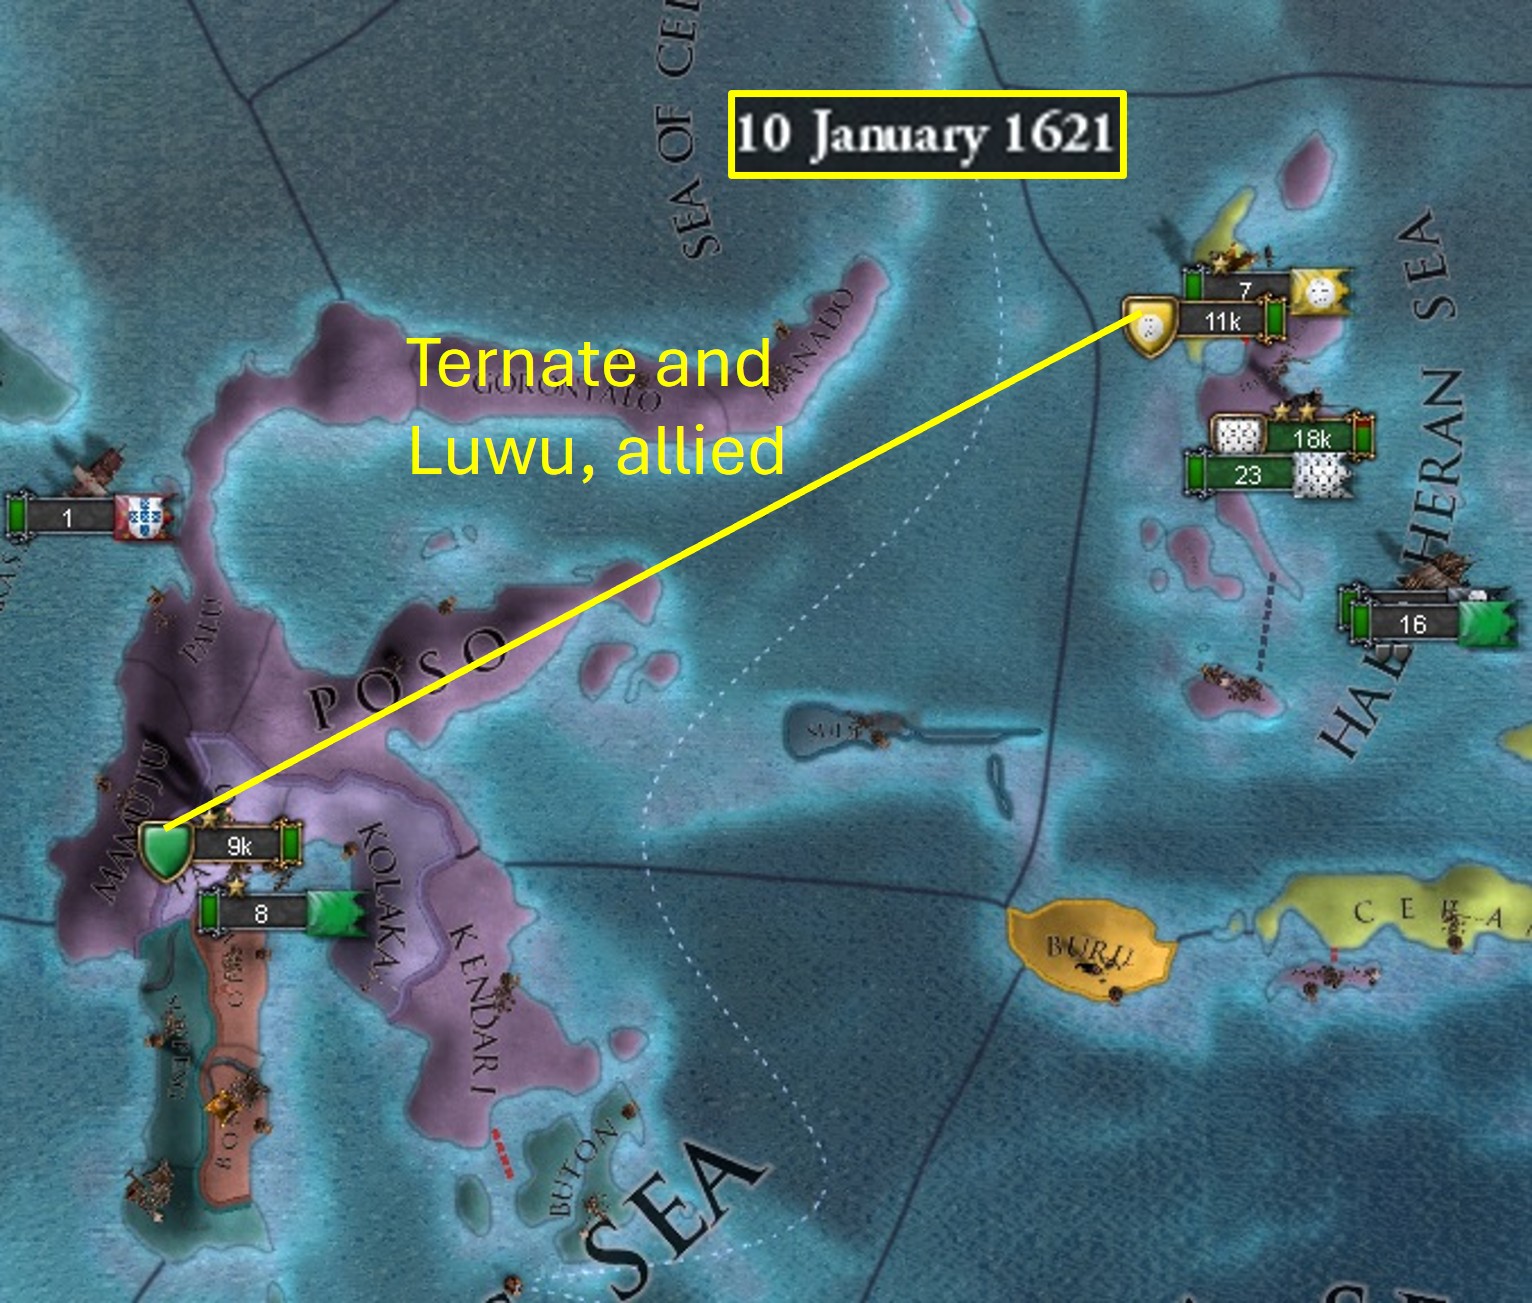
    We have an army of 11k over in Halmahera in the East Indies ready to attack Tidore.

    Not wanting to suffer a strait crossing, I load most of our army onto transports, baiting Tidore into crossing. They do. We reinforce. Our navy blocks their escape to force a stackwipe. We begin a siege.


    Picture3.jpg

    Eora completes. We start a new colony in California (Chumash). Navajo cedes 1 province to us and using their seized gold, we pay off the loans we took at the end of Chapter 41.

    Our inflation is continuing to grow, even with the Papal bonus we took (also Chapter 41) decreasing it slowly. All the gold from Mexico, Matsolo, and various peacedeals is enough to offset that. Using some admin points, I decrease it by 6.


    Picture5.jpg

    Tidore is annexed. Ternate next door is a tempting next target. I notice they have a colony in Ceram to the south.

    T’epot’aha’l in California completes. The next colony is set up in Yaqui nearby. It’s a gold province, meaning our soon-to-be CN in California will also send us gold fleets, same as Al Esperans a Anne.


    Picture7.jpg

    (Because we did not AMT Navajo, they're still around. The province across the water to the west of Yaqui is what we took. Navajo moved one province north).

    We take 1 province from Yokuts (not AMT) and some money. This, plus the Navajo province, are left uncored. They’ll be automatically fed to our CN as soon as they spawn.

    Zuni cedes a large chunk of land to us. I get to work coring the cheapest province of the bunch. That will be our 5th province in the region, enough for a CN.


    Picture8.jpg

    (Did not AMT Yokuts/Navajo to help fill in the region faster).

    We’re busy building many things. But it’s important not to neglect the colonies. I start the process of building up IDB with forcelimit, manpower, and money buildings. We want them to eventually challenge Portugal’s Caribbean colony in a 1v1 for dominance.

    The next Espionage slot is unlocked. We get 50% faster Spy Network construction and 10% faster sieges. Having a large Spy Network on an enemy also helps with sieges against them, so this is a double bonus.

    We’ve discreetly shipped 27k to Gabu in West Africa. It’s time for another war there. Since we last looked over here, the region has mostly consolidated under Songhai, though a few smaller powers remain.


    Picture9.jpg

    We declare on one of those smaller nations, Kaabu. They are allied to Songhai.

    As that goes on, another North American conflict is started against Wichiyena, Pawnee, Kiowa, and Nehiyaw all on the Great Plains.


    Picture10.jpg

    (Kiowa is over in the Pacific Northwest, well out of range. Everyone else though, we can take).

    Norway gets their own CN in Canada. Miwok finishes. We head again to Australia, but again our colonist is kicked out. Busy with our 2 wars, I don’t notice and forget to reassign him before the end of this update.

    Neither war is all that intense. We haven’t seen a single enemy army in Africa. Kaabu is full occupied. Songhai is being slowly sieged. We pick up the next mil tech a bit ahead of time for some Innovativeness.


    Picture12.jpg

    (Songhai's busy with a war in the east, so we haven't seen a single army. Kaabu is futilely trying to siege Benin).

    It’s a very key tech, giving us new artillery units (we’re at 8 pips instead of 6) and increasing our artillery’s Fire value by a whopping +1!

    We’re not at the point yet where artillery starts doing all the damage, but this tech is a major step. Our artillery now does more than double the Fire damage that our infantry does. But remember artillery only does half damage if it isn’t on the frontline (Chapter 28), so for practical purposes this increase isn’t as huge.


    Picture13.jpg

    (Looking at the top of the image and going off raw stats, our artillery now does 2.65 total damage. Compare that to infantry's 2.25 and cav's 2.5. Aside from rounding artillery's number down though to ~1.32, there's also the monetary factor. One regiment of artillery is 3x more expensive to recruit than an infantry. One unit of cav is only slightly cheaper than one of cannon).

    We get an extra diplomat and -15% Advisor costs from the next Espionage perk. Pawnee, Nehiyaw, and Wichiyena are all annexed.

    Picture14.jpg

    Songhai is peaced out. We take 2 provinces and cash. We shouldn’t have been able to, I don’t think, since we have no land or sea connection, but the game allowed us. Perhaps it was because of the Songhai-Kaabu alliance in some way.

    Bure has a fort and produces gold. Joma is a Trade Center. Both very useful. Kaabu is then annexed.


    Picture15.jpg

    In terms of Great Power score, we’re still in 5th place, but only 73 points behind France in 3rd.

    Our income? 66.25 gross. Our inflation is slowly being bought down with admin points.

    Our War Exhaustion is almost all gone. This latest batch (2.9) was only accrued due to the Kaabu war.


    Picture16.jpg

    (Highlighted in blue is our War Exhaustion).

    Our manpower sits at 59,150 with a cap somewhere in the 60,000 range.

    We have 61,000 men under arms and 43 ships that sail the seas.

    Cork, our capital, has 37 Development. It’s a hub of commerce and one of the largest cities in the world.


    Picture22.jpg

    (Whenever we've conquered land recently, like from Zuni and Songhai, I've used Concentrate Development to steal some Dev for our capital).

    Brittany has never been stronger, never this close to greatness!

    And we’ve only further heights to climb.


    Torchlight flickered unevenly on the walls. Members of the court and prominent citizens rushed past, each finding a seat in the crowded hall. Those that were late had to contend with others for seats and, failing that, stand near the back, nearly out of sight. They were buffeted constantly by the snowy wind as even more latecomers filed into the room, nodding apologies.

    It was two days after Christmas, the New Year was nearly upon them. Yet King Richard, first of his name, was a man impossible to deny. Every man present had had his name twice checked on a list by the captain of the royal guard. For those that were old enough to remember, such a thing had not been necessary in Brittany.

    But then, they were not in Brittany anymore.

    Even though they spoke in whispers, with the sheer number of mouths flapping, the hall had reached a steady commotion. Loyalists mingled with lesser lords. Bretons mixed with Irishmen.

    In a side room the King paced eagerly, mentally preparing his speech. He forgot who had said it, but Richard knew that words had meaning. Words had power. Power enough to command and cow. Power enough to mend and break. Power enough to bless and bury.

    Snapping his fingers, he listened greedily to the voices beyond the chamber. Those were his people. Those were his subjects. They would hear him out and, at best, resist lightly before bowing their heads. At worst…

    Well, Richard had dealt with such things before.

    His dear, departed father had given him a mess. But now, now Brittany sang like a well-trained bird.

    There were still screeches and squawks from time to time. Richard knew perfection was impossible. He just relished the challenge. It was a thrill to fight and plan. To him, the burdens of rulership felt almost like one large game.

    It was a game he would win.

    . . .

    The speech neared the climax. Richard stared out at the attentive faces of the lords of the realm. This was his moment to savor. Brittany had come this far off the back of his work, not theirs.

    He took a deep breath, pausing dramatically, and gave his voice a commanding pitch.

    “Our rivals thought to snuff us out. To bury us in the dust. These attempts have left Brittany scarred, exiled. But rest assured that my resolve is unwavering. We will emerge from this crisis even stronger! For the sake of stability, Brittany shall be reorganized into a glorious empire! One dedicated to the security of its citizens above all. I am prepared to do what is necessary. Are you?”


    Author's Note: I feel like this narrative episode is missing something, yet can't put my finger on what that might be. Feel free to let me know what you thought of this one.

    I also think that, if Richard were real and living in the 21st Century, that the Guns, Drums, and Steel tracks would be all he'd listen to.
     
    • 6Like
    Reactions:
    CHAPTER FORTY-FOUR: Wars, Colonies, Revolts, & Excommunication (December 1593-October 1600)
  • Author's Note: Be warned, a very long chapter below. But this is the best way I found to split these up.


    CHAPTER FORTY-FOUR: Wars, Colonies, Revolts, & Excommunication
    |-|
    (December 1593-October 1600)

    The Papal bonus that decreases our inflation has expired and I retake it. That should at least help a bit. As you’ll see sometime below, this purchase, plus another, has unintended consequences.

    Picture1.jpg

    In the meantime, our colony in Wurundjeri finishes. We move one province to the west. Gunditjmara has no native tribes adjacent to it, so we should be safe from any migration-cancellations this time.

    Picture2.jpg

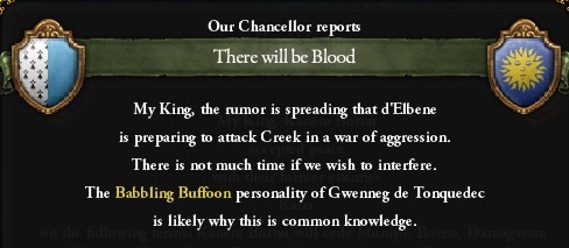
    A few days after that, our spies capture an urgent missive. Our CN, d’Elbene, is planning to attack Creek on their own!

    Usually I would allow this, but I want to ensure that Creek stays around in the provinces bordering French South Carolina. France might declare their own war against a weakened Creek afterward, giving them enough land for a CN and letting d’Elbene take it themselves later without French interference.


    Picture3.jpg

    I declare war on Creek immediately. This cancels out d’Elbene’s own plans, since they’re now at war with them anyway, and we now control the peacedeal.

    As we attack Creek, we also vassalize Jambi in Sumatra. Our diplomats have been working away diligently for a while now. A lot of the smaller nations in Southeast Asia (Deli, Jambi, Pahang, Kutai) are all willing to become our vassals, especially with the extra +15 reasons we’ll soon get from finishing Espionage.


    Picture4.jpg

    (Cicled in blue is Jambi. They have 2 provinces, one on mainland Sumatra and an island strait-crossing just off the coast).

    Most of our treasury, recently buoyed by the Songhai war, is spent on 4 Manufactories (Kildare, Ulster, Midlands, and Limerick).

    Our colonies have the Creek war well in hand. It’s only a matter of time until we gain victory.

    With no distractions, we start a war in Africa against Jolof and Timbuktu. Their alliance bloc has broken down as Songhai has consolidated the region. Kong is completely gone. This war shouldn’t be as difficult as it was back in Chapter 32.


    Picture5.jpg

    After that, our California CN spawns in. I name it after Brittany’s ruling dynasty: Douar-font Dreux (DFD), which I think roughly translates to Dreuxland. It’s a Crown Colony. The new merchant is sent to California to transfer to Mississippi.

    Writing this now and looking over screenshots, I think the name is a little wonky. I might have to revise it a bit later. But we have a century to go until then.


    Picture6.jpg

    England boasts about circumnavigating the Globe, a minor achievement of no significance. It won’t save them from being eclipsed.

    Picture7.jpg

    Our manpower is looking fine. We have around 61k in reserve, but I feel it’s better to play it safe. Using 50 more Papal Influence, I pick up the manpower recovery bonus as well.

    This, importantly, brings us below 50 Papal Influence. And, also key, our rivals in Portugal have seized the Papacy.

    King Richard is Excommunicated.

    Those Iberian fiends!


    Picture8.jpg

    The requirements for Excommunication are:
    • The Papal States has a negative opinion of the target.
      • As I said, our diplomats have been busy in Asia. I must’ve let the improve relations slip.
    • The target has less than 50 Papal Influence.
    By taking both the inflation and manpower bonuses together, we’ve inadvertently handicapped ourselves for the next while.

    The penalties aren’t game breaking. But they also aren’t anything to scoff at. In an RP sense, this just continues our long-running feud with the Pope.

    How can we lift this curse, you ask?

    Well, we have to either get Portugal to like us, or we wait until someone who does takes the Curia for themselves. We can also buy an indulgence, but that requires a boatload of cash. And if we do that, Portugal can just Excommunicate again after 5-year timer. I’d like to wait until the Pope isn’t a Portuguese puppet.

    To rub salt on the wound, we lose 1 Stability from an event.

    Sometimes, I feel like when it rains it pours in this game.

    With California secured under a subject, our colonies at Yaqui and Chumash both complete on schedule. Moving again to Australia, I claim Kurrama in the northwest and Guugu Yimithirr in the northeast. Both aren’t currently adjacent to any natives.


    Picture9.jpg

    Timbuktu is separate peaced for 1 province. We don’t intend on keeping this one for ourselves though. I have other plans. But we must be at peace first.

    Jolof is annexed and we get 80 ducats.


    Picture10.jpg

    (In yellow, the 1 province taken from Timbuktu).

    Creek’s ally in North America, Atahachi, is annexed. Creek cedes almost all their land to our CNs. All they’re left with is some provinces adjacent to France, Denmark, and Portugal. I’m hoping our rivals take the bait.

    Picture11.jpg

    (To recap, you need 5 cored provinces in a given region for a CN to spawn. Denmark and France both currently have 4, Portugal has 2. I've left Creek strategically separated in spots to tempt the European AIs to attack).

    I take this moment to also enlarge Douar-font Dreux’s gold fleet just like we’ve done previously to Al Esperans (Chapter 40).

    But now that we’re at peace, I can enact my plan for the province we stole from Timbuktu. I plan to release a vassal.

    As mentioned in Chapter 28, there are 3 ways to make vassals:

    • Force vassalize them in a war. Only works if the nation is small enough.
    • Diplo-vassalize them using alliances, improve relations, etc.
    • Release a subject out of yourself.
    In the Diplomacy screen, there’s a button at the bottom below the countries list to do the third option.

    If you have a slightly different button in this spot, click it so you’re looking at your own nation, not another country. Or you can right-click your country on the map.

    Clicking the button to release a subject lists every possible nation that could be popped out of you. In this case, we want to release Fulo.

    Fulo unfortunately has a core on Kantor, a province we’ve already cored from Kaabu. This is a slight waste of admin points, but giving up Kantor is worth it because of what Fulo gives us in return. Take a look at this:


    Picture12.jpg

    We gave up Kantor, plus uncored Trarza and Bambuk. But we’ve gained access to Fulo’s cores outside our borders.

    That’s 7 extra provinces in Africa that can be taken cheaply for little AE, unrest, and warscore.

    Continuing our goal of preparing for Absolutism, I revoke another privilege from the Nobility. We don’t need cheaper colonies anymore. Our economy can handle it and we’re running out of free land anyway.

    Immediately after though, I backtrack and take the integration privilege instead. It’s time to say goodbye to Tyrone and Sligo. We slowly annex them both, one at a time.

    Also, yes, there’s a massive rebellion going on in Ireland right now. If you looked at the screenshot of Fulo’s cores and wondered where our army and transports were going, that’s where. In fact, they’ve nearly arrived.


    Picture13.jpg

    Despite the revolt (maybe to spite it. Hah!), I upgrade our Trade Center in Cork to level 3. It’s now a World Port. The extra Trade Power gives us a bigger share in the North Sea, and the Dev cost and +1 building slot don’t hurt either.

    A chunk of cash is also spent in Cork to build a Shipyard. At this time, I also move our merchant from North Sea to Amazonas, which ends up transferring into Caribbean.


    Picture14.jpg
    Picture15.jpg

    (The increase in trade income from the Trade Center upgrade and merchant movement).

    The next Espionage slot is taken. The Foreign Spy Detection is nice for catching, get this, foreign spies. Late-game especially our rivals will constantly be trying to harry us. And the Corruption decrease offsets the extra Corruption we’re getting from our most recent Government Reform (Chapter 42).

    Picture16.jpg

    In miscellaneous news, Portugal attacks a weakened Zuni, eating a large chunk. And we offer knowledge of the latest Institution to Ayutthaya for a fee of 4.56 ducats a month.

    And at least one country has fallen for our trap. Denmark goes against Creek!

    At some point the Kurrama colonist was recalled. Whether that was my decision, or a native forced me out I’m not sure. I don’t have a screenshot of the exact moment, so I thought at first maybe it finished. But looking through later screenshots I was able to see that we don’t own it in the future.

    Gunditjmara and Guugu Yimithirr are both still planted and growing. But we send the free colonist to Sakam on the southern tip of Taiwan.

    6 Training Fields (the upgrade to a Barracks) are built across our empire to further increase our manpower. Once those are complete, I queue up a Marketplace in one of our Trade Centers (maybe in Africa, I think. Again, no exact screenshot. I can just see it in the outliner). Everything is ramping up fast.

    At the end of Chapter 41 (June 1578) I posited how much more our income might grow before the end of the century. Then, it was 41.19.

    Now, we’re 20 years and a month later with 2 years left before 1600. Production has nearly doubled to 14.04. While Trade income has seen the largest boost, going from 14.07 to 23.81.

    Our income is 75.54 gross. A hefty increase of over 30 ducats!


    Picture17.jpg

    War Exhaustion, the persistent issue, is back to manageable levels. We only have a bit left over from the Jolof-Timbuktu conflict. Our inflation is still high but being worked on.

    We even pick up another Age bonus, giving less warscore costs against heathens and heretics. That means more war on the horizon, but now we have an economy that can handle it.

    At least there is some justice in the world. France is Excommunicated too! Hopefully this slows the French behemoth down.

    Portugal is no longer the Papal Controller. That honor now belongs to Strasbourg. They hate us just because of the Excommunication. But if we improve relations they should lift it. One of our diplomats gets to work.


    Picture18.jpg

    King Richard may be a cruel, ambitious, and controlling ruler, But Queen Isabelle knows how to smooth things over. The extra points will help us complete Espionage quicker.

    Picture19.jpg

    Some problems, however, can’t be solved with words. After dealing with the revolt in Ireland, our army sails yet again for an often-overlooked part of our nation.

    Ile Bourbon was colonized way back when as an outpost (Chapter 32). During the chaos of Richard’s early reign, some peasants revolted and occupied the island. According to the province log that was only, let’s see…

    40 years ago!


    Picture20.jpg

    At last, our army has got around putting the peasants back in their place. This strange, all too brief, period in the island’s history is over.

    Realistically, Ile Bourbon has been independent and ruled by peasants this entire time. EU4 just doesn’t model revolts that way.

    Gunditjmara finishes. I set up a base in Guam. I wanted either Wake or Midway, but those have both already been claimed by the Portuguese and English respectively.

    Denmark ends their war with Creek, taking the only province they could reach. It’s still enough for a CN once they core it. And more free land for d’Elbene once that happens.


    Picture21.jpg

    We take admin tech 16 giving yet another Manufactory.

    Here’s some metrics and a brief tidbit to end-off the update:

    We have the world’s seventh highest max manpower, a testament to our focus on mil Dev and Barracks/Training Fields.


    Picture22.jpg

    We have the eighth highest Score. In terms of Ages, this one has been our best yet, far outpacing our gains in the Age of Discovery.

    Picture23.jpg

    We’re fourteenth in income. If we keep this pace, we’ll soon make the top 10.

    Picture24.jpg

    We own a decent share of different Trade Goods, giving us a couple minor buffs.

    Picture25.jpg

    We’re the fifth GP, just barely behind France and Spain.

    Picture36.jpg

    (Comparing our GP rank to last chapter, we're still in 5th place. But we've grown by 84 points. Spain grew by 61, surpassing France. France grew by only 21).

    We have 63,000 men under arms and 49 ships under sail.

    In terms of Development, we’re in eleventh place. And, surprisingly, we’re below d’Elbene.


    Picture37.jpg

    Adding our Development with d’Elbene’s and Al Esperans a Anne’s, we’re at 1,730 in second place. That doesn’t include Douar-font Dreux, Henrika, Nevez Breizh, or Iles de Beaumetz, so we might even surpass Russia.

    This goes to @TheButterflyComposer's point a few chapters ago of creating an American monarchy. We would be much, much stronger if all this land was ours directly. And if I weren’t doing a tutorial and trying to showcase CNs as a mechanic, I would do that.

    Having a colonial empire like this really only works if like Spain, England, or Portugal you have a solid homebase. We did not have that and have even been kicked from our home base. Only now are we reaching the point (via Ireland and Africa) where we have a solid amount of land under us.

    So yes, we’ve handicapped ourselves. But again, I want to show off CNs and how even in horrible positions you can still come back.

    We will return to the mainland one day and make France pay.
     
    Last edited:
    • 4Like
    • 2
    Reactions:
    CHAPTER FORTY-FIVE: The First Major Move (October 1600-November 1605)
  • CHAPTER FORTY-FIVE: The First Major Move
    |-|
    (October 1600-November 1605)

    It’s a new play session and we’re about to do something massive.

    In Chapter 43, we started the process of building up Enez a Beaumetz (renamed at some point) for an eventual war against Portugal’s Caribbean CN, Caraibas. After much preparation, I believe our subject is ready.


    Picture1.jpg

    There are 3 things I prioritize when building up a CN for a 1v1, forcelimit, tax, and production. Any forcelimit buildings that give roughly +1 I build. Any tax or production buildings that give at least +0.10 I build.

    After that, if none of those are available, I like to build manpower buildings. Anything that gives a couple hundred is fine. Anything 1,000+ is excellent.

    The level 1 versions of these buildings are sufficient. You don’t really need to splurge for the higher tiers.

    In terms of navy and manpower Caraibas has the advantage, but in terms of armies EAB wins out. EAB also has more ideas completed, which if they’ve picked a military idea group could prove decisive.

    Our CN’s entire army is stationed in Cuba, which immediately pounces on a defenseless enemy 7k. EAB can now occupy the island and wargoal unopposed.


    Picture2.jpg

    We’ll check back later to see how our colony is doing.

    The outcome of the war in the Caribbean will have a major long-term effect on our trade. With more control in the area from an EAB victory, we’ll be able to funnel money away from Sevilla and towards the North Sea.

    Trade is an increasingly key part nations’ economies. And with globe-spanning empires, trade itself goes global. The next Institution, Global Trade, has spawned in Lincolnshire. As you can see from the dashed-green lines, most everybody will soon have it.


    Picture3.jpg

    Comparing one of our TCs in Benin versus our capital in Cork, the Institution will grow in both provinces very fast.


    Picture4.jpg

    EAB’s war goes well. Cuba is being occupied and they’re winning a naval battle near Venezuela.


    Picture5.jpg

    Last chapter, we started the annexations of Tyrone and Sligo. Tyrone is gone, and Sligo’s annexation is just about to finish, however before it completes, I want to get one last boon from them.

    One of the Age Objectives wants us to convert another nation’s religion. We could do this either through war or we could force one of our vassals to convert.


    Picture7.jpg

    (Marked as complete because the screenshot is after our interaction with Sligo).

    Because Tyrone and Sligo’s provinces were both Anglican when they were released from England, they follow the Anglican creed. I force Sligo back into the folds of Papal authority, then cancel the Divert Trade toggle so the annexation can still progress (they would’ve been above 50 LD otherwise).


    Picture6.jpg

    A month later, the integration finishes.

    Having saved up enough money, I buy an Indulgence from the Pope. Usually this just increases our Papal Influence gain. But since King Richard is also Excommunicated, it lifts that as well. Spending so much money hurts, but I feel it’s worth it.


    Picture8.jpg

    Since we’re no longer a pariah, the Pope grants Colonial California to us in a treaty. See, I told you, worth it.

    The second-to-last Espionage slot is picked up. This slot is probably the weakest of the group, though the chance to capture ships is nice.


    Picture9.jpg

    Back in the Caribbean, Caraibas sits on Hispaniola as EAB invades the Lesser Antilles. Our victory is assured.

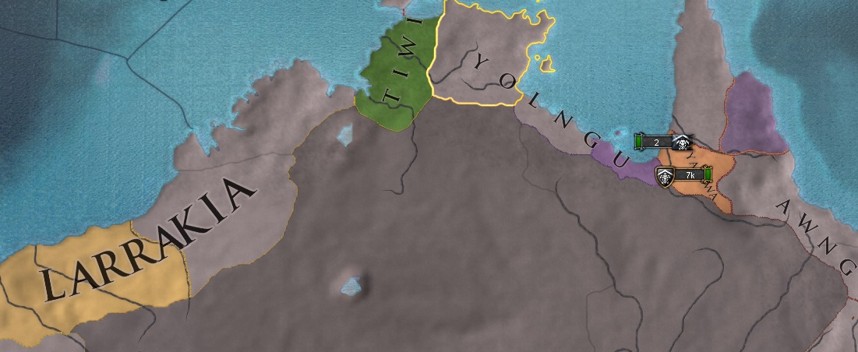
    I notice an English colony on the northern tip of Taiwan. The middle portion of the island is still unclaimed. A sort of DMZ.

    Guugu Yimithirr is almost done, so another Australian post is set up at Yolngu. And once GY does finish, we get an Australian CN. I couldn’t think of anything so just went with the default name. Terre Australe is, once again, a Crown Colony.

    Sakam finishes soon after. Rather than end the stand-off in Taiwan, I head for Ilocos in the Philippines.


    Picture10.jpg
    Picture11.jpg

    New Denmark has spawned in North America and d’Elbene is well prepared for a 1v1. They win easily and annex all of it. One threat dealt with.


    Picture12.jpg

    (New Denmark, pre-annexation).

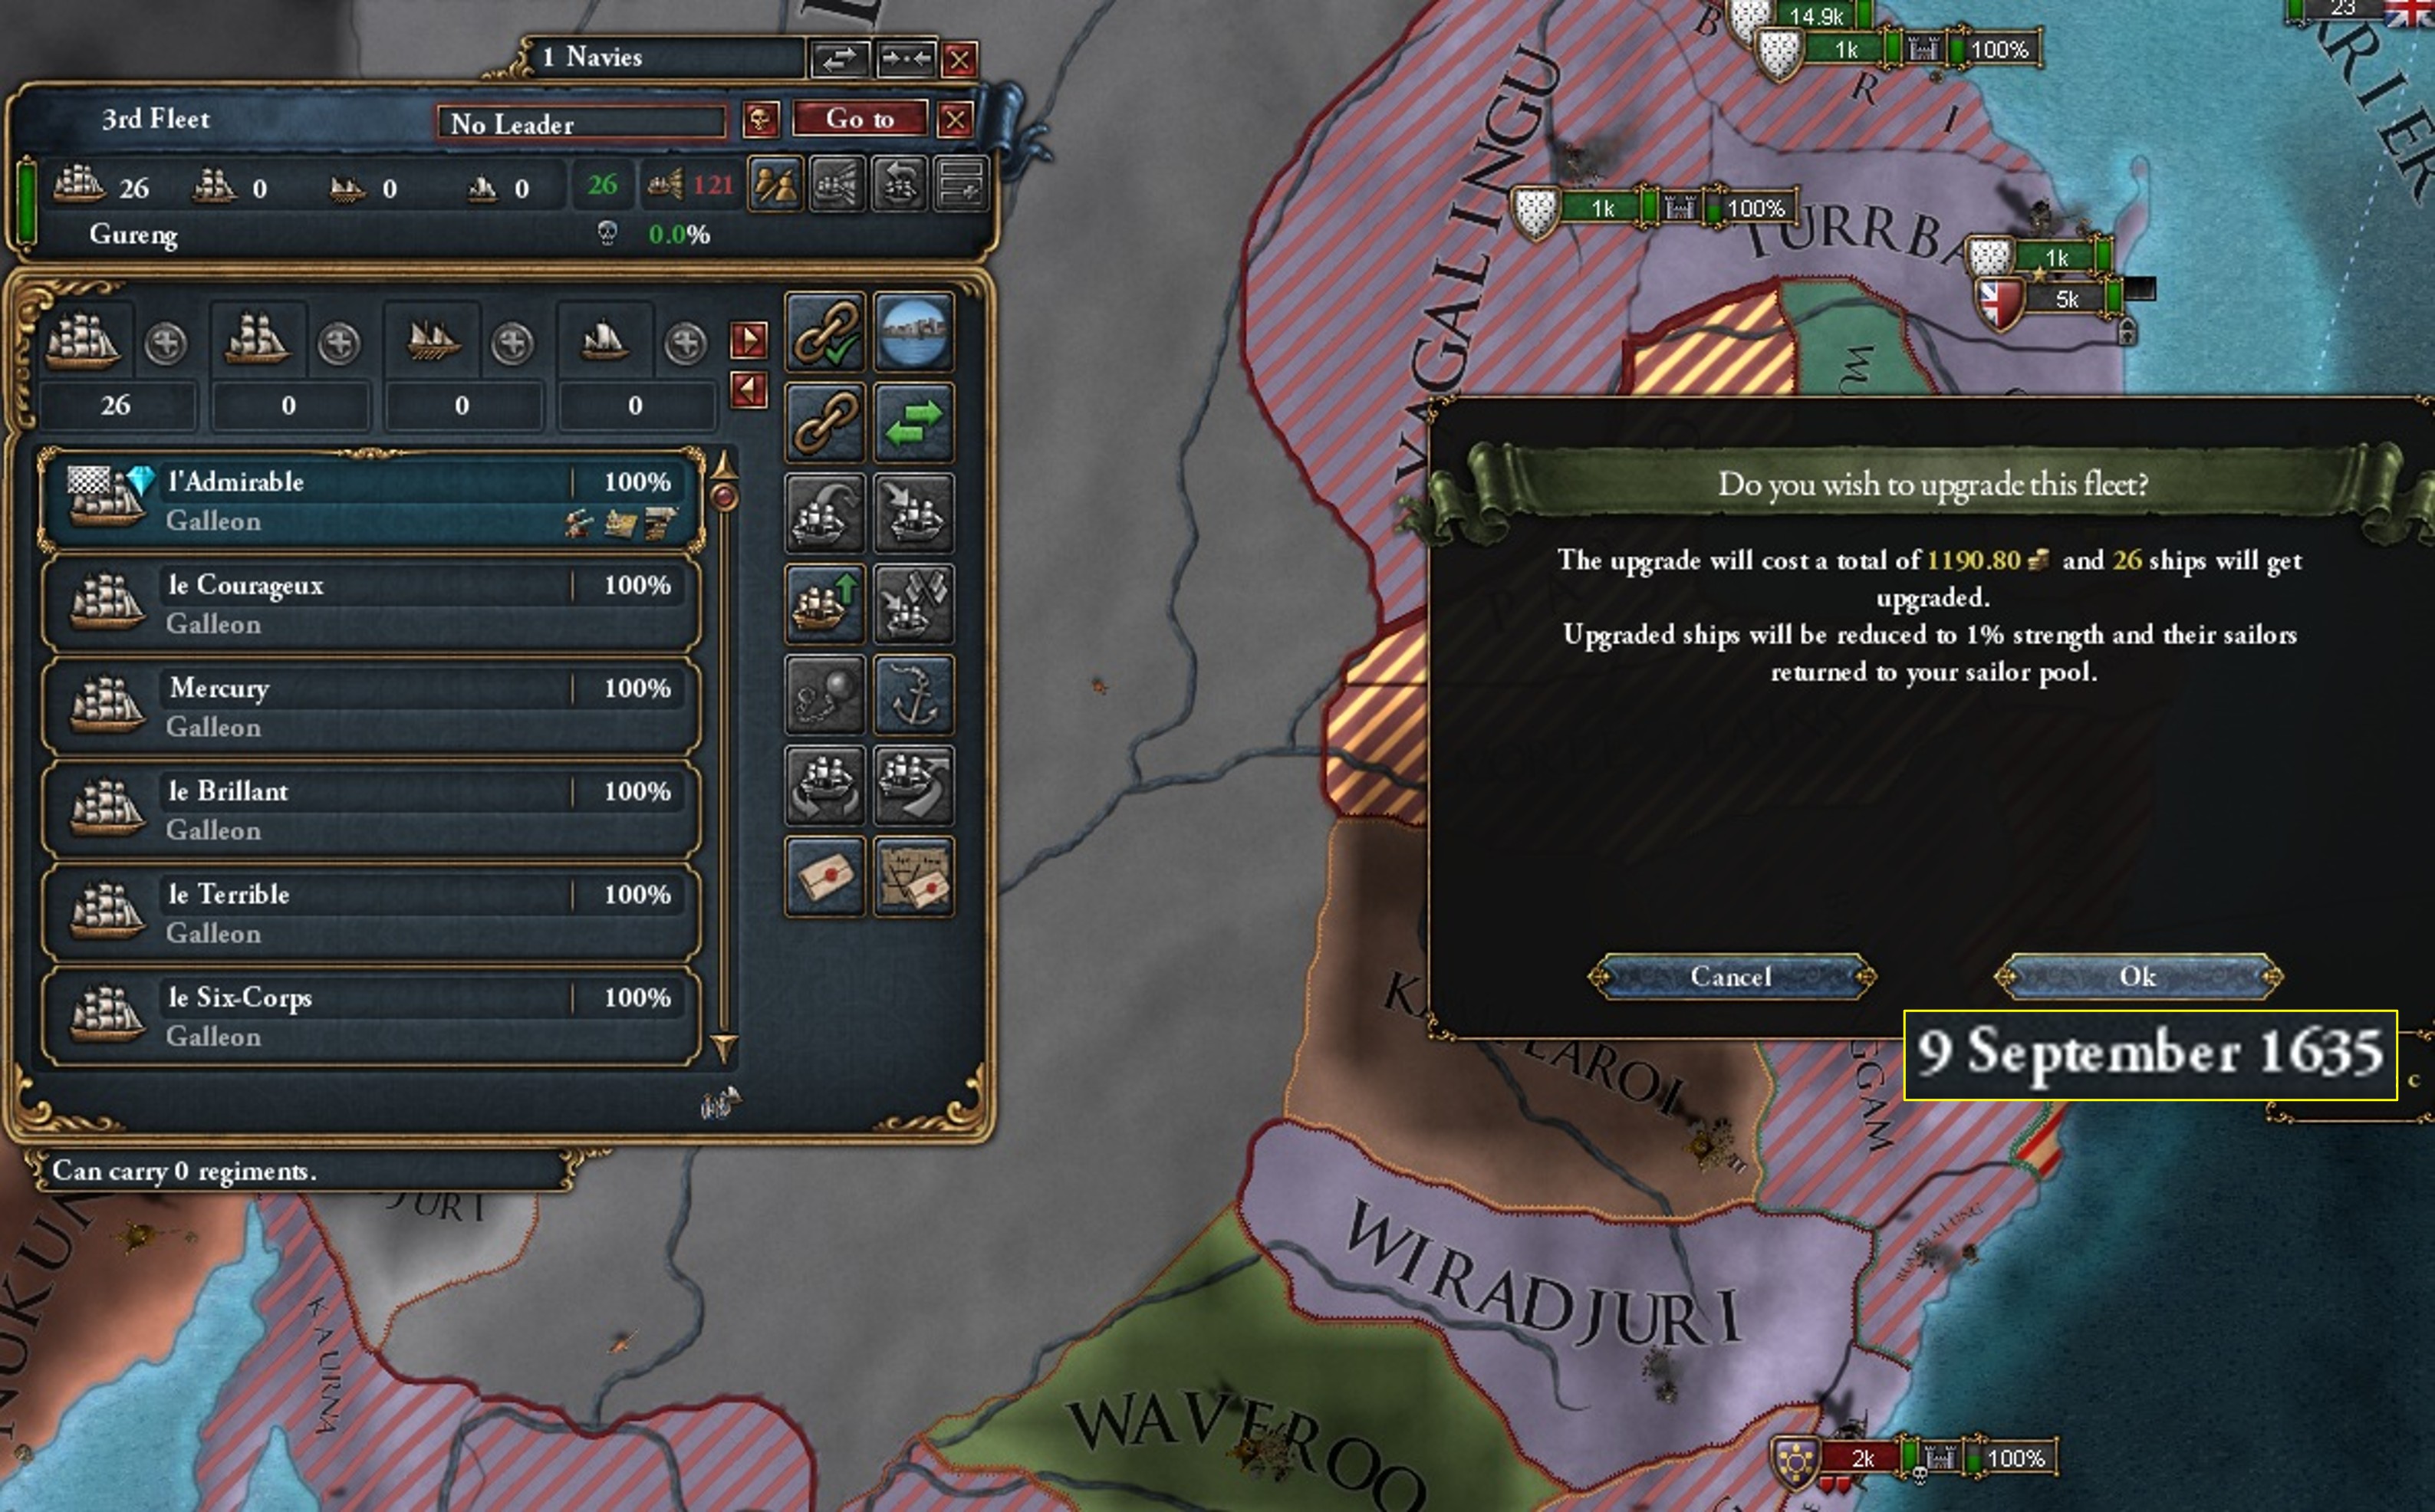
    Our economy is in good enough shape now (80.22 gross) that I decide to invest into the navy. A fleet of 20 heavy ships is queued up. It’s not enough to match France, but perhaps someone else, close by…

    I also think this particular moment is a good time to build a heavy fleet because the next upgrade for those ships is 3 techs away (tech 19). It would hurt to build a new modern fleet, only for them to immediately become outdated. We can upgrade ships, but that requires another money sink.


    Picture13.jpg

    (Cork is a great shipbuilding location due to its Development and Shipyard).

    Here’s a comparison of our current navy (minus the heavies currently being built) and England’s. Why England? Um…no reason…none…

    Picture14.jpg

    But first, another war in the Americas. The truce with Navajo is up, and now that Douar-font Dreux is a thing, we don’t have to worry about coring or overextension. That’s our subject’s problem!


    Picture15.jpg

    You may remember that previously Portugal was at war with Zuni. You should definitely remember (King Richard certainly does) that they were also the Papal Controller. At some point during their Zuni war, Portugal must have called for a Crusade against Zuni.

    Now that we’re at war with Zuni, we get some bonuses for heeding the Pope’s call. Zuni is a scourge of Christendom. Deus Vult. Yada-yada.

    France, seeing our growing power, decides to colonize next to our outpost in Greenland. That’s something we’ll have to keep an eye on.

    Espionage is finally finished. We get some useful bonuses, especially the coveted +15 reasons for vassalization acceptance. Already we can see that many nations would peacefully submit.


    Picture16.jpg
    Picture17.jpg

    (With some alliances, guarantees, and improve-relations, many small nations will accept. The questions now become: how many relation-slots are we willing to fill and go over, and who do we focus on first.).
    The completion of this Idea Group also gives us 2 new Policies we can turn on. I enact both. The extra Diplo Rep will help a ton with our vassalization attempts. And the cost to fabricate claims pairs well with our number of diplomats and the other discounts from Espionage already.

    Picture18.jpg

    Jambi is already our vassal, now we vassalize Deli.


    Picture19.jpg

    Global Trade is embraced for 1,000 ducats, giving us another merchant. But that’s not all. We also get another merchant from a decision we can now take. It required us to have the Institution and own a province in Asia.


    Picture20.jpg

    The first merchant is sent to Malacca to transfer to the Cape of Good Hope. The second is sent to Chesapeake Bay and transfer to GSL.

    Having a merchant in the East Indies also gets us more Trade Efficiency (an increase to our trade income) from a triggered modifier. As long as we fulfill these conditions, we'll get the increase.


    Picture21.jpg

    Our colony at Guam is complete, so we continue our settling of the Philippines. Leyte is next on our list.


    Picture22.jpg

    Yokuts cedes 1 province to DFD. Zuni gives 2 to them as well. Navajo is AMT’d.


    Picture24.jpg

    And EDB ends their war against Caraibas, gaining complete victory. All of Cuba and most of the Lesser Antilles is taken. They are definitely the stronger power now. Once the truce is up, we’ll have them declare again, and again, until there is nothing left.


    Picture23.jpg
     
    • 6Like
    Reactions:
    CHAPTER FORTY-SIX: Flagships, Admin Efficiency, Universities (November 1605-December 1609)
  • CHAPTER FORTY-SIX: Flagships, Admin Efficiency, Universities
    |-|
    (November 1605-December 1609)

    Next to our colony in Ilocos, Pangasinan is peacefully vassalized. Having a land border with a country makes it much easier for them to accept.


    Picture1.jpg

    According to the game, we’re the first Europeans to trade in China. Nice!


    Picture2.jpg

    Once more, war Africa is declared. It’s time Timbuktu gave Fulo their lands back. I build 7 more cannons, even if it puts us slightly above forcelimit, to help with sieges and battles.


    Picture3.jpg

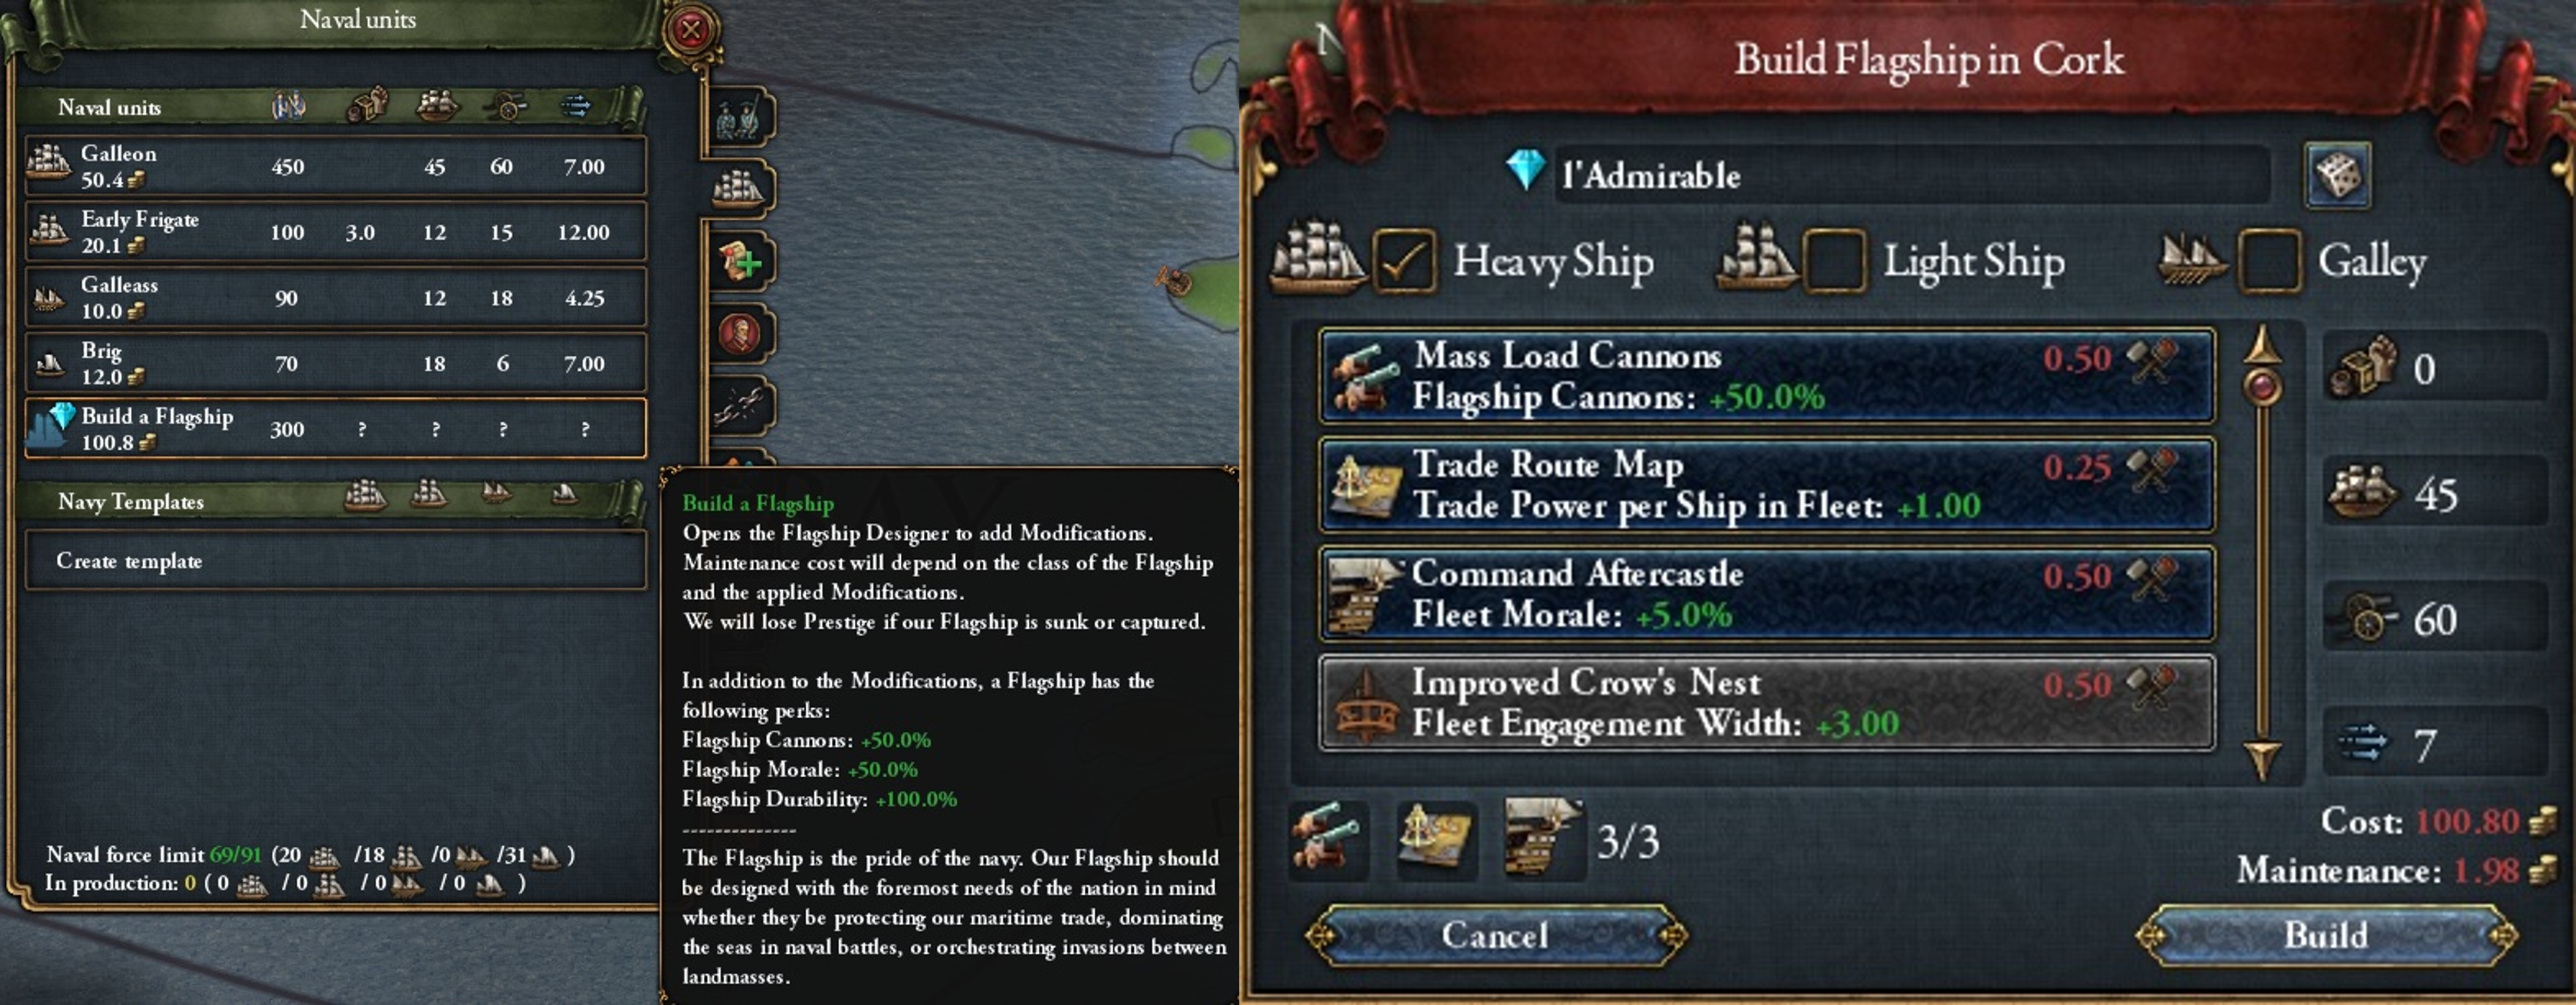
    Our 20 heavies are done, sitting mothballed in Cork. But our shiny new fleet is missing one thing. A jewel, a flagship.

    Every nation can build 1, and only 1, flagship. A flagship can be given up to 3 modifiers. These modifiers could buff the ship itself or the fleet it is a part of. I usually like to buff the flagship’s cannons, then the fleet's morale, then its Trade Power.


    Picture4.jpg

    The Trade Power buff is the most interesting to me, because usually only light ships have Trade Power. But with this modifier, every ship in the flagship's fleet gains some Trade Power. So, you can have your transports, galleys, and heavies contribute to your income, rather than just expenses.

    With Espionage complete, we can catch up on diplo tech. Tech 16 isn’t all that important, but it’s a minor boost to our trade income.


    Picture5.jpg

    We start colonizing Cagayan, as Yolngu is almost done. Ilocos is close as well, so another colony is started in Lombok. This is so we cut Spain off from Java via land.


    Picture6.jpg
    Picture7.jpg

    (In the left image, you can see Pangasinan with their 3k armies and 6 ships. For the right image, the island in-between Lombok and mainland Java is owned by Sunda).

    The latest admin, diplo, and mil techs are all taken on time in 1609. The admin tech is the most important, giving us access to Universities, Dev cost reduction, and Admin Efficiency.

    Admin Efficiency makes diplo-annexation and coring cheaper. It also means that uncored provinces cause less overextension and AE when conquered and are cheaper to demand.

    This is one of the reasons Absolutism is so important. Having high Absolutism will give us high Admin Efficiency. Wars are becoming larger, not just in terms of the number of armies and the scale of economies, but also in the scope of peacedeals.

    Universities don’t cost a building slot and give whichever province they’re in decreased Dev cost. They can be built everywhere with no limit.

    The diplo tech gives us an upgrade to our Marketplaces and an upgrade to our transports. The mil tech gives +1 cavalry Shock. We gain and enact a decision for Missionary Strength because of this latest round of tech.


    Picture8.jpg

    Our nation is truly great.

    Don’t, for some reason, believe me? Here, have a look:

    Picture9.jpg

    (Our strategy of long-term growth and expansion is paying off).

    We are, for now because of the Institution, the greatest of Great Powers. Even without the Institution, we’re still in 3rd place. And, crucially, we’re ahead of France, Spain, and England.

    Given our situation at the start of King Richard’s reign, I’d say he’s done a pretty good job. I told you his reign was impactful, perhaps the most impactful of the campaign, didn’t I?

    To celebrate, I construct a University in Limerick. It will be the first of many. I chose Limerick specifically because it is one of the least Developed Irish provinces, so will benefit the most from having the decreased Dev cost.

    Sometime during the last update, I did not mention that Vinland (a Danish CN) had declared on Norwegian Canada (guess whose CN).

    I only mention it now because a peace has been signed. The Norwegian side won. Even though Norway is a subject of Denmark, their colonies can still fight each other as normal. I’ve never seen this before, so thought I’d share.


    Picture10.jpg

    The general balance of power in the region has shifted more towards Norway, which means they might feel confident enough to break free from Denmark in the future. We’ll want all of North America eventually anyway, regardless of who owns it.

    Air, one of Timbuktu’s allies, is made to become our vassal. They may be cut off from the rest of our empire, but they’ll be a nice distraction should we find ourselves at war with Songhai again, which (spoiler) we will. They have a nice number of cores as well.


    Picture11.jpg

    (Here's Air and their cores. Useful for expanding cheaply into the interior).

    And now for a major development in Europe. England has declared on Scotland and France has dishonored the call. King Richard watches the situation very, very closely. His greedy eyes take on that familiar gleam.


    Picture12.jpg

    The update ends here. I know this one was kind of short. But rest assured, some major happenings are going to occur next time. Including a war against one of our longtime foes.

    See you all then!
     
    • 5Like
    • 1Love
    Reactions:
    CHAPTER FORTY-SEVEN: War, Unexpectedly (December 1609-August 1618)
  • CHAPTER FORTY-SEVEN: War, Unexpectedly
    |-|
    (December 1609-August 1618)

    We start a new play session with some good news. We get a free stab from an event which brings us back up to +3. That’s a good omen.


    Picture1.jpg
    Picture3.jpg

    Morrocco is separate peaced for some money and reparations. Timbuktu cedes all of Fulo’s cores to them, and 2 provinces for ourselves. They’re left with just their capital.


    Picture4.jpg
    Picture5.jpg

    One of the provinces, Do, is fed to Fulo. From the other, we release a new vassal, Segu. Segu has 3 cores inside Songhai.


    Picture6.jpg

    I also un-ally Naples to keep us below the relations-limit. We’re at 7 right now, with our ally Spain and 6 vassals: Segu, Air, Fulo, Pangasinan, Deli, and Jambi. CNs don’t take up a slot.


    Picture7.jpg

    After that, England annexes most of Scotland, leaving them with just the Outer Hebrides. Once England finishes coring their conquests, we will see Great Britain form.


    Picture8.jpg

    More Universities are queued up in Midlands, Kildare, Ulster, and Tyrconnell. Soon all of Ireland will be covered.

    Our colony in Leyte completes, letting us move to Wiradjuri in Australia.


    Picture9.jpg

    Now it is time to prepare. We’ll soon be fighting the largest war of this campaign. France is still far, far in the future. But England will get a large power boost once they form GB. I’d like to attack them now, before that happens.

    First, I slacken recruiting standards (Chapters 29 & 32) to both fill up our manpower and lower our Professionalism.

    We’re going to need mercs to win against England. And since those will decrease our Professionalism anyway once hired, we might as well get some free manpower out of it beforehand.


    Picture10.jpg

    Our army from Africa (21/3/10 composition) is shipped to Ireland.

    We also start annexing Jambi to free up a slot. What do we need a slot for?

    Well, in further preparation for the coming war with England, we attack and force vassalize Scotland. We even capture a heavy ship from them. We now also have access to all their cores.

    In the meantime, Spain attacks England on their own. This will be a nice distraction for our soon-to-be enemies. We still have the toggle enacted to not join Spain’s offensive wars and aren’t called in.


    Picture11.jpg

    Unfortunately, I don’t notice that d’Elbene has attacked Creek. Our CN wins easily and annexes the last native on the East Coast. Our plans for a French or Portuguese CN in the region are foiled. But at least we fooled the Danes.

    At this time, I think Al Esperans a Anne is strong enough to take on Portuguese Mexico in a 1v1 (they outnumber the other 2-1). We won’t need their help against England, so I tell them to declare.


    Picture12.jpg

    We’ll see how this goes.

    Our inflation is finally bought down to 0 using 426 admin points. We’re 10 years ahead on admin tech, so can afford to do so. That’s another problem dealt with.


    Picture13.jpg

    (I was shocked how much the inflation was increasing our expenses by. Glad we've finally dealt with it).

    The Ottomans have sacked Vienna. Their advance seems unstoppable. We’re luckily nowhere near them.


    Picture14.jpg

    After our colony at Cagayan completes, we next claim Zamboanga also in the Philippines.


    Picture15.jpg

    And before our plans for England come to fruition, Brittany suffers a loss. Richard, our glorious king, is dead.

    Long live King Jean the Seventh!


    Picture16.jpg


    The blanket was lain over the body. The body of a once great man.

    The sheet was white, pure. Unlike how the body was in life, Jean thought.

    Jean the Seventh was not a young ruler, not as young as his father had been when he took the throne more than fifty years prior, but still he wasn’t ancient…

    But still, fifty!

    Woe to me should I ever reach that age. Jean paused. When did I become so cynical?

    King Richard had not been a bad father, Jean admitted. Nor a bad king. Perhaps, sometimes, he had even been kind.

    But he was ambitious. And ambition breeds a special man, a ruler meant for more than idle family matters.

    Jean at this time had no children of his own. Not even a wife!

    King Richard had left him to take care of that. And now Jean was King. He had the power, the ability to rule as he saw fit, much like his predecessor had done.

    The vassals feared father. Feared him so much to not even plot rebellion. But then, they feared the French and English more. As they should.

    Will they fear me?

    Curse me?

    Love me?


    The room was empty now, save the new King of Brittany and the sheet that covered his father.

    Did he dare tempt a look? A last glance?

    Jean knew he had authority, but he had not been crowned yet. All his power came lingeringly from his father’s fingertips. Just as Richard’s power had come from King Henri. And Henri’s from Francois.

    And all their powers from God.

    Would God grant him strength? Jean knew Richard’s relationship with the Pope had been…less than cordial.

    Jean the Seventh knelt beside the sheet under which his father lay. Spying a wrinkle in the fabric, he smoothed it.

    It was colder than expected.

    Jean shivered. He said a prayer. He stood and walked out of the room.

    Before the door closed, he gave a long look.

    It was best to let the dead lie, Jean knew. They knew nothing save ashes and dust.

    And Jean knew it was time for his rule to begin.

    He would forge his own path, and do his best for the proud people of Brittany.


    Sensing weakness upon succession, our rivals come a-knocking. Portugal intervenes against Al Esperans a Anne.

    Our two spheres have finally, fully come to blows!


    Picture17.jpg

    We’re the stronger power, but our England war is now delayed. I ferry our small army in Asia to the Portuguese colonies of Aru and Sula. Both are soon occupied.


    Picture18.jpg

    Our European fleet is merged and moves with an army in tow towards North Africa.

    11 months into the war, North Africa is ours. Madeira and the Azores are about to be occupied.


    Picture19.jpg

    Even though we’re in a major war, that doesn’t mean we forget to expand our holdings in Australia. Woolna is next after our colony in Kurrama is cancelled because of a native migration.


    Picture20.jpg

    Our army in Asia occupies Wake Island. We’ve also occupied Portuguese South Africa and their province in Angola.


    Picture21.jpg

    Since we have mil access through Spain, I land our army in Sevilla. Then, I let half the Portuguese army cross into Tangiers. Our army engages the other half in Gibraltar and destroys it. And we attack the Tangiers force afterwards.


    Picture22.jpg

    (Yes, Portugal is currently unoccupying Tangiers. But as long as our battle in Gibraltar is over quick enough, they won't be able to cross in time).
    Lisbon and the Portuguese mainland is defenseless and under siege.

    In the meantime, we’ve started colonies in the Philippines at Samar and Bikol. Zamboanga has finished.


    Picture23.jpg

    Our Portuguese war has also had a knock-off effect on European diplomacy.

    France, seeing Austrian weakness against the Ottomans, attacks the HREmperor. Portugal was allied to Austria but refuses the call. Austria and Portugal were also both allied to the Papal States. Both have similarly refused to defend the Pope against a Venetian attack.

    England also loses heavily to Spain. Most of Argentina and some of Brazil is ceded to the victor. Spain also takes Buru and Yamdena in the Moluccas and Tuvalu and Nauru in the South Pacific.


    Picture24.jpg

    Furthermore, England is unable to defend Sweden from a Russian attack, seeing them lose most of Finland. Denmark attacks as well.

    The only upside is that, since England is now at peace, they can form Great Britain. We were too slow with Portugal to prevent that from happening.


    Picture25.jpg

    (I'm curious. Here's a side-by-side between England's and GB's Ideas. Which do you think is better? Are they equal?)

    Speaking of Portugal, the war is going well for us in every theater except North America.

    I’ve shipped over a small army and quickly occupied the wargoal of Borrado. With that, the warscore jumps to 23%. We peace out.


    Picture26.jpg

    (As you can see, things aren't going to well in America. But we have the wargoal now, so none of that matters. We don't need complete victory. We will eat Portugal slow and steady, one bit at a time).

    Portuguese Mexico cedes 4 provinces to Esperans a Anne (2 of which are gold provinces). 2 provinces are ceded to Douar-font Dreux (1 of which is gold).

    The 2 Portuguese provinces in the East Coast Colonial Region are ceded to d’Elbene.

    And Haiti is given to EDB.


    Picture27.jpg

    (The yellow "G" is a gold province. This increases our own Treasure Fleets and decreases Portugal's).

    We seize some Crownland once at peace, bringing us above 50%. This gives some minor boosts to Reform Growth and Max Absolutism. These bonuses will continue to improve as our Crownland increases (at 60, 70, 80, 90, and 100%).


    Picture28.jpg

    And we’ve reached the end of another part, stronger and (hopefully) ready to attack England barring any distractions.
     
    • 6Like
    Reactions:
    CHAPTER FORTY-EIGHT: The Prelude to War (August 1618-June 1627)
  • CHAPTER FORTY-EIGHT: The Prelude to War
    |-|
    (August 1618-June 1627)

    At the start of this session, we receive some unfortunate news. Great Britain is supporting the independence of d’Elbene.
    Picture1.jpg

    Not only are we not receiving any tariffs from them anymore, but at any moment d’Elbene could decide to roll the dice and risk rebellion. We do at least keep the merchant from their 10+ provinces.
    Picture2.jpg

    (The vassal integration privilege we've granted to the Nobility affects our CNs, even though they can never be integrated).

    We can end GB’s support of our subject either through defeating d’Elbene whenever they risk independence, or through declaring a war against GB (since d’Elbene will then be at war with GB, cancelling the treaty).

    Luckily, we were planning on attacking GB anyway, so no real harm done. This was just a bit unexpected.

    With the loss of tariffs, our gross income is still a respectable 115.37, and we have 50% control in our home node of the North Sea.

    Picture3.jpg

    I help boost this further by merging 22 of our transports with our European trade fleet. Remember that our flagship gives extra Trade Power per ship grouped with it. Trade goes from 52.68 to 57.43 after the change.

    Here’s a nice graph of our income over the last 26 years. I’ve never been quite sure how to read the Y-axis. I guess we could think of it like GDP? Neither am I sure what the dip at 1595 represents. The last 5 or so years have seen an impressive jump from ~1,000 to 1,440 gold.


    Picture4.jpg

    In the time-honored tradition of empires, that extra money goes straight to the military. 4 regiments are built to bolster our Asian army (1/1/2 composition).

    I temporarily unlink our transports for a quick trip across the Atlantic to pick up our North American army, which is still sitting in Borado from the Portugal war. What few trade ships we have in Asia are sent to the North Sea to join our flagship.

    Henrika is now strong enough that it declares against Lakota. Like the Creek and all other natives before them, the war leads to annexation.

    The latest Franco-Austrian war concludes with, guess what, a French victory. Austria loses some land to their rival.

    The Pope, likewise, cedes more stuff to Savoy. Their defense against Venice is still ongoing, but I don’t have high hopes for our former ally.

    Picture5.jpg

    We’ve completed our colonies in Woolna and Samar. More of Australia is on the cards. Now we claim Kaurna, a Trade Center, and Malgana. The British have also arrived and established their own CN.
    Picture6.jpg

    Those extra provinces give Terre Australe the 10+ for a merchant. We send him to Congo which transfers to Ivory Coast.

    In the meantime, Pangasinan is integrated. Their capital, which is a Trade Center, is TCd and a Marketplace is built there.

    A look at the distribution of our forces:

    3 stacks (60,000 worth) are in Ireland and 18k, recently reinforced with those newly built units from earlier, are in Tidore. 1k and 7 ships were gained from Pangasinan’s annexation which will soon be merged with our army and navy in Asia. We have a navy in Europe (67 ships, 22/23/0/22 composition) and 27 ships in Asia (a mix of some galleys and more transports, includes the 7 from Pangasinan, 4 of which are light ships).

    We’re ready to attack Ternate and “protect” them from the encroaching Spanish and British. Ternate is allied to Luwu.

    Picture7.jpg

    Conflict continues in Europe. Not even 2 years from the end of the last war (they haven’t even finished coring Breisgau), France attacks Liege, dragging the HREmperor in again.

    The Pope, having resisted bravely this whole time, is forced to cede 3 provinces to Venice and 1 to Provence.

    Picture8.jpg

    On schedule, the next techs are picked up. We get another Idea Group from admin, more naval morale and an upgraded galley from diplo, and an increase in CW, plus new cavalry and cannons from mil.

    I already switched our points focus to admin some time ago (giving us an extra +2 in that category monthly at the expense of -1 for the others) because I’ve already decided our next Idea Group.

    We want to build Ireland, and all our empire, up as much as we can. Infrastructure is a great pick for this. Already we have enough points to unlock the first slot.

    Picture9.jpg

    Back at the beginning of this update, when looking at d’Elbene’s Liberty Desire, you may have noticed that d’Elbene gets an extra +25% LD from being a Self-Governing Colony. Seeing as how we don’t need d’Elbene to fill in their region anymore, and we’re having trouble keeping them loyal, I change them to a Crown Colony. This costs 1,000 ducats.

    Immediately this has a pronounced effect on our force limit. The different colony types provide different bonuses to land and naval forcelimit, as well as other things. Already d’Elbene is giving us an extra 17.40 unit cap.

    Picture10.jpg

    They’re still disloyal for now, but only because of GB’s support. Should d’Elbene lose that support, they’ll be happy as a clam.

    Fittingly, Jean VII is now a Martial Educator. Military men are needed in these dark times.

    Picture11.jpg

    2 years after its declaration, France annexes Liege and gives a few Austrian provinces to its ally Bregenz. Another blow to Germany.

    Austria is also at war with the Ottomans again. They eventually cede a bunch of land, including Vienna, to the Turks.

    Picture12.jpg

    We annex Ternate and gain reparations and money from Luwu. Afterwards we vassalize Madyas.

    More forcelimit is gained after constructing a TCI in Kongolese Coast. The Officers’ Mess is one of the special, region-based ones that can only be built once per trade region.

    Our colonizing of the Philippines continues. Bikol is done, next is Tagloc.

    Picture13.jpg

    (Caraga is colonized soon after. See, a few paragraphs below).

    Our spies tell us that GB has plans to attack one of the natives in Australia. Perhaps this will distract them. Perhaps this will provide an opening.
    Picture14.jpg

    I order Terre Australe to go ahead with a 1v1 against British Australia to see what might happen. I also subsidize them 12 ducats a year for the next while.

    On the Isle of Mann, the increasing hostility between Brittany and GB leads to a new marshal settlement being founded. 7 more heavies are ordered to match and surpass our foe.

    Picture15.jpg

    (This event only fires once per-game per-country. I'm glad we got it somewhere close to our heartland and not a random colony).

    We get -10% construction cost from Infrastructure’s second slot. And we get 5% Admin Efficiency from the latest Age Ability.

    Seeing as how Mann, and the culture of the province, Highlander, has become such a large part of Brittany, I accept them as equals. I accept Moluccan as an equal culture as well, because the provinces are rich, and I plan to build them up further.

    Picture16.jpg

    (Accepting a culture removes the penalties).

    Kaurna is done. We move our colonist to Caraga next to Tagloc in the Philippines.

    Terre Australe wins their 1v1. They take much from the British CN.

    Our colony at Malgana is also done. I decide, both to help Nevez Breizh and to block off d’Elbene, to colonize Pepikokia.

    Picture17.jpg

    Spain attacks GB again. We make sure that the toggle to join offensive wars is still left unchecked. We want to declare our own war, not help Spain.

    I take a deep breath, check the ledger again. The sides:

    • GB: 127k troops, 149 ships, 53k manpower
    • Spain: 194k, 85, 80k
    • Brittany: 121k, 105, 124k
    We have double the British infantry, 20k less cavalry, and half their artillery.

    We are equal on heavy ships and transports. The British have more lights. We have more galleys.

    The British have ~90 more income. But if we occupy their homeland, that should change.

    Picture18.jpg

    It’s all about to change.

    Our European fleet, merged together with the best admiral we’ve got, sits off the coast of Scotland, waiting. 6 British heavies are in the province, completely unaware of what is about to happen.

    Picture19.jpg

    June 23rd, 1627.

    The conquest of Sutherland.

    The outbreak of war.


    The newly formed British Royal Navy had been born out of the traditions of its predecessor, the English “Navy Royal.” Most of the Scottish vessels were either sunk during England’s conquest or defected later into Breton hands. A growing hostility and naval arms race between the Bretons based in Ireland and the English—now British—was inevitable.

    On the one hand this uniform transfer of power—from an entirely English navy into an entirely British one—contributed to British prestige and power. English ships were sailed by English crews and commanded by English officers, bringing all the experience, doctrine, and tradition gained during their wars with France and Spain.

    But on the other, this left British sea forces badly overstretched, especially as they now had to police Scottish waters wholly with their own vessels. This lack of ships—warships especially—persisted, even as their shipwrights continued to match the recent spike in Breton naval production. Indeed, at the outbreak of the First Breton-British War the number of heavy warships was even for both main combatants—a nasty shock for the larger British power.

    And they were about to receive another.

    The Bretons, as the aggressors, could pick the time and place to strike a first, fatal, blow. Such an important task King Jean trusted to the up-and-coming, young, skilled Corentin de Goulaine. Goulaine, not even a year into his captaincy, was a true representation of the Breton attitudes at that time, attitudes coming mostly from the policies of Jean’s father, Richard. Goulaine held ambition, raw talent, and youthful energy beyond measure. His efforts ensured the Breton navy would dominate the seas of Northern Europe for the next five years, until the famed Battle of Skagerrak.


    ***Excerpt from: “The First Breton-British War, Chapter Two” by Erwan Bergot***

    . . .

    It was unseasonably foggy that June. And so superstitious sailors grumbled. The officers and admirals kept calm, carried on. Still, one might drift too close to Scottish shores and Breton rocks. An early grave was no one’s wont.

    Piracy was common. Breton, Gael, Scots, Manx—even Spanish now with the war on. Of course, those governments denied it. But all knew, pirates or no, the shallow seas of the North Channel were no one’s friend.

    North of the Outer Hebrides, Caesar took the lead. Captain Newport could barely see through his spyglass that Newcastle—normally direct to port—was also lagging far astern. Hoping to tighten the formation, Newport gave orders and a flurry of signal flags were raised and lowered. Sending a messenger boat in these conditions would’ve been fruitless. The mist thickened considerably again, leaving each ship an island. It was unclear whether Newcastle had received the order.

    Elsewhere in the flotilla were Melville, Zealous, Dunbar, and Alexandria. Neither of the vessels had been seen since the dawn, except a brief appearance of Melville. Supposed to be straight astern, the ship had been surprisingly close as the fog—persistent for days—briefly thinned. Minutes later it had backed off, leaving Caesar and her crew alone again.

    The fleet was arranged in two rows of three, a total of six. Somewhere off to starboard traditionally was Alexandria, with Dunbar behind. Caesar and Melville kept each other company in the center column. And portside was Newcastle and Zealous. But with such dreary grey fog, who knew where anyone was?

    Newport’s heart gave shudder of dread when he heard the thunderous cannon fire.


    ***Taken from “Christopher Newport’s Last Battle” by Harvey Elliott***

    . . .

    (NARRATOR, measured, triumphant):

    Goulaine had gotten exceptionally lucky.

    The British warships Alexandria and Dunbar had drifted far too close to the Hebrides, seeing both run aground to become captured prizes. Both ships would later serve with distinction in the Breton fleet during the Danish War.

    That just left the four—badly isolated—Newcastle, Zealous, Caesar, and Melville.

    The Breton European fleet—docked and waiting in the Scottish Hebrides under Goulaine’s command—set sail as soon as scouts reported the wrecks of Alexandria and Dunbar. Goulaine immediately smelled larger fish.

    Melville, alone at their end of the formation, was the first to be sunk. Caesar followed suit a few minutes later as Captain Newport blundered through the Scottish fog, unlike anything he had dealt with in the Caribbean.

    Zealous and Newcastle were headless, hopeless, and mercilessly outgunned.

    Goulaine’s much larger fleet—consisting of eighty vessels—surrounded and peppered the British boats. Instead of surrender, the British fought on. Their ships sunk—British crewmen were left to flounder in the open ocean—succumbing to the elements.

    Back home, Goulaine was celebrated as a hero and portrayed his actions as a noble defense of Breton territorial waters. The House of Tudor was outraged at such brazen conduct. No Breton apology—by King Jean, the Breton government, or (now admiral) Goulaine—was supplied.

    So began the war.


    ***From the History Channel’s multi-part, six-hour documentary special: “War in the Isles: The Breton Conquest.” This special was noted for its use at the time of CGI-simulated battles and the unprecedented violence of its reenactments.***

    Picture20.jpg
     
    Last edited:
    • 8Like
    Reactions:
    CHAPTER FORTY-NINE: More About Claims, Wargoals, GB Defeated! (June 1627-December 1629)
  • CHAPTER FORTY-NINE: More About Claims, Wargoals, GB Defeated!
    |-|
    (June 1627-December 1629)

    Before we get to the meat of this chapter, I want to talk a bit about the wargoal we used to declare on England and wargoals in general. This is prompted by @diskoerekto's comment last week.

    Why did we choose conquest as our CB against Great Britain when we have reconquest available? And why did we pick Sutherland as our wargoal/occupation target?


    Picture1.jpg

    Depending on the wargoal you use, provinces may or may not cost diplo points to demand. This is what the game calls Unjustified Demands.

    By using conquest as our CB, all provinces we have claims on, not just Sutherland, don’t suffer that extra diplo point cost.

    The same principle would be true if we were using reconquest instead. If that were the case, all cores would cost no diplo to demand.

    But vassals and subjects also factor in here, since they are their own nations with their own diplomats, Spy Networks, and claims/cores.

    As Scotland’s overlord, we benefit from their claims if those provinces actually go to Scotland in the peacedeal. We can’t use Scotland’s claim on Sutherland and take it for ourselves, for example. That would still count as “unjustified.” But if Scotland takes it, then it is “justified.”

    We also don’t have that many claims on GB itself. As you can see from the declaration of war screen, we only claim 6 provinces (Carmarthen, Cornwall, Devon, Dorset, Hampshire, and Somerset). However, Scotland has many more claims than us.

    By using Scotland’s claim, we get no Unjustified Demands for claimed provinces we take and claimed provinces Scotland takes. Whereas if we just used our own claims, only we would benefit.

    Here’s a weird quirk though: If we had a third subject and were using their claims, then we would benefit, and they would benefit, but Scotland would not benefit. Scotland’s claims would be “unjustified.” Whoever’s claim you use as the primary matters.

    The reconquest CB oddly doesn’t work like this. Anyone who has a core receives the benefits of no Unjustified Demands. Us, our vassals, even uninvolved third parties.

    And I’ll remind everyone of Chapter 42: claimed provinces cost less to core and whichever province you choose as a wargoal is cheaper to demand.

    Basically, I’m wanting to minimize the excess diplo I spend taking land and the excess admin I use coring it. Since Scotland has the most claims, we will receive the most benefit.

    Sutherland is an easy province to occupy and is the highest dev province Scotland has claimed.

    Anyway, to war!

    It is time for Brittany to claim her destiny.

    We start the war off with 2 opening moves. The first was the naval battle at the end of the last part. For the second move, we move a pre-built 1k into British South Africa.


    Picture2.jpg

    The Alexandria is split off from our European fleet to repair. Goulaine’s fleet moves into the Irish Sea, sinking another 2 British heavies and 6 lights. Then he docks in Cork (the shipyard we’ve built there increases ship repair speed). We’ve secured the naval advantage, now we must keep it.


    Picture3.jpg

    (Captured Dunbar is seaworthy enough to help out right away. Alexandria has to repair).

    The speed of Goulaine’s fleet, thanks to his trait buffing it, lets us respond to any threats and get back in port for the monthly repair-tick with the British none the wiser. Another 3 heavies and 2 lights are sunk.

    While this is going on, we grab the next slot in Infrastructure, giving decreased Expand Infrastructure cost (Chapter 40).


    Picture4.jpg

    While effective, the downside to keeping our fleet together and ready for battle is that our lights aren’t contributing to our trade income. Our income has dropped by about 20 ducats, giving us a deficit. At least d’Elbene is providing tariffs again, since without British support, they’ve become loyal.


    Picture5.jpg
    Picture6.jpg

    (A neat trick: if we kept our trade fleet in port, told it to collect trade, and turned on the toggle for staying in port during war, it would still provide trade income. Anytime our fleet was in port repairing I could've done this. But the deficit wasn't major enough for that level of micro).

    After a few months of seeing how the British would react and seeing whether I could bait any of their armies into a hopeless crossing of Ulster or the Hebrides using the blockade trick, we cross ourselves.


    Picture7.jpg

    We do end up catching an army of around 12k in the Inner Hebrides, so the blockade trick worked in that case. Elsewhere, our navy has split up for blockades and the siege of the fort in Dumfries goes well.


    Picture8.jpg

    After only 63 days Dumfries falls. That British 16k you see is destroyed soon after. The fort in Dumfries blocks their retreat south.

    Our attention is briefly drawn to Europe as Austria loses a large chunk to Bohemia and is also losing to OPM Donauworth and their allies.


    Picture9.jpg

    Northumbria falls after 112 days and Inverness after 185. We have enough cannons for a full bonus when sieging, a large Spy Network in Britain to decrease the time it takes between ticks, and enough mil power to preemptively force wall breaches (Chapter 36).


    Picture10.jpg

    Here, for example, is our siege of London. It’s not quite as fast as the others because London has some bonuses to its Defensiveness, but is still pretty good.


    Picture11.jpg

    Over a year in, Scotland, and north and central England have fallen. We also now have all of South Africa. And I’ve built a 1k in Taiwan to occupy the British outpost there. We’ve also sent a colonist to the other Taiwanese province, Middag, because Tagloc is almost complete.


    Picture12.jpg

    Jean VII has a great mind for military matters. The game says he’s personally trained many of our newest officers. Quite an accomplishment! We get a half-cost mil advisor as a result.

    We also now have an heir. Of course we named him Francois. He was sired during the previous chapter as we prepared for war. Stats-wise Francois is not the best. But he’s an amazing diplomat.


    Picture13.jpg
    Picture14.jpg

    After 139 days Coventry is ours! We fight a bloody battle in Shrewsbury, but win. Later in Cornwall, we win again against the same force.


    Picture15.jpg
    Picture16.jpg

    London falls the week afterwards, unfortunately I didn’t get a screenshot of the number of days it took. We entered the province in either October or November 1628, and the fort fell April 8th of 1629. Around 160 days.

    The last of the British forces on the island are destroyed at Devon. And we sink many enemy lights as they retreat from the now unfriendly port of London. A month later at St. George’s Channel, 1 heavy is sunk and 1 is captured.


    Picture17.jpg

    Goulaine has had quite the successful war. Brittany has wholly dominated the conflict, losing only 3 transports. And soon will come the peace.

    Now we’re just waiting for the last fort in Wales (Montgomery) to fall. Goulaine amuses himself in the meantime hunting down isolated enemy fleets. Another 3 heavies and 21 lights are sent to the Locker.


    Picture18.jpg

    Another brief look at Europe as that plays out. Poland has just lost a province to Magdeburg after an exhausting war against them, Calenberg, and Venice. The Ottomans jump at the chance for an easy war a few months later.


    Picture19.jpg

    Montgomery falls after 259 days. Another 3 lights are forced out of Welsh ports and sunk.

    Peace comes that December, just in time for Christmas! All in all, the war lasted 2 years and less than 6 months.


    Picture20.jpg

    We lost barely anything navally, though our subjects weren’t so lucky. And in terms of casualties our CNs and vassals were hit hard, especially Terre Australe. But none of that matters because we won.


    Picture21.jpg

    What did we take?

    All of South Africa. The Cape is TCd for a new merchant (transfers to Ivory Coast from Cape of Good Hope).

    Scotland gets larger, including the forts at Inverness and Dumfries.

    A province in Wales (Carmarthen) to release them as a vassal.

    The British outpost in Taiwan. Our colonist hasn’t arrived in Middag yet, but the whole island is now ours.

    632.90 ducats of which we get 622.11.


    Picture22.jpg
    Picture23.jpg

    (The TC region for the Cape of Good Hope only has one Trade Center, the Cape itself, so it's really easy to get a merchant here).

    Here’s a look at the largest navies in the world after that. We’re in second place in terms of heavies, even with France. GB has lost 40 or so naval forcelimit and almost half their heavies.


    Picture24.jpg

    Even if they manage to rebuild their fleet, it will take a ton of cash that they might have trouble generating. The same goes for their destroyed armies. And we’ve caused Devastation in their home provinces, further hurting their income.

    A very good war, I’d say.
     
    • 6Like
    • 1Love
    Reactions:
    CHAPTER FIFTY: Harsh Treatment & The Blasted Battle of Skagerrak (December 1629-September 1633)
  • CHAPTER FIFTY: Harsh Treatment & The Blasted Battle of Skagerrak
    |-|
    (December 1629-September 1633)

    In triumph, we start the annexation of Fulo. I purchase the Papal bonus to help speed and cheapen the process. And I grab the increased taxes and decreased construction cost perk, plus the one for less inflation, interest, and Corruption.


    Picture1.jpg
    Picture2.jpg

    Al Esperans a Anne has no truce with Portuguese Mexico, so I tell them to attack. Now that our British war is done, we can handle it if Portugal intervenes.

    I also tell Henrika to declare a 1v1 on Vinland with the same reasoning.

    And EAB is told to 1v1 Caraibas.

    We aren’t slowing down.

    With Pepikokia almost finished, we colonize another province to cut d’Elbene off from Colonial Louisiana: Espeminkia. Another colony is set up at Baxoje to prevent Henrika from doing the same.


    Picture3.jpg

    (CNs can colonize outside of their assigned region as long as they have a land border. We obviously don't want d'Elbene and Henrika to consolidate even more power by weakening the more loyal Nevez Breizh).

    5 months into 1630, Denmark does intervene. Not a huge deal.


    Picture5.jpg

    At least EAB’s war goes off without a hitch. Caraibas is left with only 1 province: St. Thomas. We’ve secured our control over the Caribbean. Most of the money flows towards us and away from Spain and Portugal. The Spanish colonies in Venezuela unfortunately mean some money escapes.


    Picture6.jpg

    (St. Thomas is the island just east of Puerto Rico. If you look closely, you can see the crown icon which designates Caraibas' capital).

    Speaking of Spain and Portugal, as part of Spain’s most recent war against GB, they take some land from Portugal in a separate peace. This includes 4 provinces in the Mexico region, not enough for a CN.

    Unfortunate.

    Spain might soon crave our Mexican land and break our alliance.


    Picture7.jpg

    Our navy under Goulaine has crossed the Oresund and landed an army in Gotland. It’s a nice base and some warscore, even as our CNs win the war in the Americas handily.


    Picture8.jpg
    Picture9.jpg

    We have enough Reform Progress for the next Government Reform, but the one I want is locked behind completing Infrastructure ideas. We’ll wait for that then.

    Bornholm is occupied after Gotland.

    Our fleet scores a victory against Norway in the Helgoland Bight. Our navy is invincible! Goulaine is unstoppable!


    Picture10.jpg

    A native over in Australia attacks Terre Australe because they have no troops after their losses in the British war. We intervene of course.


    Picture11.jpg

    I try and land on Lolland, but the Danes have amassed a large force to stop us. Back to the boats we go.


    Picture12.jpg

    (I only tried landing with a portion, since I didn't want to risk losing all our men. Our retreating army is there, buried under the icons of our navy and the Danish army).

    We’ll continue our war in the Baltic momentarily. But first, missions!

    We haven’t completed any missions in a while. With some annoying rebels about to fire, now is the perfect time to complete one which gives us decreased Harsh Treatment Cost.


    Picture13.jpg

    Harsh Treatment is an option you can use when looking at a rebellion. It lowers the progress of the revolt by 30% at the cost of military points. The mil points cost is determined by the size of the rebellion.

    Since we’re in the Age of Absolutism, Harsh Treatment also gives some Absolutism every time we use it. In fact, there’s an Age Ability that further cheapens the cost. We’d ideally want to pick this up before using Harsh Treatment, but for now content ourselves with the mission-provided discount.


    Picture14.jpg

    We also pick up Infrastructure’s fourth slot. The movement speed is, of course, helpful. And the cheaper cost to upgrade Trade Centers will be useful whenever we conquer one. Every time a Trade Center changes hands, through conquest, vassal annexation, selling a province, etc. the Trade Center is downgraded a level.


    Picture15.jpg

    Back to the Baltic we go.

    I split the fleet up to allow some ships to repair after our failed landing at Lolland. Our transports are also busy ferrying our forces between Bornholm and Gotland because of attrition, since neither island by itself has enough supply limit.

    This was a mistake.

    If the eagle-eyed among you read the Historybook segments a few chapters ago and wondered what the Battle of Skagerrak was, well wonder no longer.

    Feeling overconfident because of our easy victories over enemy navies, Goulaine attacks the main Danish fleet.

    Our admirals have equal combat stats, we have more heavies, and the Danish have a lot of transports which are easy pickings.

    But the Danes have galleys. I underestimated the galleys.


    Picture16.jpg

    I begin to worry if I’ve just sent our brave sailors to an early grave. But despite the unexpected closeness of the fight, we look to be winning.

    That is until a sniper’s musketball takes Admiral Goulaine.

    Poor Goulaine. He was young, burned bright, yet flew to close to the Sun.

    You can see our morale in the battle. We had outlasted the enemy. But without a leader, our navy crumbles. I get out of there quick as I can.


    Picture17.jpg

    (Without an admiral, we suffer the penalties from not having a leader, and Goulaine's stats no longer counteract the enemy admiral's stats. We could've won this otherwise, I believe).
    We lost a lot. But at least our flagship is safe. Our treasury is spent on 5 new heavies as replacements.

    Picture18.jpg

    (It says the Danes captured 13 ships. But I think the number only shows as positive on the battle screen if the captured boats make up for those sunk, like here for light ships. We still sunk more heavies, galleys, cogs than whatever the Danes captured as replacements).
    But the naval advantage is no longer ours, for this war at least. The Danes land in Bornholm. Our army there is stackwiped.

    Picture19.jpg

    We’re left with our transports and army in Gotland. That army should be safe because Denmark only has 36 transports against our army of 39k, combined with the offensive penalties they’ll get for attempting a landing.

    This momentary weakness of course means Portugal intervenes against Al Esperans a Anne.

    Of course.

    I’m surprised Portugal did this considering they haven’t recovered at all after Spain thrashed them.

    We’re just that popular.


    Picture20.jpg

    The Spain-GB war has actually just ended. Spain won and took all of British Brazil and most of British Argentina.

    Also, here’s El Dorado for those of you wondering where it ended up being. England discovered it all the way back in Chapter 27 if you remember, though we had no vision over the area at that time.


    Picture21.jpg

    To focus on Portugal and to get our army and fleet out of Gotland safely, we peace out with Denmark.

    We take Arguin (northwest Africa) from Norway. And most of Canada is seized from Denmark and Norway. Henrika has grown in strength.


    Picture22.jpg
    Picture23.jpg

    The first moves in the Portugal war are to occupy their holdings in South Africa and Kongo.


    Picture24.jpg

    Fulo’s annexation is finished in the meantime. Our income is now greater than Great Britain. We also have enough Development to proclaim ourselves an empire. We were already pretty imperial, but today it’s official.


    Picture25.jpg

    Emperor of Brittany has a nice ring to it, don’t you think?


    Picture26.jpg

    And we’ve reached the end of another part. We continue to grow even as we suffer defeats and distractions. What will we take from Portugal this time, you think?
     
    • 5Like
    • 1Love
    Reactions:
    CHAPTER FIFTY-ONE: Absolutism & Coalitions (September 1633-December 1637)
  • CHAPTER FIFTY-ONE: Absolutism & Coalitions
    |-|
    (September 1633-December 1637)

    In the last part, I wondered what Spain’s new Mexican holdings would mean for our alliance. And since this is a new play session, the Spanish AI has decided to reevaluate things.

    Thankfully we’re still allies, for now.


    Picture1.jpg

    (Our Philippines land is also in the mix. But I'm less concerned about that because Spain doesn't border us there).

    Our common rivalries in GB as well as our longstanding friendship and consort ties have kept our alliance secure. But we’ll need to be careful we don’t do too much to upset the Spanish crown in the future.

    As a side note, I didn’t realize you could gain Historical Friendship with a nation over the course of a campaign. I only thought they could be lost. Historical Friendships and Enemies are preset at the start of the game between certain nations. Good for us then that Spain got an event trigger for friendship.

    A diplomat will be kept improving relations with Spain from here on out. We already have a second diplomat currying favors with them to increase Trust.

    Emperor Jean will not let such a vital ally be lost.

    To further prevent d’Elbene from overstepping their boundaries, we begin colonizing Kaskankahan. And we colonize Hunkpapha to cut off Henrika.


    Picture3.jpg

    (The border between Henrika and Nevez Breizh is the thick, dark-blue line between Minnesota and Wisconsin, plus the one designating NB's northern exclave).

    The Russo-Ottoman bloc continues their expansion, defeating Poland. Can anyone stop the eastern juggernaut?

    As if the game is listening, that alliance breaks down a few months after the peace. The Russo-Turkish friction along the new border in Moldavia must’ve been too much.


    Picture2.jpg

    The next Infrastructure slot is unlocked. This one just makes so our Stated provinces cost less governing capacity.

    We’re spending most of our admin on our idea group, so will be a little late in taking admin tech 19 on time. That tech unlocks the upgrade to Temples, Cathedrals.

    The diplo and mil techs, though, are taken on schedule. The diplo one unlocks new heavy and light ship upgrades and the upgrade to Docks. The mil tech gives more Tactics, new infantry units, and an upgrade to our forts.


    Picture5.jpg
    Picture4.jpg

    Most of our treasury is spent upgrading our heavies. I see no reason to wait. We must maintain our naval advantage against the other Great Powers.

    We’ve shipped some troops over to help Terre Austral in their native war. With our help, they win, annexing the troublesome tribe of Awngthim.


    Picture6.jpg

    I revoke 2 privileges, one from the Clergy and one from the Nobility, right afterward. Now it is time to talk about Absolutism.


    Picture7.jpg

    As soon as the game reaches the Age of Absolutism, the Absolutism mechanic unlocks and persists until the end of the game.

    Every country has a different maximum value of Absolutism based on their form of government, Estate privileges, and so on. Absolutism gives 2 main benefits:

    • Admin Efficiency: effects how much provinces cost for purposes of warscore, diplo-annexation, and overextension. Basically, everything is cheaper to take and annex.
    • Discipline: the same modifier, like Morale and Tactics, that affects our armies. Basically, damage dealt.
    Absolutism’s effects only go up to 100, though your cap can be higher if you want redundancy.

    Our Max Absolutism sits at 14, mostly because our handed out privileges are dragging the value down. Without any privileges assigned we’d gain 99 cap for a total of 113.


    Picture8.jpg

    Some privileges we will of course want to keep due to their usefulness (the extra monarch points per month, for example). But I’d like to get rid of most of these with time. That’s why we’ve been slowly revoking them when we could.

    How do we gain Absolutism?

    One, as mentioned previously, Harsh Treatment. We can also increase Stability or Legitimacy or decrease Autonomy.

    There’s even a Disaster around Absolutism. Fun!

    Another colony is set up in Highveld, South Africa. I want to try and cut off the Spanish colonies there and link up with our East African land. Can we do it?


    Picture9.jpg

    Another Infrastructure idea is picked up, this one just gives cheaper forts. Not that exciting. But we’re one slot away from finishing the group.

    As our war against Portugal continues, the Papal situation deteriorates further. They lost a few provinces to the Ottomans some time ago. Now Savoy, with the help of France and Bohemia, declares their own invasion.

    Portugal has allied the Pope, so even if we peace out, Portugal will still be stuck in an unwinnable war. Their intervention against us really wasn’t a smart move.

    After Lisbon and their mainland falls, we sue for peace. We didn’t even have to fight their army this time.

    We've taken a corridor of land to finally connect Nevez Breizh’s disconnected nation, as well as some extra provinces on the Great Plains. Some of that plains land goes to Henrika.

    We took Bermuda, and the Portuguese provinces in Kongo and South Africa.


    Picture10.jpg

    (The blue provinces are the colonies at Hunkpapha and Kaskankahan we've set up. Both will go to Nevez Briezh once complete. The solid yellow province is one of Nevez Breizh's half-cores).

    Al Esperans a Anne is given some land too, including that disconnected bit because it’s in the Mexico Colonial Region, not California as I'd assumed. I think somewhere in what we took was the last of Portuguese Mexico’s gold mines.

    Douar-font Dreux earned 2 provinces.


    Picture11.jpg

    Here’s something about the peacedeal. Portugal, obviously, hates us. They get 66 Aggressive Expansion because of it. But France also gets 50 AE. Yikes!

    We also get AE with other countries, but France and Portugal are the only ones going over the 50 AE threshold to join a Coalition.

    Inspired by @Cora Giantkiller's comment a few weeks ago, why then am I not worried?

    Simple. A Coalition requires at least 4 nations to actually form, France and Portugal only make 2.

    Portugal actually can’t even join since they have a truce with us.

    To join a Coalition, you need 4 things: at least 50 AE with the target, a negative opinion of the target, no truce with the target, and, in general, be at peace.

    I also purposely signed this peacedeal in December. AE decays on the yearly January tick. After the tick, France doesn’t even have 50 AE anymore, for the brief amount of time that lasted.

    One final thing about AE: religion matters.

    Anglicans and Protestants, for example, don’t care as much about our aggressions against Catholic Portugal. The principle applies everywhere across the globe. So if you’re looking to expand rapidly, spreading your AE out over religious denominations can help.

    Here’s an example:

    If we were playing as the Ottomans, my expansion against the Hindus in India, the Catholics in Europe, and the Muslims in Africa would all count towards my total AE. But one group wouldn’t care as much about my expansion against another.

    If I were to expand a lot in India, then Europe, and then Africa, by the time I get back to India after truces expire, the Indian AE will have burnt off. Then after India, I go back to Europe, then Africa, and repeat, adding in new religions like Protestant or Buddhist as I go.

    Of course if you’re expanding really rapidly, a Coalition is inevitable. But these steps help manage it. And management strategies like this are necessary if you’re going for a world conquest or any of the difficult achievements.

    After our war, we pick up the Harsh Treatment Age Ability I mentioned last time. My plan is to use Harsh Treatment as much as possible to suppress revolts and rapidly increase our Absolutism, while still keeping some mil points in reserve for tech and Development.
     
    • 8Like
    • 2
    Reactions:
    CHAPTER FIFTY-TWO: Expand Administration, Chapter 49 Appendix (December 1637-December 1647)
  • CHAPTER FIFTY-TWO: Expand Administration, Chapter 49 Appendix
    |-|
    (December 1637-December 1647)

    Madyas, our latest Philippine vassal, is annexed after 10 months. And Great Britain has decided to meddle in the region by attacking Cebu.

    We continue helping Nevez Breizh colonize against Henrika and d’Elbene’s encroachments, starting with Sihasapa.

    Picture1.jpg

    With our annexations and war against Portugal concluded, here’s the latest look at our income. We last checked it at the end of Chapter 49 when we were in 7th place.

    We’re now in 6th place. With an extra 22 ducats to our name. France’s income, interestingly, has decreased by 30 gold, mostly in Production and Trade. Spain has grown by 30 gross.

    Picture2.jpg

    Pagarruyung is peacefully vassalized over in Sumatra. I’ll point out that because they’ve sat there the entire game, they just casually have 1,000 ducats in their treasury. Too bad that money disappears when we integrate them.

    The Papacy has lost yet another war. They were once the strongest Italian power. Now they have 5 provinces left.

    Picture3.jpg

    Infrastructure Ideas is finally completed. We Develop things cheaper, construct things faster, and it’s cheaper to Expand Administration.

    Picture4.jpg

    Expand Administration is a button in the Government Reforms menu that lets you spend Reform Progress to gain Government Capacity. The cost increases after each click, so the 100% discount we’ve just got from Infrastructure doesn’t make things completely free.

    We’re fine on Government Capacity anyway and want to finish our Reforms first. There are some good bonuses we’ve yet to get. One of those bonuses we pick up now.

    If you remember we wanted to wait until finishing Infrastructure so we could pick up a Reform that had finishing that Idea Group as a requirement. This Reform gives even more Dev Cost and some Goods Produced.

    Alternatively, if we hadn’t picked Infrastructure I think the one that gives less loan interest and inflation would’ve suited us well. Especially given what we’re about to do.

    Picture5.jpg

    2,860 ducats in loans are taken out (5 loans, 572 gold per). Along with the 838 already in reserve, we spend it all constructing profitable Manufactories. Once these complete, our income should see a nice jump.

    Picture6.jpg

    (Buildings like these are being built all the time. We're becoming richer and richer).

    Gundungurra and Yuin are the next provinces we claim in Australia. Even this once vast land is slowly coming under our dominion, split between us, the British, and the natives.

    Picture7.jpg

    Portugal’s woes continue as Spain attacks them. GB has annexed Cebu.

    In another news, the unstoppable Ottoman behemoth is distracted by a successful rebellion in Yemen. I don’t think Rassids won independence through the traditional means of a successful revolt. It looks like they popped out via event?

    Picture8.jpg

    At the same time, our grip on the continent is slipping. It’s been over 100 years since the mainland was lost. We still have our cores in Brittany proper since it’s our own culture, but we’ve just lost the one over Anjou.

    Emperor Jean, in his 66th year, has never visited the land of his ancestors. Neither did his father, King Richard. The young Prince Francois probably won’t either, we’ll have to see.

    The reclamation is slow going. The British are still powerful, and we’re gearing up for another war with them soon.

    First though, I’ve had our Asian army attack the last native nation in Tasmania to secure the strait crossing. I’ve also accepted Fulani as an equal culture to Breton, Irish, and Highlander since it makes up a large part of our nation after Fulo’s integration.

    Picture9.jpg

    We win the native war easily.

    I notice that 70% of GB’s forces are stuck in Cebu and taking attrition. This doesn’t bode well for our Philippine colonies, but GB’s homeland should be easy to take.

    Picture10.jpg

    Spain has taken 2 provinces from the Pope in Italy. Naples and Venice are at war. Savoy joins the fun later. The Ottomans annexes Wallachia. Ming rivals us, so we rival them.

    We take admin tech 19, getting caught up.

    Picture11.jpg

    Here’s Nevez Breizh. Now that they’re all connected, they’re actually able to start colonizing. I think they couldn’t before because their capital was in Nouvelle Nantes (New Orleans) and split off from their land in Wisconsin.

    Picture12.jpg

    Speaking of Portugal, Spain takes more of Mexico from them (enough for a CN), and some land in Columbia, North Africa, and Portugal proper. The smallest of our rivals has fallen on hard times. Will they last the century?

    Picture13.jpg

    We start a new colony in Swazi and another in Transvaal, successfully cutting off all others from the South African interior.

    Picture14.jpg

    Here’s a look at our income before and after our Manufactories complete. 205.41 becomes 209.10.

    Production increased by ~5 ducats. Trade dropped because some of our navy is getting ready for war. Progress!

    Picture15.jpg

    We still hold the naval advantage against GB. This war should be just as, if not easier, than last time.

    Picture17.jpg

    Again, we choose to press one of Scotland’s many claims.

    A difference between this war and the last are GB’s allies: Sweden and Sunda. We’ll either have to deal with them directly, or separate white peace them out once the war drags on long enough.

    Another difference, I call in Spain this time. They might deal with Sunda or Sweden for me. And while Spain is distracted in our war, they won’t declare their own wars.

    Picture18.jpg

    The mainland war is easy. I won’t detail it. I will however go over the war in the Philippines where our forces and the British fought a cat-and-mouse game, shown below:


    Picture19.jpg

    (Our navy sinks some isolated British transports to start off).


    Picture20.jpg

    (We then help our allies in another naval battle).

    Picture21.jpg

    (But while our ships repair, they can't block the British from strait crossing. Here, we're starting to see the damage cannons can do).

    Picture22.jpg
    Picture23.jpg

    (We retreat northeast, recover, and fight another battle. After that, the British split up into a larger southern stack and a smaller northern stack).

    Picture24.jpg

    (We destroy the smaller enemy army while the British wander back-and-forth down south. Our navy is useful to blockade the straits between islands, keeping the enemy AI isolated and reevaluating its move orders).

    Picture25.jpg

    (Our navy is caught).

    Picture26.jpg

    (The last battle of the Philippine campaign. Another defeat. Had the war gone on long enough, we would've eventually outnumbered the British once they ran out of manpower).

    We’re entering the final stages of the war. GB is defeated at home and stalemated abroad. We could decide to force Sweden and Sunda out through naval invasions and occupation, but I don’t feel like it. I’d much rather take what we can from GB now (67% warscore) and come back in a few years.

    Before we look at the peace and end this part, here’s some stuff that happened elsewhere:

    Venice lost to Naples in their war. I’m not sure who’s winning on the peninsula anymore. Probably Savoy. Definitely France, seeing as Savoy and Naples are their allies.

    Picture27.jpg

    Another colony is started in South Africa, Senqu.

    Diplo tech 20 picked up, giving a few small bonuses.

    Picture28.jpg

    France declares another war on Austria.

    Peace!

    Picture29.jpg

    The treaty isn’t expansive as our previous war, only 6 provinces and cash. But those provinces are rich, including 2 forts and the Trade Center in York.

    An addendum about our discussion on wargoals, claims, and Unjustified Demands. You might have noticed we spent 125 diplo points taking these provinces for ourselves, instead of for Scotland. This negates the “justified” nature of our conquest, since Scotland was the one with the claims.

    The reason I did this was because we’ve started to gain some Absolutism. You may remember that Absolutism gives Admin Efficiency, which makes warscore costs cheaper.

    I played around with the peacedeal and occupations a bit, seeing whether it would be cheaper for us or for Scotland or Wales to take land. Obviously if the costs are cheaper, we can take more.

    In the end, I decided taking more land would be better than the diplo point hit, especially as we just took diplo tech and don’t need to spend those points on anything for a while.

    Most of the land is fed to Scotland anyway, post-peace. We keep the fort in Coventry for adjacency to fabricate claims and the Trade Center in York for income.
     
    • 6Like
    Reactions:
    CHAPTER FIFTY-THREE: Great Power Interventions (December 1647-October 1660)
  • CHAPTER FIFTY-THREE: Great Power Interventions
    |-|
    (December 1647-October 1660)

    Mil tech 20 is picked up. We get new cannons, more Combat Width, and some infantry Fire. By this point in the game, Western European nations like Brittany should definitely start fielding more cannons in their armies. Cannons to do the damage and siege. Infantry to hold the line. Cavalry to sit there and look pretty.


    Picture1.jpg

    Some players like to phase out cavalry altogether and just use infantry and artillery, since infantry is cheaper and most of your damage is coming from artillery instead of cavalry anyway. Just something to think about.

    More news comes from Europe all the time. Savoy has defeated Venice, giving them a dangerous border with the Turks. The Rassids’ stint at independence was short-lived. And Poland, yes Poland, has joined the HRE.


    Picture2.jpg
    Picture4.jpg

    They’re not even an Elector, so automatically lose their kingdom title and become a duchy. Maybe this will protect them from the Russians. Maybe not.

    And, speaking of Russia, they’ve whittled Lithuania down to a single province.


    Picture5.jpg

    Our own conquests don’t stop either. We’re finally conducting a war in the Philippines instead of vassalizing everyone. While vassals are nice, the diplomatic process is slow, and I don’t want to give the British any ideas.


    Picture6.jpg

    Admin tech 20 is taken for more governing capacity. The bureaucracy is expanding to meet the needs of the expanding bureaucracy.


    Picture7.jpg

    All this red tape is enough to give Emperor Jean a heart attack.

    Long live Emperor Francois!


    Picture8.jpg

    All our loans are repaid as the Ottomans attack Austria. Why Poland wanted to get chained to this sinking ship is beyond me.


    Picture9.jpg

    (Our economy with no debt).

    Tswana is colonized after Swazi completes. That’s the last empty South African province. We colonize Ifugao too, that’s the last Philippine one.

    The ledger says there’s nowhere left we can colonize. That’s true. There’s only some inland stuff in Africa and Siberia we can’t reach.

    That chapter of our nation’s history has ended.

    The latest Institution, Manufactories, spawns. Like the previous one, Global Trade, it spreads basically everywhere, this time simply through the province having a Manufactory.

    Some more lights are built. I’d just like to point out that Desmond can build a heavy in 197 days. Breton industry is the best!


    Picture10.jpg

    (The completion times for lights-left-and heavies-right in Ireland).

    Tondo, Maguindanao, and Maynilla are all annexed in the Philippines. It’s now just us, the British in Cebu, a Russian colony, and the independent island of Sulu.

    We TC a couple provinces to give us a merchant for this region. They’re sent to collect in the North Sea.

    Our income is at 221.70 and growing.


    Picture11.jpg
    Picture12.jpg

    (The turquoise Philippines image is the TC mapmode. The provinces in their national colors have been TCd).

    France continues its voracious expansion, defeating Switzerland and even taking land from their former ally Bregenz. Bregenz later loses an internal HRE war and is forced to give land back to Austria.


    Picture13.jpg
    Picture14.jpg

    Henrika has grown so much that they attack Vinland on their own without any prompting. We start annexing Pagarruyung. And we attack Portugal.

    The Poles and Austrians lose more land to the Ottomans. Joining the HRE is looking more and more like a poor decision. Bohemia pounces on Austria too.


    Picture15.jpg

    The Portuguese war is over. It ends with glorious victory.


    Picture16.jpg

    Caraibas, Portuguese Mexico, and Portuguese Louisiana are all annexed, ceding their lands to our respective CNs.


    Picture18.jpg

    Portuguese Alaska gives the land they held in the Louisiana and Canada regions to our subjects. And, importantly, we take 5 provinces in the Alaska region for ourselves.


    Picture17.jpg
    Picture19.jpg

    (Three different screens of what we took from Portuguese Alaska, showing the border with Henrika, a zoomed-in view, and the CN regions).

    We could have annexed Portuguese Alaska fully, but I want to pull off a trick next war with Portugal. Any guesses what that trick might be? It’s been mentioned a couple of times in the comments at various points, back when our expansion in the Americas was just beginning.

    We force Al Esperans a Anne to attack New Spain. I’m hoping once Spain loses their colony here, they’ll have no reason to covet our Mexican land. Then our alliance will be much more secure.

    AEaA ends up taking only 3 provinces. I guess it’ll take a couple wars then.

    We peacefully vassalize Kelantan, Pahang, and Malacca in Malaya.


    Picture20.jpg

    Bohemia defeats Austria, forcing their conversion to Protestant. This means a legitimate Catholic Emperor is needed. The crown falls to Lorraine.

    What is this, a Victoria 2 mod?

    We start a new war against GB. I even call in Spain this time, both to prevent them from deccing a separate war and potentially messing with our plans and also because I’m hoping they’ll deal with Sunda or Sweden.

    But this causes an interesting wrinkle.

    Brittany is a Great Power. Spain is a Great Power. GB is a Great Power.

    When a Great Power is at peace, they can choose to intervene in GP-on-GP wars as long as it’s on the side with fewer GPs.

    France has entered the war.


    Picture22.jpg
    Picture21.jpg

    The sides overall are still in our favor, but I really hope Spain is able to hold their own on the continent. The seas at least protect us from the masses of French bodies assembled across the Channel.

    The first naval battle goes poorly, as the British have French help. We occupy French holdings in Greenland and Africa in the meantime. And the war in the isles is balanced.


    Picture23.jpg

    I take the next mil tech a few years early just to help speed things up and hire 20k more infantry. France could land any of their forces in England to help their ally. And the British have pushed us back a bit. Their entire army is home.


    Picture24.jpg

    Eventually we fight a close battle in Cumberland to try and tip the scales. With more reinforcements on our side, and the British not having enough of a frontline to protect their cannons, we win.


    Picture25.jpg

    (The British cannons and Discipline mean they'll deal more damage. But we have enough Morale/reinforcements to outlast them. This is the battle already in progress).

    Picture26.jpg

    (The good thing about the British number of cannons, they don't have enough of a frontline to protect them. Even with a mediocre Fire roll like this, the Brits blast us to shreds).

    Picture27.jpg

    (We fare much better in the Shock phase).

    Picture28.jpg

    (We're winning)...

    Picture29.jpg

    (Just barely)...

    Picture30.jpg

    (No end-battle screen unfortunately. But you can see the remaining number of men).
     
    • 4Like
    Reactions:
    CHAPTER FIFTY-FOUR: War With Britain, War With Songhai, Court & Country (October 1660-June 1682)
  • CHAPTER FIFTY-FOUR: War With Britain, War With Songhai, Court & Country
    |-|
    (October 1660-June 1682)

    Last chapter we won a close victory against the British in our ongoing war.

    I bet many of you were shocked at the power the Brits still held. You may have even wondered how many brutal battles like that were left before a bloody, miniscule peace.

    Well fear not! We’ve done what I like to call, future proofing.

    The British army has no morale after their defeat. Usually, they’d be able to run away behind a fort and recover before we could chase, catch, and destroy them. But in previous wars I made sure to target key forts like Coventry and Northumberland.

    With few forts to hide behind, we can chase the enemy anywhere. We continue harrying the enemy until they’re bottled up behind their fort in Wales.


    Picture1.jpg
    Picture2.jpg

    Our navy helps Spain and a plethora of allies score a victory against France off the Breton coast. Songs shall be sung of this day!

    Picture3.jpg
    Picture4.jpg

    Some more naval victories are secured as the British on land push us back again. But we’re playing the long game. They don’t have much manpower, while we have an ample reserve.

    Picture5.jpg
    Picture6.jpg

    Picture7.jpg
    All it takes is one slip up:

    Picture8.jpg

    (The British force split up into two stacks. Perfect prey for the discerning Breton general).
    One victory after another:

    Picture9.jpg

    Again and again:

    Picture10.jpg

    Until victory:

    Picture11.jpg

    France enters a full-fledged alliance with GB during this time. The world stands against us, but we push forward, grateful for the challenge.

    Sweden is white-peaced after Denmark attacks them. One down.

    And now for some partial payoff.

    Last chapter I asked you all to guess as to why we took 5 provinces from Portuguese Alaska instead of annexing them. And @diskoerekto answered correctly.

    Now our 5 provinces are cored, so we spawn a CN: Douar-font a Francois, named for our Emperor, heir, and the favorite first name of the Dreux.


    Picture12.jpg

    The next part of the payoff will have to wait until another war with Portugal. Coming soon!

    Meanwhile, we purchase another age Ability, this one giving us yearly +1 Absolutism.

    The war in Britain is over. The British have lost. Now what do we do?

    We could wait for France and Sunda to accept white-peaces, or we could go on the offensive.

    Unfortunately, the French fleet has bottled-up our navy and transports via blockade. We’ll need to fight our way out.


    Picture13.jpg

    We damage and sink a few French ships, then retreat before the month tick for repairs. Scotland didn’t get the memo.

    The battle screen glitches and includes our navy even though we retreated. But the French losses are accurate.


    Picture14.jpg

    We get our month of repairs and attack again before France leaves. This second battle is a slaughter, cathartic after such a tough war.

    Picture15.jpg

    Our victorious fleet blockades the Atlantic coast of France, giving a nice boost to our income. Keep in mind that our income is not actually, permanently, as high as shown because our occupations in Britain are contributing to the total.

    Picture16.jpg

    (Here we also get a look at the continental war. Many battles have been fought between Spain and France, yet neither side has truly broken through).


    Picture17.jpg

    After a few months though, I notice France will accept a white peace. I still think a short war is better than a long slog, even if we’d eventually win. GB first, France later.

    Picture18.jpg

    Scandinavia has formed after a Danish victory over Sweden. They’re also now a Great Power.

    We embrace the Manufactories Institution for nearly 2k ducats, then take the current admin tech. This one gives us Furnaces.

    Sunda is white-peaced. Meaning it’s time for the British to face facts.

    All of Australia, all of Scotland, all of Wales. All ours.


    Picture19.jpg
    Picture20.jpg
    Picture21.jpg

    We start annexing Scotland and Wales too now that we have all their cores.

    And we prompt Al Esperans a Anne into another war in Mexico. They take 6 provinces. The next war should see the end of New Spain.

    3 years on from our GB war, I think it’s time for a journey to Africa, don’t you?


    Picture23.jpg

    I won’t go into detail on the Songhai war. They get distracted sieging our Ivory Coast holdings. We siege their homeland much faster due to our cannons, barrages, and Spy Network. Battles are fought, some we lose, some we win. But we have enough economy and manpower to force the victory.

    After 3 years, peace with Songhai comes.

    Air’s cores. Segu’s cores. A land bridge to reach them both. And access to the uncolonized interior into Morocco and Libya. 700 ducats.


    Picture25.jpg

    We took another Government Reform during the war. Each of the ones for tier 9 are actually very good. But I think Brittany this game has shown herself to be quite the Machiavellian. I mostly did this just for the Max Absolutism. I want to grow that value to the top.

    Picture24.jpg

    Admin tech 22 is taken ahead of time because it unlocks a new Idea Group. We go with Administrative for decreased coring costs and increased governing capacity mostly.

    Picture26.jpg

    (This screenshot shows which Administrative slots were taken this chapter).

    Later, Spain attacks Sulu and calls us in. I’d reenabled the “call us into offensive wars toggle” at some point because I was afraid that keeping it off might tip Spain over the threshold to break our alliance while they still have a stake in Mexico.

    Our Asian ships set sail with an army. We land, occupy the province, and don’t give occupation to Spain.

    Diplo and mil techs 22 are grabbed. Both give out a bunch of goodies: cannons, heavy ships, Fire and Shock, building upgrades.


    Picture27.jpg

    Emperor Francois dies. His son, Emperor Francois, will guide us. The new heir to the throne, Francois, seems like a fine fellow.

    Once Spain realizes they can do nothing, they peace out, giving us Sulu. For being such a good, “helpful” ally during that war, we gain 31 favors.

    New Spain is annexed finally after we prompt Al Esperans again. Spain should like us now.

    After Scotland and Wales are done being annexed, we annex Segu.

    And now our country has become embroiled in a new Disaster.


    Picture28.jpg

    But this one is on purpose. Court and Country has a few different solutions for how we can end it. Depending on how we do, we get different bonuses. One of those bonuses is for more Max Absolutism and is what we’re going for.

    Throughout the Disaster, we’ll receive events like these:


    Picture29.jpg
    Picture30.jpg
    Picture31.jpg

    We want to make sure we have enough Absolutism by the time the Disaster ends to get the best result. The results being, either +20, +10, or -10 Max Absolutism.

    Picture32.jpg

    From Segu’s remains, we release Kong and Jenne as vassals. They have cores. Enough said.

    Picture33.jpg
     
    Last edited:
    • 5Like
    Reactions:
    CHAPTER FIFTY-FIVE: Imperialism & Client States (June 1682-February 1697)
  • CHAPTER FIFTY-FIVE: Imperialism & Client States
    |-|
    (June 1682-February 1697)

    We start off annexing our vassal Air. Now that we’ve reconquered their cores, their autonomy is no longer necessary. Once they’re integrated we colonize the strip of land between Morocco and West Africa.

    Picture1.jpg

    Over in Asia, Brunei has just lost 2 wars to Sunda then Sampas. They now have tons of lost cores that we’d love to help them reclaim. The price is their fealty.

    Picture2.jpg

    Before we’re able to complete their vassalization though, we get called in to defend them against…Russia!

    Suddenly we’re at war.


    Picture3.jpg

    During this, we complete Administrative Ideas.

    Picture4.jpg

    We get 2 new diplo Policies and 1 new admin Policy. While the diplomatic ones are kept turned off, I repeal our current admin Policy (cheaper claims) and enact this new one (cheaper advisors) instead.

    Picture5.jpg
    Picture6.jpg

    We could’ve gone over the free Policy limit and kept both active, but I want to catch up in admin tech. The next tech gives Admin Efficiency and cheaper Development costs, something we of course want to grab ASAP.

    Picture7.jpg

    (Even though we could take diplo and mil tech right now, we're still ahead of time. Since we won't gain Innovativeness, I want to wait).

    Back to our war, we occupy the Russian’s Philippines outpost first. They also have some land in Papua New Guinea which will be our next target.

    Picture8.jpg

    In the meantime, Scandinavia crosses from Orkney into Inverness. I completely forgot they had land there.

    Despite our numbers, their superior quality means we lose a ton of men in an attack!


    Picture9.jpg

    Our reinforcements were too late and are destroyed.

    Picture10.jpg

    In a second battle we lose again. Another batch of losses are taken.

    Picture11.jpg

    As we recover, we take the latest mil tech. It’s a Tactics tech which should help.

    In a subsequent battle, we force Scandinavia to retreat to Orkney. Our naval advantage lets us occupy the Faroes and Shetlands unopposed.

    We also take diplo tech 23. We’ve now unlocked the Imperialism CB and Client States.


    Picture12.jpg

    Imperialism gives us a CB on every nation across the globe. For nations within our culture group, we also have access to the Nationalism CB, a buffed version of Imperialism.

    Client States are sort of a new subject type.

    Previously we’ve either force vassalized, diplo-vassalized, or released nations as subjects. But Client States let us create entirely new nations out of thin air. And we can create an infinite amount of them, assuming we want to go over the relations-limit.

    As we take admin tech 23, our war continues.

    In Asia we lose a land battle but win a naval one. Terre Australe has already given us a foothold on Papua New Guinea.


    Picture13.jpg

    More naval engagements are fought against the Russians in the South Pacific and Scandinavians in the North Sea. We even capture Russia’s flagship!

    Unfortunately, since a nation can only benefit from one flagship, we don’t receive whatever buffs the Russians gave the Piotr. It is just a nice cosmetic trophy.


    Picture14.jpg
    Picture15.jpg

    Here’s a look at the current GPs, including Russia and Scandinavia for those curious. Over half our score comes from our subjects, evidence of our heavy focus on vassals, diplomacy, and colonies.

    Picture16.jpg
    Picture17.jpg

    Brunei chooses that moment to make peace.

    We win a small victory, but our interests in Asia have been maintained against blatant Russian aggression. Brittany would never stoop to such lows! ;)

    Brunei gains the Russian presence in the Philippines. Henrika gains the rest of Vinland.


    Picture18.jpg

    The grateful Bruneians then swear fealty to the Emperor.

    Francois dies just a few days before the proposal is sent, aged 42. Our Empress-Consort will head the realm until the young Prince reaches adulthood.


    Picture19.jpg

    We finished the Court and Country Disaster during all that, attaining the best result. Our Max Absolutism is over 100 now, letting us keep some Estate Privileges should we wish.

    Picture20.jpg

    Now it is time for another war against the British, joined by both Sunda and France. And despite what that screenshot says we do call Spain in after a while because I wanted to see how France would react to a sudden enemy to their south.

    Picture21.jpg

    The war goes the same as last time. We lose, lose, lose, lose and take horrendous casualties until the British run out of manpower, then we win.

    Picture22.jpg
    Picture23.jpg

    Before I recount the peace, a few things:

    We vassalize Lunda in the Congo. They have a Trade Center

    Our West Africa TC gains a merchant. We send it to the Moluccas.

    I attack OPM Gujarat after they lose a war. They have cores and will be a good springboard into India. We win and they become our vassal.


    Picture24.jpg

    Spain white-peaces out of the war. I guess they just couldn’t take the heat. We white peace Sunda and France in response.

    Most of GB is annexed.


    Picture25.jpg

    This was a bloody war. But we won. In the end that’s all that matters.

    While we core our new British land, that doesn’t mean we have to stop expanding.

    We spend diplo points to buy down our War Exhaustion and Professionalism to increase our manpower, then declare on Morrocco.


    Picture26.jpg

    They are allied to Songhai who I cobelligerent.

    Picture27.jpg
     
    • 5Like
    Reactions:
    CHAPTER FIFTY-SIX: The Many Wars of Spain (February 1697-September 1717)
  • CHAPTER FIFTY-SIX: The Many Wars of Spain
    |-|
    (February 1697-September 1717)

    In the middle of our African war, Spain calls us in for a venture against Blambangan. I have no forces in position to prevent them from annexing their foe, unlike our previous trick with Sulu.


    Picture1.jpg

    The Enlightenment Institution spawns as well, signaling that in 120 months the Age of Absolutism will end.


    Picture2.jpg

    We take the latest round of tech. Then I decide to white peace Songhai.


    Picture3.jpg

    Morrocco is giving me a bit of trouble, so I want to just focus our main enemy down. Songhai can wait.

    We annex Morocco and Fez and leave Spain’s war so we can rerelease Morocco as a loyal subject with no memory of past transgressions.


    Picture4.jpg

    Guess what? Morocco has cores on Spain. Also guess what? We can have allies give us vassals’ cores by spending Favors. Time to start currying with Spain!

    Later, we annex Songhai and the OPMs of Mossi and Mali which broke away from them.

    Hausa is the last independent West African.


    Picture5.jpg

    (The red stars were gained from Hausa by end-of-chapter, as you'll soon see).

    I’ve stated all our English provinces so we can accept them as an equal culture and get the most benefit from the land. We needed to demote Moluccan though because we didn’t have a spare accepted culture slot.

    I wonder how we can get more slots?


    Picture6.jpg

    Having English as accepted also means we can use the Tower of London and Stonehenge monuments. The bonuses for these wonders aren’t huge, but don’t hurt.


    Picture7.jpg

    Speaking of wonders, Henrika owns one.

    If it was upgraded, our CN would get the benefits. But this wonder is unique in that it is small enough to be moved. Not many wonders are, so I thought I’d point it out. The bonuses we’ll get from owning this monument are, again, not huge but nice to have.


    Picture8.jpg

    We start annexing Pahang and Kelantan. And we take the next Government Reform.


    Picture9.jpg

    It’s time to attack Portugal for the last time.

    Before we conclude that war though, some more news:

    Spain actually loses to Blambangan. Transports have never been the AI’s strong suit. They lose 2 colonies, and release Sardinia and Vanua Levu.


    Picture10.jpg
    Picture11.jpg

    That doesn’t deter our ally though. They attack Hausa not even a year afterward.

    I occupy the 1 province Spain can take via their border with Hausa and wait.

    When Spain signs peace, they get nothing except money. Kong gets their 2 cores.


    Picture12.jpg

    Poland is also now the HREmperor and looks set to keep it for a long time.


    Picture13.jpg

    The peace with Portugal comes.

    We annex them. All of them. Colony, mainland, island.


    Picture15.jpg

    We take 6 provinces from Portuguese Alaska to give to our existing Alaskan CN. They now have 10 provinces for a merchant (I took an extra province for nicer borders).

    By annexing Portugal, we receive Portuguese Alaska as a separate subject for free. They also have 10 provinces.


    Picture14.jpg

    One merchant is sent to the Philippines. The other is sent to Australia.

    If you’re wondering about Spain’s opinion of us. They don’t care:

    Picture16.jpg

    They call us into another war, this time against Pasai.


    Picture17.jpg

    We attack the British again. This will be our last war with them.


    Picture18.jpg

    We hear rumors of Revolution in the Ottomans. Emperor Francois thinks it’s nothing to worry about. Revolutionaries and kings have always been the best of friends.

    I’ll discuss the Revolution and its effects another time.


    Picture19.jpg

    Bone is vassalized. Spain pays cash to Pasai in return for peace.


    Picture20.jpg

    I change Henrika to a Crown Colony to decrease their Liberty Desire.

    Spain attacks Blambangan again. We were allied to the defender to try and vassalize them. I choose to keep our alliance with Spain and leave Blambangan to their fate.


    Picture21.jpg

    Sunda and France are white-peaced.

    We embrace the Enlightenment and get coal in some of our provinces. We build Furnaces in them.


    Picture22.jpg
    Picture23.jpg

    And now we’re all caught up.

    1717 is here and Brittany stands triumphant and at war.

    Author’s Note: Well, we’ve finally done it! We’re finally current with gameplay! Hopefully the rapid pace of coverage these last couple updates wasn’t too much.

    Future chapters will probably take a bit longer now that I have no backlog. But, on the bright side, I can now answer any questions you all may have more effectively and showcase how things currently stand in the game.

    So the once-per-week update schedule is over for now.

    If you have any questions or regions of interest, I’d love to do an overview chapter so we can reorient ourselves going into the last century of the campaign.


    Thank you all very much for reading! See you whenever I see you next.
     
    • 4Like
    • 1Love
    Reactions: